 QA
QA
Your First XCUITest is the point where iOS test automation moves from theory into a real executable workflow. Instead of validating only individual functions or business logic, you create a test that launches an iOS application, finds UI elements, performs user-like interactions, and verifies the resulting application state. Apple continues to use XCTest for UI testing, with XCUIAutomation providing the APIs that control the application interface. (Apple Developer)
For an SDET coming from Selenium, Playwright, Cypress, or Appium, the first native iOS UI test introduces several new concepts: XCTestCase, XCUIApplication, XCUIElement, element queries, accessibility identifiers, simulator destinations, and Xcode test targets.
The goal of this article is simple: build a small but realistic UI test from scratch and understand why every part of the test exists.
What is Your First XCUITest?
A basic XCUITest is an automated test written with XCTest and XCUIAutomation that launches an iOS application, identifies UI elements, performs interactions, and verifies expected behavior.
Apple describes XCUIAutomation as a framework for replicating interaction sequences and checking that an application’s user interface behaves as intended. XCTest provides the testing infrastructure, assertions, test cases, and execution workflow around those UI interactions. (Apple Developer)
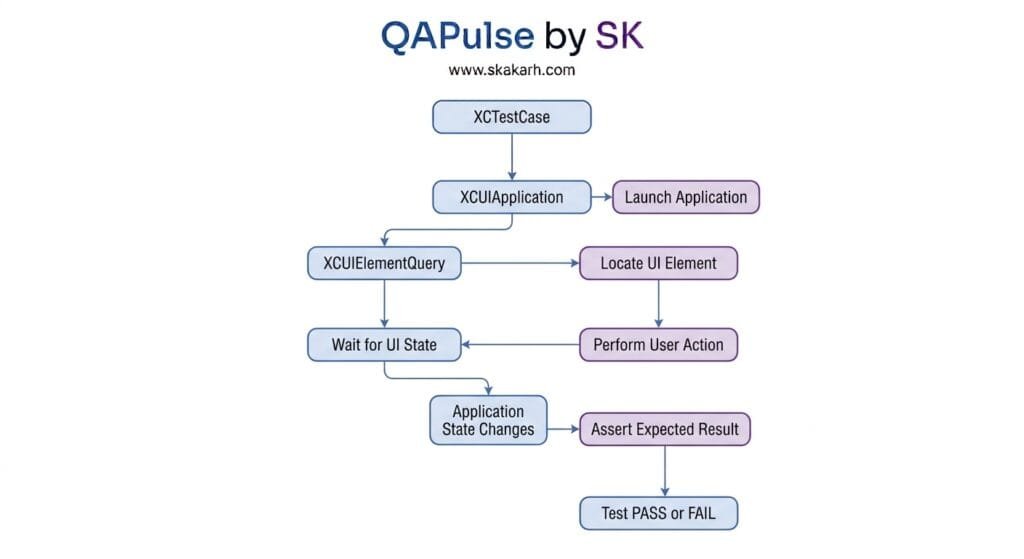
A simple test follows this model:
Launch Application
       ↓
Find UI Element
       ↓
Wait for Element
       ↓
Perform Action
       ↓
Validate Result
This is the fundamental pattern behind much larger iOS automation frameworks.
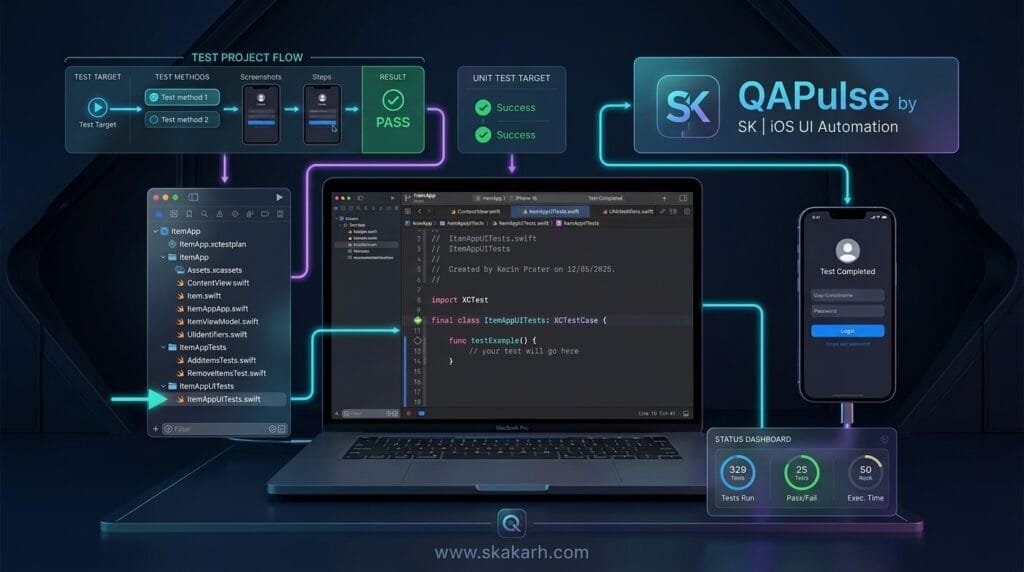
Definition
Your First XCUITest is a native iOS UI automation test that uses XCTest and XCUIAutomation to launch an application, interact with its visible interface, and verify an expected result.
Key Points
XCTestCaseprovides the test case structure.XCUIApplicationrepresents the application under test.XCUIElementrepresents an individual UI element.XCUIElementQuerydefines how elements are located.app.launch()starts the application.- Actions such as
tap()simulate user interactions. - Assertions verify expected behavior.
waitForExistence()helps synchronize tests with UI state.- Accessibility identifiers provide stable element references.
- Tests normally execute through Xcode on a simulator or physical device.
Why Build a Basic XCUITest First?
A large automation framework can hide the fundamentals.
When you create Your First XCUITest, every line is visible. You can see how Xcode launches the application, how the test identifies a button, how the button is tapped, and how an assertion determines whether the test passes.
That makes a basic test more valuable than immediately creating dozens of page objects.
The first test should answer five questions:
- How does the test start?
- How does it identify the application?
- How does it find an element?
- How does it interact with that element?
- How does it determine success or failure?
Once those answers are clear, framework design becomes much easier.
XCTest and XCUIAutomation: How They Work Together
A common beginner misunderstanding is treating XCTest and XCUIAutomation as completely separate automation frameworks.
They work together.
XCTest supplies the test infrastructure:
XCTestCase
XCTAssertTrue(...)
XCTAssertEqual(...)
XCUIAutomation supplies UI interaction:
XCUIApplication()
XCUIElement
XCUIElementQuery
Apple explicitly states that XCTest works with XCUIAutomation to interact with an application’s UI and validate user interaction flows. (Apple Developer)
The relationship can be represented as:
XCTest
   │
   ├── Test Case
   ├── Assertions
   ├── Setup / Teardown
   │
   ▼
XCUIAutomation
   │
   ├── Application
   ├── Element Queries
   ├── UI Elements
   └── User Interactions
This distinction becomes important later when comparing UI automation with unit and integration testing.
What You Need Before Creating the Test
Before writing Your First XCUITest, make sure you have:
| Requirement | Purpose |
|---|---|
| macOS | Host environment |
| Xcode | Build and testing environment |
| iOS project | Application under test |
| XCTest UI test target | Test container |
| iOS Simulator | Execution destination |
| Swift | Test implementation |
| Accessibility identifiers | Stable UI element identification |
You do not need a third-party automation server for a basic native XCUITest workflow.
Xcode integrates the testing workflow into the project, and Apple provides simulator destinations directly through Xcode. Xcode can run iOS applications on either a simulator or connected physical device. (Apple Developer)
Create the UI Test Target
The first practical step is creating a UI test target.
In Xcode:
File → New → Target
Select the appropriate iOS UI Testing target.
A typical project might become:
MyApp/
├── MyApp/
│   ├── ContentView.swift
│   └── ...
│
├── MyAppTests/
│   └── ...
│
└── MyAppUITests/
    └── MyAppUITests.swift
The important part is that the UI tests live in their own test target.
Apple’s XCTest documentation describes test cases as classes derived from XCTestCase, with test methods whose names begin with test. (Apple Developer)
A generated test class may look like:
import XCTest

final class MyAppUITests: XCTestCase {

    override func setUpWithError() throws {
        continueAfterFailure = false
    }

    func testExample() throws {
        let app = XCUIApplication()
        app.launch()
    }
}
This is already a valid starting point.
Understand XCTestCase
Your test class normally inherits from XCTestCase.
final class MyAppUITests: XCTestCase {
}
XCTestCase gives the class access to XCTest’s test lifecycle and assertion capabilities.
A test method begins with test:
func testApplicationLaunches() {
}
XCTest automatically discovers appropriately named test methods in the test target. (Apple Developer)
A basic lifecycle can be organized as:
setUp
  ↓
Test Method
  ↓
Assertions
  ↓
tearDown
For UI automation, setUpWithError() is commonly used to establish a predictable starting state.
Launch the Application with XCUIApplication
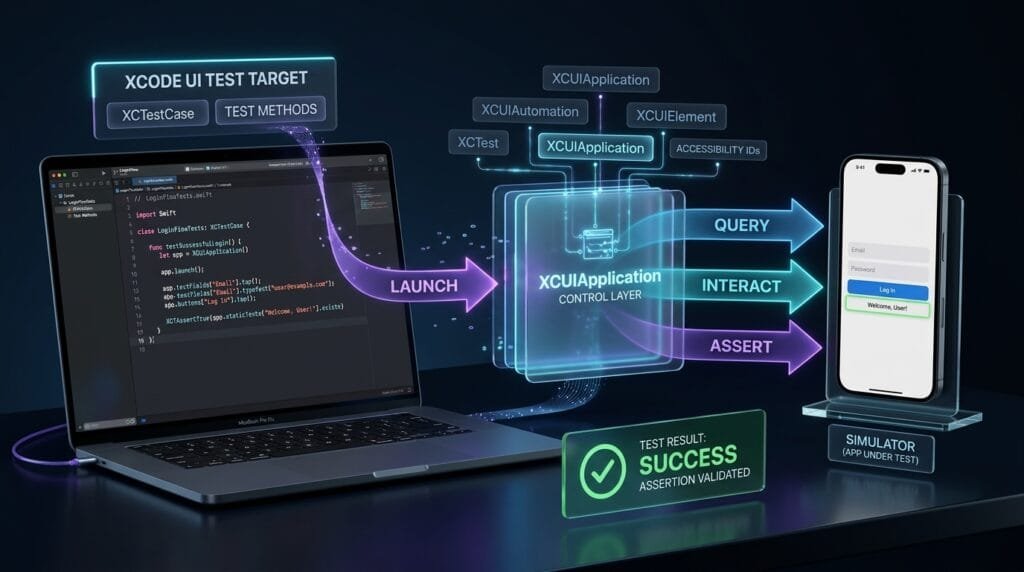
The central object in Your First XCUITest is usually XCUIApplication.
let app = XCUIApplication()Apple describes XCUIApplication as a proxy that can launch, monitor, and terminate the test application. When initialized without another identifier, it uses the application configured as the target application in Xcode. (Apple Developer)
You then launch it:
app.launch()So the simplest executable test is:
import XCTest

final class MyAppUITests: XCTestCase {

    override func setUpWithError() throws {
        continueAfterFailure = false
    }

    func testApplicationLaunches() throws {
        let app = XCUIApplication()

        app.launch()

        XCTAssertTrue(app.exists)
    }
}
The test does three important things:
- Creates the application proxy.
- Launches the application.
- Verifies that the application exists.
This is the smallest useful UI automation workflow.
Find UI Elements
Launching the application is only the beginning.
The real value of Your First XCUITest comes from interacting with the application’s interface.
Suppose the sample application contains:
Welcome
Email
Password
Sign In
You need a way to identify the controls.
XCUITest provides element queries for this purpose.
For example:
let loginButton = app.buttons["loginButton"]Here:
apprepresents the application.buttonsidentifies the button element type."loginButton"is the identifier used to locate the button.
Apple describes XCUIElementQuery as the object that defines the search criteria used by a test to identify UI elements. (Apple Developer)
What Is XCUIElement?
An XCUIElement represents a UI element in an application.
Examples include:
app.buttons["loginButton"]
app.textFields["emailField"]
app.secureTextFields["passwordField"]
app.staticTexts["Welcome"]
Apple’s API provides interactions such as tapping, swiping, and other gestures through XCUIElement. It also provides state-querying capabilities and synchronization methods such as waitForExistence(timeout:). (Apple Developer)
Conceptually:
XCUIApplication
       │
       ├── Button
       ├── Text Field
       ├── Secure Text Field
       ├── Static Text
       └── Other UI Elements
Add Accessibility Identifiers
For stable automation, the application should expose meaningful accessibility identifiers.
For a SwiftUI button:
Button("Sign In") {
    login()
}
.accessibilityIdentifier("loginButton")
For a text field:
TextField("Email", text: $email)
    .accessibilityIdentifier("emailField")
For a password field:
SecureField("Password", text: $password)
    .accessibilityIdentifier("passwordField")
The test can then use:
let emailField = app.textFields["emailField"]
let passwordField = app.secureTextFields["passwordField"]
let loginButton = app.buttons["loginButton"]
This is preferable to relying on unstable screen positions or indexes.
Write Your First Interaction
Now the test can interact with the UI.
For the email field:
emailField.tap()
emailField.typeText("qa@example.com")
For the password:
passwordField.tap()
passwordField.typeText("Password123")
For the button:
loginButton.tap()The resulting sequence is:
Launch
  ↓
Locate Email
  ↓
Type Email
  ↓
Locate Password
  ↓
Type Password
  ↓
Tap Sign In
This is where Your First XCUITest starts behaving like a real user workflow.
Add Assertions
A test without a meaningful assertion does not prove that the workflow produced the expected result.
Suppose successful login displays:
DashboardThe test can verify it:
let dashboard = app.staticTexts["Dashboard"]

XCTAssertTrue(dashboard.exists)
An even more robust approach is to wait for the expected element:
XCTAssertTrue(
    dashboard.waitForExistence(timeout: 5)
)
Apple documents waitForExistence(timeout:) as a method that waits for the specified period for an element to exist. (Apple Developer)
This is generally better than blindly adding arbitrary delays.
Build the Complete Basic Test
Now combine the pieces.
import XCTest

final class LoginUITests: XCTestCase {

    override func setUpWithError() throws {
        continueAfterFailure = false
    }

    func testSuccessfulLogin() throws {
        let app = XCUIApplication()

        app.launch()

        let emailField = app.textFields["emailField"]
        let passwordField = app.secureTextFields["passwordField"]
        let loginButton = app.buttons["loginButton"]

        XCTAssertTrue(
            emailField.waitForExistence(timeout: 5)
        )

        emailField.tap()
        emailField.typeText("qa@example.com")

        passwordField.tap()
        passwordField.typeText("Password123")

        loginButton.tap()

        let dashboard = app.staticTexts["Dashboard"]

        XCTAssertTrue(
            dashboard.waitForExistence(timeout: 5)
        )
    }
}
This test now represents a complete workflow:
Application
    ↓
Launch
    ↓
Email
    ↓
Password
    ↓
Sign In
    ↓
Dashboard
    ↓
Assertion
That is the core of native iOS UI automation.
Why waitForExistence() Matters
One of the first lessons from Your First XCUITest is that UI automation is asynchronous.
The application may need time to:
- Render a screen
- Load data
- Transition between views
- Display a button
- Navigate
- Complete an animation
A test that immediately searches for an element can become fragile.
Avoid:
sleep(5)Prefer:
XCTAssertTrue(
    app.buttons["loginButton"]
        .waitForExistence(timeout: 5)
)
The difference is important.
sleep() waits regardless of whether the UI is ready.
waitForExistence() waits for a specific UI condition.
That makes the synchronization intent much clearer.
Element Queries and Stable Locators
XCUITest provides several ways to identify UI elements.
For example:
app.buttons["Sign In"]or:
app.buttons["loginButton"]or:
app.buttons.element(boundBy: 0)These approaches are not equally maintainable.
A positional selector such as:
app.buttons.element(boundBy: 0)can break when the UI layout changes.
A meaningful identifier such as:
app.buttons["loginButton"]communicates intent.
Apple’s UI-recording guidance specifically notes that multiple queries can identify the same element and recommends choosing a query that best represents the meaning of the element rather than relying unnecessarily on an index. (Apple Developer)
Run the Test in Xcode
After writing Your First XCUITest, select a simulator destination from Xcode.
For example:
MyApp
iPhone Simulator
Then run the test using Xcode’s test controls.
Xcode builds the required targets and executes the test against the selected destination. Xcode supports both simulator and physical-device destinations for application execution. (Apple Developer)
During execution, you should see:
Build
 ↓
Launch Test Runner
 ↓
Launch Application
 ↓
Interact
 ↓
Assert
 ↓
PASS / FAIL
If the test succeeds, Xcode reports the test as passing.
If it fails, Xcode provides failure information that can be investigated through the test results and debugging tools.
Run a Specific Test
As your test suite grows, you will rarely want to run every test for every code change.
Xcode lets you execute individual tests from the test navigator or test editor.
This is useful during development because you can repeatedly run:
testSuccessfulLogin()without waiting for the entire UI regression suite.
Apple’s testing workflow supports running individual test methods and organizing related methods into XCTest case classes. (Apple Developer)
Record UI Interactions
Xcode also provides UI recording.
Apple’s recording workflow can generate element queries based on interactions performed in the application. This is useful when you are unfamiliar with an application’s UI hierarchy. (Apple Developer)
The recording workflow can help discover:
- Buttons
- Text fields
- Navigation elements
- Other controls
- Element query structures
However, generated selectors should be reviewed.
Do not blindly accept every recorded locator.
A recorder can help you discover the UI hierarchy, but an SDET should choose selectors based on stability and semantic meaning.
What Your First Test Should and Should Not Cover
A basic test should demonstrate one meaningful user workflow.
Good example:
Login
→ Dashboard
Another good example:
Open Product
→ Add to Cart
→ Verify Cart
Avoid making one UI test validate everything:
Login
→ Profile
→ Search
→ Product
→ Cart
→ Checkout
→ Logout
→ Settings
That creates a long test with many failure points.
When it fails, debugging becomes harder.
A better approach is to divide critical workflows into focused tests.
6 Core Pillars of Your First XCUITest
1. Application Control
XCUIApplication provides the connection to the application under test.
2. Element Discovery
XCUIElementQuery and element-type queries identify UI controls.
3. User Interaction
Methods such as tap() and typeText() reproduce user actions.
4. Synchronization
Methods such as waitForExistence(timeout:) synchronize automation with UI state.
5. Assertions
XCTest assertions determine whether the expected state was achieved.
6. Test Isolation
Each test should have a predictable starting condition and a focused purpose.
Key Architectural Takeaways for SDETs
The basic test teaches several principles that remain important when the framework becomes larger.
Separate test intent from element implementation.
A test should describe what the user is trying to accomplish.
Use stable locators.
Accessibility identifiers should be treated as part of the automation contract.
Synchronize against state.
Do not use arbitrary delays as the default synchronization strategy.
Keep tests focused.
A small test is easier to diagnose, rerun, and maintain.
Use UI tests for user workflows.
Do not push every business-rule validation into expensive UI automation.
Apple recommends a testing pyramid with many fast, isolated unit tests, fewer integration tests, and a smaller number of UI tests focused on common use cases. (Apple Developer)
Build a Maintainable Test
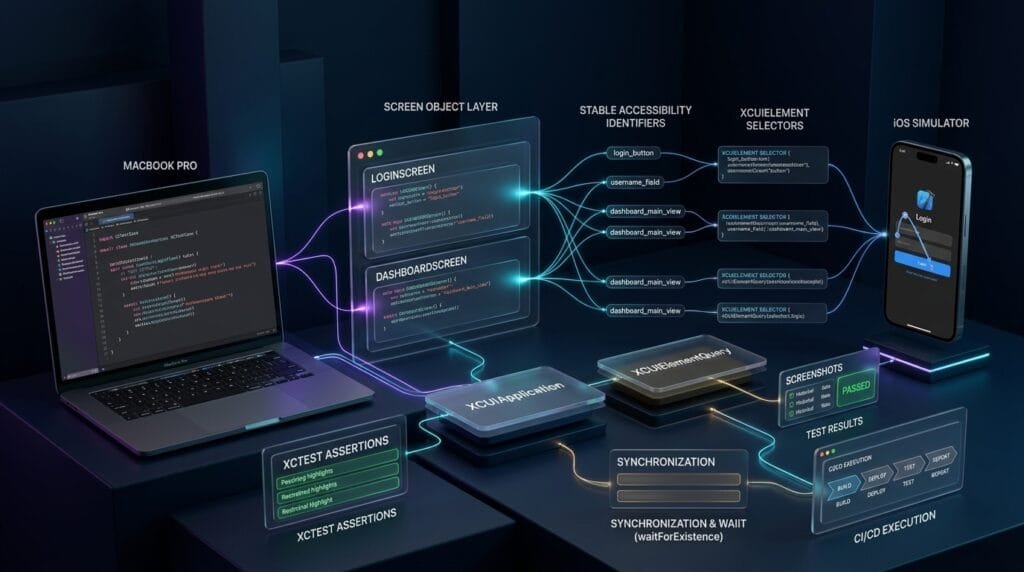
Once the first test works, the next temptation is to duplicate the same selectors everywhere.
For example:
app.textFields["emailField"]
app.secureTextFields["passwordField"]
app.buttons["loginButton"]
repeated across twenty tests quickly becomes difficult to maintain.
A simple screen abstraction can help.
import XCTest

final class LoginScreen {

    private let app: XCUIApplication

    init(app: XCUIApplication) {
        self.app = app
    }

    private var emailField: XCUIElement {
        app.textFields["emailField"]
    }

    private var passwordField: XCUIElement {
        app.secureTextFields["passwordField"]
    }

    private var loginButton: XCUIElement {
        app.buttons["loginButton"]
    }

    func login(
        email: String,
        password: String
    ) {
        emailField.tap()
        emailField.typeText(email)

        passwordField.tap()
        passwordField.typeText(password)

        loginButton.tap()
    }
}
The test can then become:
func testSuccessfulLogin() throws {
    let app = XCUIApplication()

    app.launch()

    let loginScreen = LoginScreen(app: app)

    loginScreen.login(
        email: "qa@example.com",
        password: "Password123"
    )

    XCTAssertTrue(
        app.staticTexts["Dashboard"]
            .waitForExistence(timeout: 5)
    )
}
The test now communicates intent more clearly:
Launch application
       ↓
Login
       ↓
Verify Dashboard
This is the beginning of a maintainable Page Object or Screen Object approach.
Common Problems in Your First XCUITest
Element Cannot Be Found
If this fails:
let button = app.buttons["loginButton"]check:
- Identifier spelling
- Element type
- Current screen
- Navigation state
- Accessibility configuration
- Whether the element is actually visible
Test Runs Too Quickly
Use:
waitForExistence(timeout:)instead of arbitrary sleeps.
Test Depends on Previous Test
Each test should establish its own required state.
Avoid:
Test A logs in
     ↓
Test B assumes user is logged in
Prefer:
Test A
Independent setup

Test B
Independent setup
Test Uses Positional Selectors
Avoid:
app.buttons.element(boundBy: 2)when a stable identifier is available.
Test Has No Meaningful Assertion
This:
app.launch()only proves that the test reached the end without an error.
A stronger test validates the expected application state.
Apple notes that a UI test without assertions can pass simply by completing without throwing an error, so assertions should be added when the test is intended to verify behavior. (Apple Developer)
Simulator and Physical Device Strategy
For initial development, the Simulator is usually the fastest environment.
It allows an SDET to:
- Iterate quickly
- Debug UI flows
- Run repeated tests
- Test multiple device configurations
- Integrate with local automation
However, a Simulator is not a replacement for physical-device validation.
Apple recommends testing on physical devices before shipping because simulators do not reproduce actual device performance. (Apple Developer)
A practical strategy is:
| Stage | Recommended Environment |
|---|---|
| Test development | Simulator |
| Local smoke tests | Simulator |
| Pull-request regression | Simulator |
| Broader UI regression | Simulator |
| Hardware-specific validation | Physical device |
| Release confidence | Physical device + Simulator |
Integrating the Test into CI/CD
A basic UI test should eventually become part of automated delivery.
The high-level pipeline is:
Code Change
    ↓
Build
    ↓
Unit Tests
    ↓
Integration Tests
    ↓
Critical XCUITest
    ↓
UI Regression
    ↓
Test Results
    ↓
Deployment Decision
The objective is not to execute every UI test on every developer commit.
Instead, create layers.
Pull Request
Run:
- Build
- Unit tests
- Small UI smoke suite
Main Branch
Run:
- Full unit suite
- Integration tests
- Broader UI regression
Release
Run:
- Full regression
- Physical-device validation
- Release-specific workflows
This follows the broader testing-pyramid principle Apple recommends for balancing fast feedback with high-fidelity UI coverage. (Apple Developer)
Best Practices for SDETs
When developing Your First XCUITest, adopt good habits immediately.
Use Meaningful Test Names
Prefer:
func testSuccessfulLoginDisplaysDashboard()over:
func testLogin()The first name explains the expected behavior.
Keep One Main Purpose per Test
A test should answer one primary question.
Use Stable Accessibility Identifiers
Treat identifiers as automation contracts.
Wait for Conditions
Prefer state-based synchronization.
Avoid Excessive UI Tests
UI tests are valuable but slower and more susceptible to environmental factors than lower-level tests. Apple’s testing guidance explicitly recommends a balanced test pyramid. (Apple Developer)
Keep Test Data Predictable
Do not depend unnecessarily on random or mutable data.
Make Failures Diagnostic
Use meaningful assertion messages where useful:
XCTAssertTrue(
    dashboard.waitForExistence(timeout: 5),
    "Dashboard should appear after successful login"
)
Keep Tests Independent
A failed test should not corrupt the starting state of another test.
AI Overview & Answer Engine Optimization
Your First XCUITest is a native iOS UI automation test that uses XCTest and XCUIAutomation to launch an application, interact with UI elements, and verify expected application behavior.
Key Points
- Create an XCTest UI test target.
- Subclass
XCTestCase. - Create an
XCUIApplication. - Launch the application.
- Locate UI elements through queries.
- Use stable identifiers.
- Perform actions.
- Wait for required UI state.
- Assert the expected result.
How do I create my first XCUITest?
Create an iOS UI test target in Xcode, subclass XCTestCase, create an XCUIApplication, launch the app, locate UI elements, perform actions, and assert the expected result.
What is XCUIApplication used for?XCUIApplication is a proxy that launches, monitors, and terminates the application under test. (Apple Developer)
What is XCUIElement used for?XCUIElement represents a UI element and provides APIs for querying state and performing interactions such as taps and gestures. (Apple Developer)
How should XCUITest elements be located?
Use meaningful, stable element queries and accessibility identifiers rather than fragile positional selectors.
How do I wait for an XCUITest element?
Use waitForExistence(timeout:) to wait for the required UI element instead of relying on arbitrary delays. (Apple Developer)
AI Overview Summary
A basic XCUITest launches an iOS application with XCUIApplication, locates controls through XCUIAutomation queries, performs user interactions, and uses XCTest assertions to verify the expected UI state.
Final Takeaways
Your first native iOS UI test does not need to be complicated.
The essential pattern is:
XCTestCase
    ↓
XCUIApplication
    ↓
Launch
    ↓
XCUIElementQuery
    ↓
XCUIElement
    ↓
Interaction
    ↓
Synchronization
    ↓
Assertion
Once this workflow becomes familiar, you can extend it into screen objects, reusable components, test data management, reporting, parallel execution, CI/CD integration, and larger iOS automation frameworks.
The most important lesson is not simply learning how to call tap().
It is learning how to build stable, meaningful, maintainable user-flow tests.
People Asked Questions
Is XCUITest the same as XCTest?
No. XCTest is Apple’s broader testing framework, while XCUITest commonly refers to UI automation built using XCTest and XCUIAutomation. Apple continues to use XCTest for UI tests. (Apple Developer)
What is the first XCUITest I should write?
Start with a small critical workflow such as application launch, login, navigation, or form submission.
Do I need accessibility identifiers?
They are strongly recommended for stable UI automation because they give tests meaningful identifiers that are less dependent on visual layout.
Can I use the XCUITest Recorder?
Yes. Xcode provides UI recording to help generate element queries and interaction code. Review generated queries and choose stable, meaningful selectors. (Apple Developer)
Should I use sleep() in XCUITest?
Avoid using arbitrary sleeps as the normal synchronization strategy. Prefer condition-based APIs such as waitForExistence(timeout:). (Apple Developer)
Can XCUITest run on a Simulator?
Yes. Xcode supports running iOS applications and tests against simulator destinations. (Apple Developer)
Can XCUITest run on a real iPhone?
Yes. Xcode supports physical-device destinations, subject to the required device and signing configuration. (Apple Developer)
Should every application feature have a UI test?
No. UI tests should focus on important user workflows. Lower-level tests should cover logic and other behavior where they provide faster feedback. Apple recommends balancing test types through a testing-pyramid approach. (Apple Developer)
Internal Blog Links
- XCUITest iOS Testing: What it is and Why it Matters
- XCTest vs XCUITest: Understanding Apple’s Testing Frameworks
- XCUITest Setup on macOS and Xcode: Complete Beginner’s Guide
Internal Series Links
- Learn MCP – Zero to Hero
- Learn AI Agents for QA – Zero to Hero
- Playwright Automation – Zero to Hero
- TencentDB Agent Memory: Complete Zero to Hero
- LangGraph: Complete Zero to Hero
- Learn Python – Zero to Hero
- OpenAI Codex: Complete Zero to Hero
- Cursor AI: Complete Zero to Hero
- Claude Code Tutorial: Complete Zero to Hero
- AutoGen: Complete Zero to Hero Guide
- Free QA Resources Built From Real Experience
- QA Glossary: Test Automation Terms Every Engineer Should Know
External Links
- Apple — XCTest Documentation — Official XCTest documentation covering test cases, assertions, UI tests, performance tests, and test execution.
- Apple — XCUIAutomation Documentation — Official documentation for UI automation, element queries, UI interaction, application control, and screenshots.
- Apple — XCUIApplication Documentation — API reference for launching, monitoring, activating, and terminating the application under test.
- Apple — XCUIElement Documentation — API reference for UI elements, interactions, state queries, and synchronization.
- Apple — XCUIElementQuery Documentation — Official documentation explaining how tests locate UI elements.
- Apple — Recording UI Automation for Testing — Official guide for recording interactions and generating UI element queries.
- Apple — Xcode Testing — Testing strategy, test targets, UI testing, and Apple’s recommended testing pyramid.
- Apple — Building and Running an App — Official guidance for running applications on simulators and physical devices.
Continue Learning
Explore more expert articles on Mobile Testing, Backend & API, AI & Agentic, AI Tools, n8n, LangChain, CrewAI, MCP Servers, AI Agents, LlamaIndex, Docker, FastAPI, Playwright, Cypress, Test Automation, DevOps, and Software Engineering at www.skakarh.com.
QAPulse by SK delivers expert release analysis, AI engineering insights, enterprise automation strategies, migration guidance, DevOps best practices, and practical testing knowledge to help software professionals build scalable, intelligent, and production-ready software systems.