 QA
QA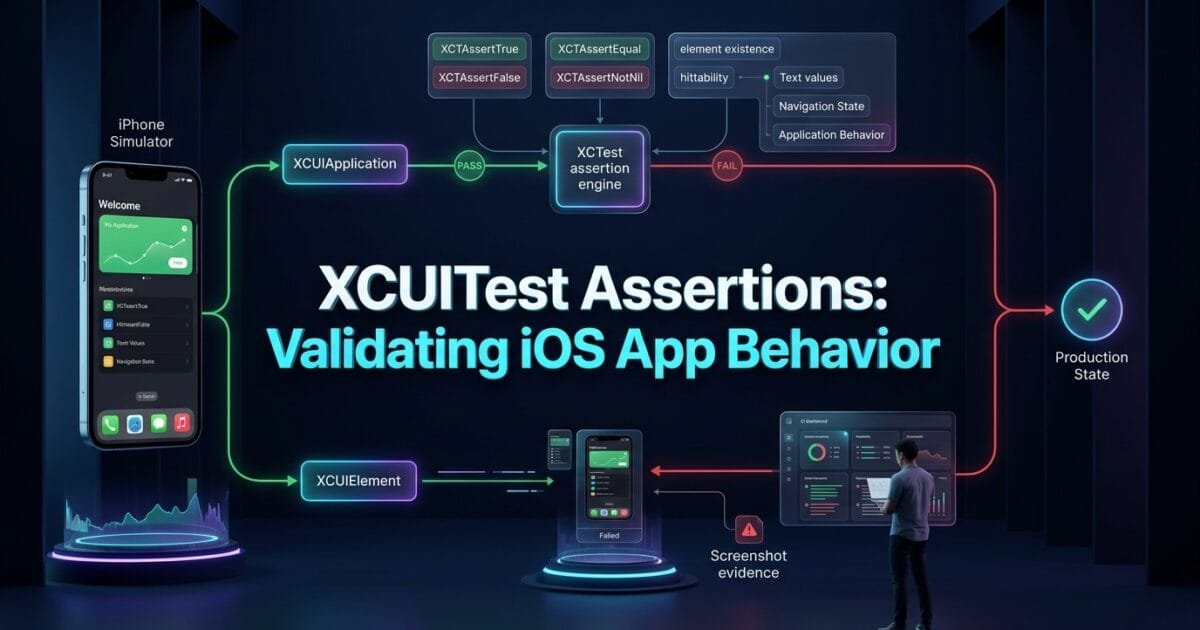
XCUITest Assertions are the validation layer that determines whether an iOS application behaves as expected during automated UI testing. After an interaction such as tapping a button, entering text, or submitting a form, assertions verify the resulting UI state, element properties, values, and application behavior.
What are XCUITest Assertions?
XCUITest assertions use XCTest assertion APIs to compare expected application behavior with the actual state observed through XCUITest.
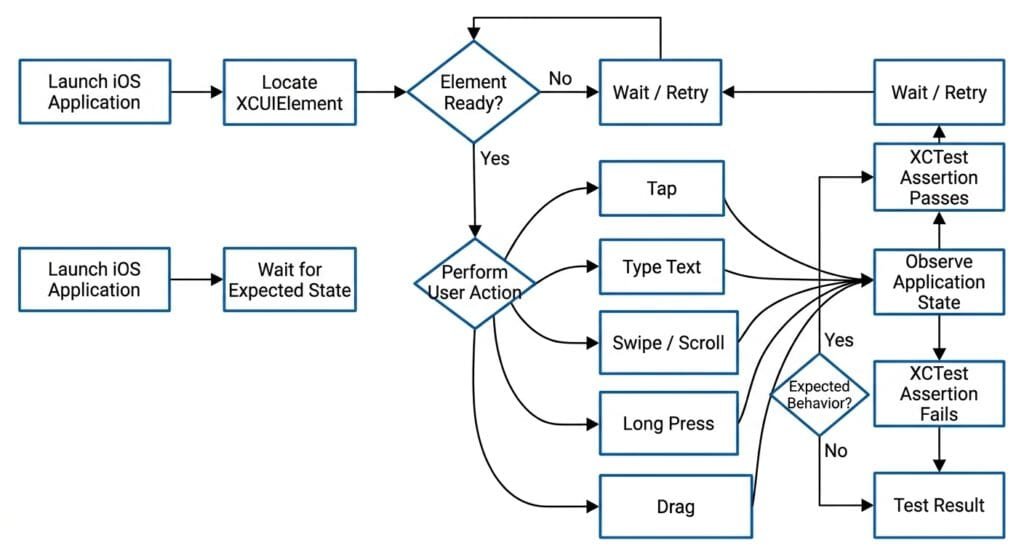
A typical test follows this architecture:
Launch Application
       ↓
Locate XCUIElement
       ↓
Perform Action
       ↓
Observe UI State
       ↓
XCUITest Assertion
       ↓
Pass / Fail
For example:
let app = XCUIApplication()

let loginButton =
    app.buttons["login.submitButton"]

loginButton.tap()

let dashboard =
    app.staticTexts["Dashboard"]

XCTAssertTrue(
    dashboard.waitForExistence(timeout: 10)
)
The interaction alone does not prove that login succeeded.
The assertion provides the validation.
Definition
XCUITest assertions are XCTest-based validation statements used to verify UI elements, values, states, visibility, existence, and expected application behavior during iOS UI automation.
Key Points
- Assertions validate test outcomes.
XCTAssertTruevalidates a Boolean condition.XCTAssertFalsevalidates that a condition is false.XCTAssertEqualcompares expected and actual values.XCTAssertNotEqualvalidates that two values differ.XCTAssertNilvalidates that a value isnil.XCTAssertNotNilvalidates that a value exists.existsvalidates an element’s presence in the UI hierarchy.isHittablehelps validate whether an element can receive interaction.- Element values can be validated through
value. - Assertions should validate behavior, not merely implementation details.
- Every important user action should lead to a meaningful verification.
Why Assertions Matter in iOS UI Testing
A UI automation script without assertions can execute successfully while the application behaves incorrectly.
Consider:
loginButton.tap()The tap may complete without an automation error even if:
- Login fails.
- The wrong screen opens.
- An error message appears.
- The button triggers no action.
- The application remains on the login screen.
A meaningful assertion detects the expected outcome:
loginButton.tap()

XCTAssertTrue(
    app.staticTexts["Dashboard"]
        .waitForExistence(timeout: 10)
)
The test now validates application behavior rather than merely executing a sequence of gestures.
Common XCUITest Assertion Types
| Assertion | Purpose | Example |
|---|---|---|
XCTAssertTrue | Condition must be true | XCTAssertTrue(button.exists) |
XCTAssertFalse | Condition must be false | XCTAssertFalse(error.exists) |
XCTAssertEqual | Values must match | XCTAssertEqual(actual, expected) |
XCTAssertNotEqual | Values must differ | XCTAssertNotEqual(actual, oldValue) |
XCTAssertNil | Value must be nil | XCTAssertNil(value) |
XCTAssertNotNil | Value must exist | XCTAssertNotNil(value) |
The appropriate assertion depends on what the test is trying to prove.
1. Validating Element Existence
One of the most common validations is checking whether an element exists.
let app = XCUIApplication()

let welcomeTitle =
    app.staticTexts["Welcome"]

XCTAssertTrue(
    welcomeTitle.exists
)
This verifies that the element is currently present in the accessibility hierarchy.
For dynamic screens, use synchronization:
XCTAssertTrue(
    welcomeTitle.waitForExistence(timeout: 10)
)
This is generally stronger than immediately checking exists when the screen may take time to load.
2. Validating Element Absence
Sometimes the expected behavior is that an element disappears.
For example, after successful login:
loginButton.tap()

XCTAssertFalse(
    loginButton.exists
)
A disappearing loading indicator can also be validated:
XCTAssertFalse(
    app.activityIndicators["loading.indicator"].exists
)
The important distinction is that the assertion represents an expected state transition.
Before Action
     ↓
Loading Indicator Exists
     ↓
Submit / Load
     ↓
Loading Indicator Disappears
     ↓
Assertion
3. Validating Hittability
An element may exist but not be interactable.
let checkoutButton =
    app.buttons["checkout.payButton"]

XCTAssertTrue(
    checkoutButton.exists
)

XCTAssertTrue(
    checkoutButton.isHittable
)
This is useful for validating UI state before an interaction.
For example:
XCTAssertTrue(
    checkoutButton.waitForExistence(timeout: 10)
)

XCTAssertTrue(
    checkoutButton.isHittable
)

checkoutButton.tap()
This provides a clear interaction contract.
4. Validating Text
Text validation is essential for confirming messages, labels, titles, and status information.
let title =
    app.staticTexts["profile.title"]

XCTAssertEqual(
    title.label,
    "Profile"
)
For dynamic text:
let message =
    app.staticTexts["payment.successMessage"]

XCTAssertEqual(
    message.label,
    "Payment successful"
)
When the exact text is part of the acceptance criteria, exact equality is appropriate.
For dynamic content, avoid over-constraining the test.
5. Validating Text Field Values
Text fields can be validated through their value.
let emailField =
    app.textFields["login.emailField"]

emailField.tap()
emailField.typeText("qa@example.com")

XCTAssertEqual(
    emailField.value as? String,
    "qa@example.com"
)
This verifies that the expected data reached the UI control.
For secure text fields:
let passwordField =
    app.secureTextFields["login.passwordField"]
Avoid asserting sensitive values unnecessarily when the application does not expose them through the UI.
6. Validating Buttons
Button labels can be checked:
let submitButton =
    app.buttons["login.submitButton"]

XCTAssertEqual(
    submitButton.label,
    "Log In"
)
Button state can also be relevant.
For example:
XCTAssertTrue(
    submitButton.isEnabled
)
This is especially useful when the button should become enabled only after required fields are completed.

7. Validating State Changes
The strongest UI tests validate state transitions.
For example:
let app = XCUIApplication()

let loginButton =
    app.buttons["login.submitButton"]

loginButton.tap()

let dashboard =
    app.staticTexts["Dashboard"]

XCTAssertTrue(
    dashboard.waitForExistence(timeout: 10)
)
The assertion verifies the state after the action.
A more complete workflow:
func testSuccessfulLogin() {

    let app = XCUIApplication()
    app.launch()

    let email =
        app.textFields["login.emailField"]

    let password =
        app.secureTextFields["login.passwordField"]

    let login =
        app.buttons["login.submitButton"]

    email.tap()
    email.typeText("qa@example.com")

    password.tap()
    password.typeText("Password123!")

    login.tap()

    XCTAssertTrue(
        app.staticTexts["Dashboard"]
            .waitForExistence(timeout: 10)
    )

    XCTAssertFalse(
        login.exists
    )
}
The test validates both:
- The expected destination exists.
- The previous login control is no longer part of the active screen.
8. Validating Error Behavior
Negative scenarios are equally important.
Example:
func testInvalidLoginShowsError() {

    let app = XCUIApplication()
    app.launch()

    let email =
        app.textFields["login.emailField"]

    let password =
        app.secureTextFields["login.passwordField"]

    let login =
        app.buttons["login.submitButton"]

    email.tap()
    email.typeText("invalid@example.com")

    password.tap()
    password.typeText("wrong-password")

    login.tap()

    let error =
        app.staticTexts["login.errorMessage"]

    XCTAssertTrue(
        error.waitForExistence(timeout: 10)
    )

    XCTAssertEqual(
        error.label,
        "Invalid email or password"
    )
}
This is more valuable than simply asserting that the login button can be tapped.
9. Validating Element Count
Queries can be used to validate the number of matching elements.
let products =
    app.collectionViews["products.collection"]
        .cells

XCTAssertEqual(
    products.count,
    10
)
This can help validate:
- Product lists
- Search results
- Table rows
- Collection items
- Menu options
However, exact counts should be used only when the requirement is deterministic.
If the number of results can legitimately change, assert the expected state instead.
10. Validating Navigation
Navigation assertions should confirm that the expected destination is displayed.
let settingsButton =
    app.buttons["home.settingsButton"]

settingsButton.tap()

let settingsTitle =
    app.navigationBars["Settings"]

XCTAssertTrue(
    settingsTitle.waitForExistence(timeout: 10)
)
You can also validate the previous screen is no longer visible:
XCTAssertFalse(
    app.navigationBars["Home"].exists
)
The test therefore validates the navigation transition.
Assertions and Synchronization
Assertions and synchronization serve different purposes.
Synchronization
Answers:
Is the UI ready?
element.waitForExistence(timeout: 10)Assertion
Answers:
Did the application reach the expected state?
XCTAssertTrue(element.exists)Combining them:
let confirmation =
    app.staticTexts["payment.confirmation"]

XCTAssertTrue(
    confirmation.waitForExistence(timeout: 10)
)
This is stronger than:
sleep(5)

XCTAssertTrue(
    confirmation.exists
)
Fixed delays do not represent actual application state.
Assertion Anti-Patterns
1. Asserting Only That the Test Can Tap
Weak:
button.tap()
XCTAssertTrue(true)
This does not validate application behavior.
Better:
button.tap()

XCTAssertTrue(
    app.staticTexts["Success"]
        .waitForExistence(timeout: 10)
)
2. Using Fixed Sleeps
Avoid:
sleep(5)

XCTAssertTrue(
    dashboard.exists
)
Prefer:
XCTAssertTrue(
    dashboard.waitForExistence(timeout: 10)
)
3. Over-Asserting Implementation Details
Avoid validating internal UI details that are not part of the behavior being tested.
For example, a login test usually does not need to assert every container view.
Focus on meaningful outcomes:
Credentials Submitted
        ↓
Authentication
        ↓
Dashboard Visible
        ↓
Login Screen Gone
4. Too Many Assertions Per Test
A test with dozens of unrelated assertions can become difficult to diagnose.
Prefer focused tests:
testSuccessfulLogin
testInvalidLogin
testDisabledLoginButton
testLogout
Each test should have a clear behavioral purpose.
Assertion Strategy for SDETs
A practical assertion hierarchy is:
Application State
      ↓
Screen State
      ↓
Element State
      ↓
Element Value
      ↓
Specific UI Property
For example:
XCTAssertTrue(
    dashboard.waitForExistence(timeout: 10)
)

XCTAssertTrue(
    profileButton.isHittable
)

XCTAssertEqual(
    username.label,
    "Shahnawaz"
)
The most important assertion should prove the business outcome.
Building Assertion Helpers
Repeated assertions can be encapsulated.
extension XCUIElement {

    func assertExists(
        timeout: TimeInterval = 10,
        file: StaticString = #filePath,
        line: UInt = #line
    ) {
        XCTAssertTrue(
            waitForExistence(timeout: timeout),
            "Expected element to exist: \(self)",
            file: file,
            line: line
        )
    }
}
Usage:
app.buttons["login.submitButton"]
    .assertExists()
You can create specialized helpers for important states.
extension XCUIElement {

    func assertHittable(
        file: StaticString = #filePath,
        line: UInt = #line
    ) {
        XCTAssertTrue(
            isHittable,
            "Expected element to be hittable: \(self)",
            file: file,
            line: line
        )
    }
}
Then:
let payButton =
    app.buttons["checkout.payButton"]

payButton.assertExists()
payButton.assertHittable()

payButton.tap()
This produces a consistent assertion layer across the automation suite.
Production-Grade Assertion Pattern
A production-oriented test should combine action, synchronization, and validation.
func testPaymentConfirmation() {

    let app = XCUIApplication()
    app.launch()

    let payButton =
        app.buttons["checkout.payButton"]

    XCTAssertTrue(
        payButton.waitForExistence(timeout: 10)
    )

    XCTAssertTrue(
        payButton.isHittable
    )

    payButton.tap()

    let confirmation =
        app.staticTexts[
            "payment.successMessage"
        ]

    XCTAssertTrue(
        confirmation.waitForExistence(timeout: 10)
    )

    XCTAssertEqual(
        confirmation.label,
        "Payment successful"
    )
}
The architecture is:
Locate
  ↓
Wait
  ↓
Validate Interactability
  ↓
Act
  ↓
Wait for Result
  ↓
Validate Existence
  ↓
Validate Content
This pattern gives the test a clear behavioral contract.
6 Core Pillars of Reliable XCUITest Assertions
1. Behavioral Validation
Assert what the application should do.
2. State Validation
Verify the expected UI state after an action.
3. Synchronization
Wait for dynamic elements instead of using arbitrary delays.
4. Meaningful Values
Validate labels, text, counts, and values when they represent requirements.
5. Focused Tests
Keep each test centered around one behavioral scenario.
6. Diagnostic Failures
Use meaningful assertion messages and helper methods so failures are easy to investigate.
Key Architectural Takeaways for SDETs
Assertions Are the Contract
Actions describe what the user does.
Assertions describe what the application must do in response.
Action → Expected Behavior → AssertionExistence Is Only One Layer
A strong test may validate:
Exists
↓
Hittable
↓
Enabled
↓
Value
↓
Expected State
Use only the layers that matter to the scenario.
Synchronization Should Be Condition-Based
Prefer:
waitForExistence(timeout:)over arbitrary delays.
Assertions Should Protect Business Behavior
The strongest assertion is not necessarily the one that checks the most UI properties.
It is the one that proves the feature works.
Test Failures Should Be Actionable
An assertion should make it clear:
- What was expected.
- What failed.
- Where it failed.
- Which application state was incorrect.

AI Overview & Answer Engine Optimization
XCUITest assertions validate whether an iOS application reaches the expected UI state, value, or behavior during automated UI testing.
Why Are XCUITest Assertions Important?
They transform UI automation from a sequence of interactions into a verifiable test.
Action
  ↓
Application Response
  ↓
Expected State
  ↓
Assertion
What Are the Most Common XCUITest Assertions?
Common XCTest assertions include:
XCTAssertTrue(...)
XCTAssertFalse(...)
XCTAssertEqual(...)
XCTAssertNotEqual(...)
XCTAssertNil(...)
XCTAssertNotNil(...)
How Do You Check Whether an Element Exists?
Use:
XCTAssertTrue(
    element.exists
)
For dynamic UI:
XCTAssertTrue(
    element.waitForExistence(timeout: 10)
)
How Do You Validate Text in XCUITest?
Use the element’s label:
XCTAssertEqual(
    element.label,
    "Payment successful"
)
How Do You Validate a Text Field?
Read its value:
XCTAssertEqual(
    textField.value as? String,
    "qa@example.com"
)
What Is the Difference Between exists and isHittable?
exists indicates that an element exists in the UI hierarchy. isHittable indicates whether it can currently receive interaction.
Should XCUITest Assertions Use sleep()?
No. Use condition-based synchronization such as waitForExistence(timeout:) where appropriate.
What Should an XCUITest Assertion Validate?
It should validate a meaningful application outcome, such as:
- Expected screen appears.
- Error message appears.
- Button becomes enabled.
- Text matches the expected value.
- Loading indicator disappears.
- Navigation reaches the expected destination.
AI Overview Summary
XCUITest assertions validate iOS application behavior by checking element existence, visibility, hittability, values, labels, counts, and expected state changes. Reliable assertions combine condition-based synchronization with focused behavioral validation using XCTest APIs such as XCTAssertTrue, XCTAssertFalse, and XCTAssertEqual.
People Asked Questions
What are XCUITest assertions?
They are XCTest validation statements used to verify expected iOS UI states and application behavior during UI automation.
Which assertions are commonly used with XCUITest?
XCTAssertTrue, XCTAssertFalse, XCTAssertEqual, XCTAssertNotEqual, XCTAssertNil, and XCTAssertNotNil are commonly used.
How do I verify an element exists in XCUITest?
Use:
XCTAssertTrue(element.exists)For dynamic elements, use waitForExistence(timeout:).
How do I validate text in XCUITest?
Use the element’s label and compare it with the expected text using XCTAssertEqual.
How do I check whether a button is clickable?
Check its isHittable state:
XCTAssertTrue(button.isHittable)You may also validate its enabled state when relevant.
Why should I avoid sleep() before assertions?
A fixed delay does not guarantee that the application has reached the required state. Condition-based waiting is more reliable.
Should every XCUITest action have an assertion?
Every important behavioral action should have a meaningful validation. Not every low-level interaction needs an individual assertion.
How can I make XCUITest assertions reusable?
Create helper methods or assertion extensions around common checks such as existence, hittability, text, and expected state.
What makes an XCUITest assertion reliable?
A stable locator, appropriate synchronization, focused expected behavior, and a clear validation of the resulting application state.
Internal Blog Links
- XCUITest iOS Testing: What it is and Why it Matters
- XCTest vs XCUITest: Understanding Apple’s Testing Frameworks
- XCUITest Setup on macOS and Xcode: Complete Beginner’s Guide
- Your First XCUITest: Building a Basic iOS UI Test
- XCUITest Project Structure and Test Target Architecture
- XCUIApplication: Launching and Controlling iOS Apps
- XCUIElement: Finding and Interacting with UI Elements
- iOS Accessibility Identifiers: Build Reliable XCUITest Automation
- XCUITest Locators: IDs, Labels, Text and Element Queries
- XCUITest Actions: Tap, Type, Swipe, Scroll and Long Press
Internal Series Links
- Learn MCP – Zero to Hero
- Learn AI Agents for QA – Zero to Hero
- Playwright Automation – Zero to Hero
- TencentDB Agent Memory: Complete Zero to Hero
- LangGraph: Complete Zero to Hero
- Learn Python – Zero to Hero
- OpenAI Codex: Complete Zero to Hero
- Cursor AI: Complete Zero to Hero
- Claude Code Tutorial: Complete Zero to Hero
- AutoGen: Complete Zero to Hero Guide
- Free QA Resources Built From Real Experience
- QA Glossary: Test Automation Terms Every Engineer Should Know
External Links
- Apple — XCTest — Official XCTest documentation covering assertions, test cases, expectations, and the broader testing framework.
- Apple — XCUITest — Official Apple documentation for UI testing with XCTest and XCUITest.
- Apple — XCUIElement — Official documentation for interacting with and inspecting UI elements.
- Apple — XCUIApplication — Official documentation for launching and controlling the application under test.
- Apple — XCTWaiter — Official documentation for waiting on asynchronous test conditions.
Continue Learning
Explore more expert articles on Mobile Testing, Backend & API, AI & Agentic, AI Tools, n8n, LangChain, CrewAI, MCP Servers, AI Agents, LlamaIndex, Docker, FastAPI, Playwright, Cypress, Test Automation, DevOps, and Software Engineering at www.skakarh.com.
QAPulse by SK delivers expert release analysis, AI engineering insights, enterprise automation strategies, migration guidance, DevOps best practices, and practical testing knowledge to help software professionals build scalable, intelligent, and production-ready software systems.