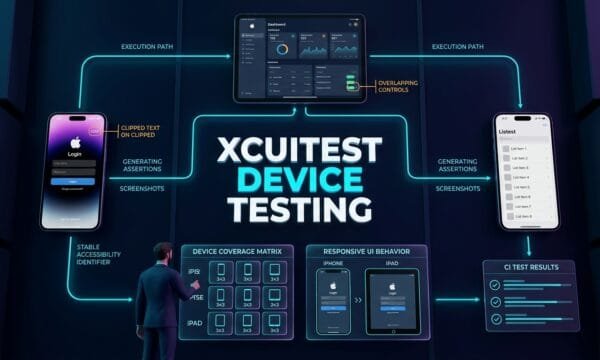
 QA
QA
XCUITest setup on macOS and Xcode is the first practical step toward building native iOS UI automation with Apple’s testing ecosystem. Xcode provides the project, test target, simulator or physical-device environment, and test execution workflow, while XCTest and XCUIAutomation provide the APIs used to create and run UI tests. Apple currently recommends XCTest for UI testing and uses XCUIAutomation to control application interfaces and validate user interaction flows. (Apple Developer)
For a QA Engineer or SDET coming from Selenium, Playwright, Cypress, or Appium, the initial setup can feel different because XCUITest is deeply integrated into Xcode rather than being a separate automation server that you install and configure independently.
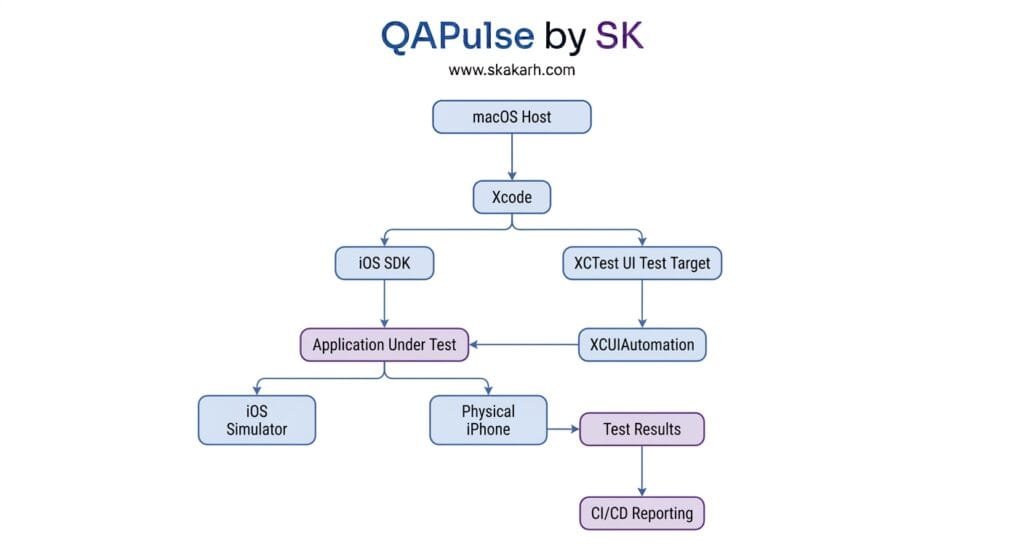
The good news is that the setup becomes straightforward once you understand the relationship between macOS → Xcode → iOS SDK → Simulator/device → application target → UI test target.
This guide walks through the complete setup, explains the architecture, shows a first working UI test, covers simulator and physical-device execution, introduces accessibility identifiers, explains common setup failures, and finishes with an SDET-ready project structure.
What is XCUITest?
Before starting the XCUITest setup on macOS and Xcode, it is important to understand what you are actually installing.
XCUITest is commonly used to describe Apple’s native iOS UI automation approach built around XCTest and XCUIAutomation. XCTest provides the test framework, assertions, test lifecycle, and execution infrastructure, while XCUIAutomation provides APIs for interacting with the application’s UI.
Apple’s documentation describes XCTest as the framework for creating and running unit, performance, and UI tests. UI tests use XCUIAutomation to replicate user interactions and validate application behavior. (Apple Developer)
A simplified architecture looks like this:
macOS
   │
   ▼
Xcode
   │
   ├── Swift
   ├── XCTest
   ├── XCUIAutomation
   └── iOS SDK
          │
          ▼
    iOS Simulator / iPhone
          │
          ▼
     Application
          │
          ▼
      UI Test Target
The important point is that you generally do not install a standalone “XCUITest server.”
Xcode supplies the development and testing environment.
Key Points
- XCUITest is Apple’s native iOS UI automation approach.
- XCTest provides the test foundation.
- XCUIAutomation provides UI interaction APIs.
- Xcode manages test targets and execution.
- iOS Simulator provides a convenient execution environment.
- Physical iPhones provide higher-fidelity validation.
- Accessibility identifiers make UI automation more stable.
- Test targets are separate from the application target.
XCUIApplicationrepresents the application under test.XCUIElementrepresents an interactable UI element.
What You Need Before Starting
A successful XCUITest setup on macOS and Xcode starts with the correct environment.
You need a Mac capable of running the selected Xcode version, a compatible macOS version, sufficient storage, and an Apple development environment.
Apple maintains the official Xcode system-requirements matrix because Xcode versions have specific macOS, SDK, simulator, and deployment-target requirements. For example, Apple’s current matrix lists Xcode 26.x versions alongside their supported macOS releases and corresponding iOS SDKs. Always check the matrix before deciding which Xcode release to install. (Apple Developer)
Basic Requirements
| Requirement | Purpose |
|---|---|
| macOS | Host operating system |
| Xcode | Development and testing environment |
| iOS SDK | Build and test against iOS |
| Swift | Write application and test code |
| iOS Simulator | Virtual iOS execution environment |
| Apple Account | Useful for device development and signing |
| Xcode project | Application under test |
| UI test target | Container for automation tests |
| Physical iPhone | Optional higher-fidelity testing |
Check Your macOS Version
Open:
Apple menu → About This Mac
Or use Terminal:
sw_versYou may see output similar to:
ProductName:    macOS
ProductVersion: 26.x
BuildVersion:   ...
The exact version matters because Xcode has specific supported macOS versions.
Check Your Mac Architecture
Modern Macs may use Apple silicon, while older Macs use Intel processors.
Run:
uname -mTypical results:
arm64or:
x86_64This can matter when installing third-party command-line tools and dependencies.
Check Available Storage
Xcode, SDKs, simulators, derived data, archives, and test artifacts can consume substantial disk space.
Check storage with:
df -hFor a serious automation workstation, avoid starting with a nearly full disk.
Simulator failures and build problems can sometimes be caused by environmental resource constraints rather than the test code itself.
Installing Xcode
The central component of the XCUITest setup on macOS and Xcode is Xcode itself.
Install the Xcode release appropriate for your macOS version and project requirements.
After installation, launch Xcode and allow it to complete any additional component installation it requests.
Then verify the command-line developer tools:
xcode-select -pA normal result points to the active Xcode developer directory.
You can also inspect the selected developer directory:
xcode-select --print-pathIf the wrong Xcode installation is selected, you can change it with:
sudo xcode-select --switch /Applications/Xcode.appThen verify:
xcodebuild -versionExample:
Xcode 26.x
Build version ...
The exact version will depend on the Xcode installation.
Accept the Xcode License
If command-line tools report a license issue, run:
sudo xcodebuild -licenseFollow the displayed instructions.
You can also trigger Xcode’s first-launch setup through:
sudo xcodebuild -runFirstLaunchThis is particularly useful on newly configured machines or CI hosts.
Install the Required iOS Simulator Runtime
One of the easiest mistakes during XCUITest setup on macOS and Xcode is assuming that installing Xcode automatically means every desired iOS simulator runtime is ready.
The available simulator runtimes depend on the Xcode release.
In Xcode, inspect the available platforms or device runtimes through the relevant platform/device management interface.
You want at least one compatible iPhone simulator.
For example:
iPhone
   └── iOS Runtime
       └── Available
If the required runtime is missing, install it through Xcode’s platform management options.
Why the Simulator Matters
The simulator gives you a repeatable environment for development and automation.
Apple notes that simulated devices can be used to test on different hardware configurations, but they do not reproduce every performance characteristic or feature of physical devices. Apple recommends physical-device testing when you need to verify behavior on actual hardware. (Apple Developer)
Therefore:
Development
     ↓
Simulator

Fast Regression
     ↓
Simulator

Hardware Validation
     ↓
Physical iPhone
An SDET should ideally use both.
Create an iOS Application Project
The next stage of XCUITest setup on macOS and Xcode is creating or opening the application you want to automate.
For a new project:
- Open Xcode.
- Select Create New Project.
- Choose an iOS application template.
- Select Swift as the programming language.
- Configure the application name and bundle identifier.
- Select an appropriate project location.
- Create the project.
If you already have an application, simply open the existing .xcodeproj or .xcworkspace.
Your project might contain:
MyApp/
├── MyApp/
│   ├── App.swift
│   ├── ContentView.swift
│   └── ...
├── MyAppTests/
│   └── ...
├── MyAppUITests/
│   └── ...
└── MyApp.xcodeproj
The exact structure depends on whether the project uses SwiftUI, UIKit, Swift Package Manager, CocoaPods, or other dependencies.
Create the UI Test Target
This is one of the most important steps in the XCUITest setup on macOS and Xcode.
Your application target and UI test target are different.
The application target builds the application.
The UI test target builds and runs the automation tests.
Apple’s current Xcode documentation explains that when creating projects you can configure testing systems and test targets. For UI testing, Xcode provides an XCTest UI Test template, and those tests are implemented using XCTestCase. (Apple Developer)
Add a UI Test Target
From Xcode:
File → New → Target
Choose the iOS UI Testing target/template appropriate to your Xcode version.
Give it a meaningful name:
MyAppUITestsMake sure it targets the correct application.
You should then see a UI test file resembling:
import XCTest

final class MyAppUITests: XCTestCase {

    override func setUpWithError() throws {
        continueAfterFailure = false
    }

    func testExample() throws {
        let app = XCUIApplication()
        app.launch()
    }
}
This is the foundation of your first UI automation test.
Understanding the UI Test Target
A common beginner mistake is thinking the UI test directly runs inside the application process.
Conceptually, the relationship is closer to:
UI Test Process
      │
      │ controls
      ▼
Application Under Test
      │
      ▼
iOS UI
XCUIApplication provides the proxy used by the UI test to launch and control the target application. Apple documents XCUIApplication as a proxy that can launch, monitor, and terminate a test application. (Apple Developer)
This separation is important for understanding UI automation behavior.
Core XCUITest Architecture
A clean XCUITest setup on macOS and Xcode can be understood through six components.
1. macOS
Provides the host environment.
2. Xcode
Provides:
- Editor
- Build system
- Test runner
- Simulator integration
- Debugger
- Test navigator
- Code signing tools
- Test reporting
3. XCTest
Provides:
XCTestCase- Assertions
- Setup and teardown
- Test execution
- Performance testing
- UI test integration
4. XCUIAutomation
Provides UI automation capabilities.
5. Application Under Test
The actual iOS application.
6. Simulator or Physical Device
The environment where the application and UI tests execute.
Key Architectural Takeaways for SDETs
- UI tests should validate user-visible behavior.
- The application target and test target should remain conceptually separate.
- Stable element identifiers are essential.
- Simulator execution is excellent for fast feedback.
- Physical devices are necessary for hardware-specific confidence.
- Test setup should be deterministic.
- UI tests should cover critical workflows rather than every internal rule.
- CI should execute tests through reproducible schemes and destinations.
6 Core Pillars of XCUITest Setup on macOS and Xcode
Pillar 1: Host Environment
Your macOS version must support the selected Xcode version.
Pillar 2: Xcode Toolchain
Xcode provides the compiler, SDKs, simulator integration, testing framework, and execution workflow.
Pillar 3: Test Target
The UI test target contains the automation code and connects it to the application under test.
Pillar 4: Execution Destination
Tests require a compatible simulator or physical device.
Pillar 5: UI Identification
Tests need reliable ways to locate UI elements.
Pillar 6: Test Execution
Tests must be runnable through Xcode and, eventually, from the command line or CI/CD pipeline.
Create Your First XCUITest
Now that the environment exists, the next step in XCUITest setup on macOS and Xcode is creating an actual test.
Start with a simple launch test:
import XCTest

final class LoginUITests: XCTestCase {

    override func setUpWithError() throws {
        continueAfterFailure = false
    }

    func testApplicationLaunches() throws {
        let app = XCUIApplication()

        app.launch()

        XCTAssertTrue(app.exists)
    }
}
The key components are straightforward.
let app = XCUIApplication()Creates an application proxy.
app.launch()Launches the application.
XCTAssertTrue(app.exists)Uses an XCTest assertion to validate the application state.
Apple’s XCTest documentation confirms that XCTest works with XCUIAutomation to interact with application UI and validate user interaction flows. (Apple Developer)
Find Your First UI Element
Once the application launches, locate a UI element.
Suppose your application has:
Login
Email
Password
Sign In
A UI test can locate the button:
let loginButton = app.buttons["loginButton"]Then:
loginButton.tap()For a text field:
let emailField = app.textFields["emailField"]Then:
emailField.tap()
emailField.typeText("qa@example.com")
For a password field:
let passwordField = app.secureTextFields["passwordField"]

passwordField.tap()
passwordField.typeText("Password123")
Accessibility Identifiers
One of the most important setup practices is adding stable identifiers to application controls.
For example:
Button("Sign In") {
    login()
}
.accessibilityIdentifier("loginButton")
Your UI test can then use:
app.buttons["loginButton"].tap()This is much more stable than relying on screen position or text that may change.
Apple’s UI automation APIs expose element attributes and querying capabilities through XCUIElement. XCUIElement also provides methods such as waitForExistence(timeout:) for synchronizing tests with UI state. (Apple Developer)
Build a Complete Login Test
A useful first workflow is login.
import XCTest

final class LoginUITests: XCTestCase {

    private var app: XCUIApplication!

    override func setUpWithError() throws {
        continueAfterFailure = false

        app = XCUIApplication()
        app.launch()
    }

    func testSuccessfulLogin() throws {
        let emailField = app.textFields["emailField"]
        let passwordField = app.secureTextFields["passwordField"]
        let loginButton = app.buttons["loginButton"]

        XCTAssertTrue(
            emailField.waitForExistence(timeout: 5)
        )

        emailField.tap()
        emailField.typeText("qa@example.com")

        passwordField.tap()
        passwordField.typeText("Password123")

        loginButton.tap()

        let dashboard = app.staticTexts["Dashboard"]

        XCTAssertTrue(
            dashboard.waitForExistence(timeout: 5)
        )
    }
}
This test demonstrates the core lifecycle:
Launch
  ↓
Find element
  ↓
Wait for element
  ↓
Interact
  ↓
Submit
  ↓
Validate expected state
That is the basic pattern you will reuse throughout an iOS UI automation framework.
Run the Test in Xcode
With the test selected, run it through Xcode.
You can:
- Run the complete test target.
- Run a test class.
- Run a specific test method.
- Use the Test navigator.
Apple documents running individual test functions from Xcode and also provides xcodebuild options for command-line execution. (Apple Developer)
A successful execution should show a passing test indicator in Xcode.
If the test fails, inspect:
- Failure message
- UI hierarchy
- Test attachment
- Screenshot
- Console output
- Build logs
- Application state
Run XCUITest from Terminal
A production XCUITest setup on macOS and Xcode should eventually support command-line execution.
A basic command is:
xcodebuild test \
  -scheme MyApp \
  -destination 'platform=iOS Simulator,name=iPhone 17'
The exact simulator name and OS version must match an installed destination.
You can inspect available destinations with:
xcodebuild \
  -scheme MyApp \
  -showdestinations
For a specific test:
xcodebuild test \
  -scheme MyApp \
  -destination 'platform=iOS Simulator,name=iPhone 17' \
  -only-testing:MyAppUITests/LoginUITests/testSuccessfulLogin
Apple documents the -only-testing option for running specific tests from Terminal and describes the resulting .xcresults bundle produced by xcodebuild. (Apple Developer)
Running on a Physical iPhone
Simulator testing should not be your only validation layer.
Apple explains that a physical device can be selected as an Xcode run destination, but additional signing and device setup may be required. With automatic signing enabled, Xcode can register the device and create the development provisioning profile. (Apple Developer)
A typical workflow is:
Connect iPhone
     ↓
Trust Mac
     ↓
Enable required Developer Mode
     ↓
Sign in to Apple Account
     ↓
Select Development Team
     ↓
Select iPhone
     ↓
Build
     ↓
Run UI Test
Physical-device execution is particularly valuable for:
- Hardware behavior
- Camera interactions
- Sensors
- Real performance
- Device-specific rendering
- Permission flows
- Network conditions
- OS/device combinations
Simulator vs Physical Device
| Area | Simulator | Physical iPhone |
|---|---|---|
| Setup speed | Fast | More setup |
| Cost | Low | Requires hardware |
| Parallel execution | Excellent | More infrastructure |
| UI regression | Excellent | Excellent |
| Hardware validation | Limited | Strong |
| Real performance | Not equivalent | Accurate |
| Sensors | Simulated | Real |
| CI usage | Very common | More complex |
| Developer feedback | Excellent | Good |
| Release confidence | Good | Essential |
The best strategy is not to choose one permanently.
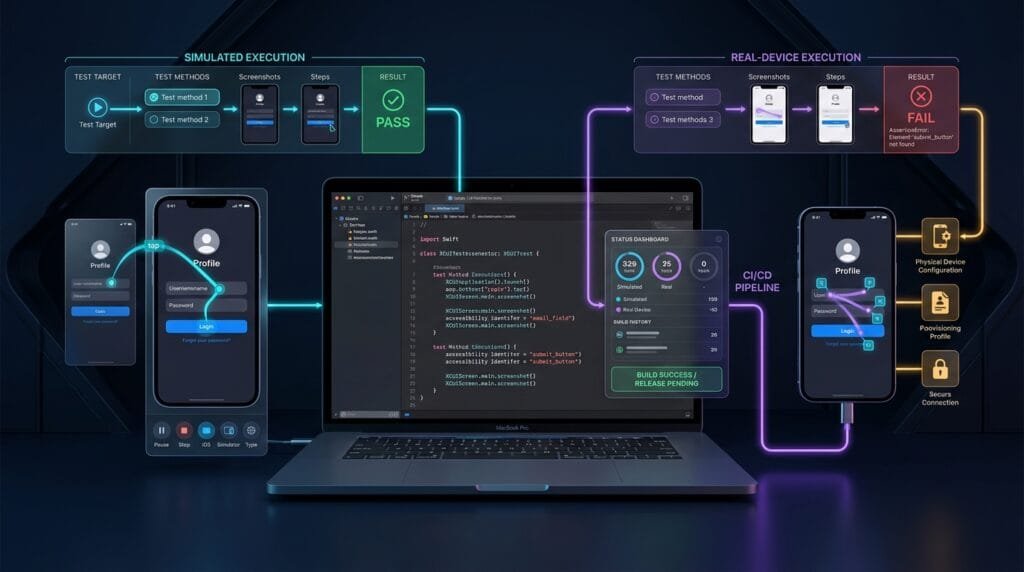
Use simulators for fast feedback and broad automated coverage, then use physical devices for important hardware and release validation. Apple explicitly cautions that simulators do not reproduce the performance or every feature of physical devices. (Apple Developer)
Common XCUITest Setup Problems
Even a correct XCUITest setup on macOS and Xcode can fail because of environment configuration.
Problem 1: Xcode Cannot Find the Simulator
Check installed runtimes and destinations.
Run:
xcodebuild -showsdksThen inspect available destinations:
xcodebuild \
  -scheme MyApp \
  -showdestinations
If the required simulator runtime is missing, install the appropriate platform/runtime through Xcode.
Problem 2: Wrong Developer Directory
Check:
xcode-select -pIf necessary:
sudo xcode-select --switch /Applications/Xcode.appThen:
xcodebuild -versionProblem 3: Signing Errors
Physical-device testing often introduces signing requirements.
Check:
Project → Target → Signing & Capabilities
Confirm:
- Team
- Bundle identifier
- Signing configuration
- Automatic signing where appropriate
Problem 4: UI Element Not Found
Suppose:
app.buttons["loginButton"]fails.
Check:
- Does the button exist?
- Is the identifier actually
loginButton? - Is the correct screen displayed?
- Is the application fully loaded?
- Is the element inside another container?
- Is the test running against the expected application build?
Use:
XCTAssertTrue(
    app.buttons["loginButton"]
        .waitForExistence(timeout: 10)
)
rather than immediately tapping an element that may not yet exist.
Problem 5: Tests Are Flaky
Avoid:
sleep(5)Prefer condition-based synchronization:
let dashboard = app.staticTexts["Dashboard"]

XCTAssertTrue(
    dashboard.waitForExistence(timeout: 10)
)
XCUIElement provides waitForExistence(timeout:) specifically for waiting until an element exists. (Apple Developer)
Problem 6: Test Target Uses the Wrong Application
Verify the UI test target’s target application configuration.
XCUIApplication() uses the configured target application when initialized without another identifier. (Apple Developer)
Production-Ready Project Structure
Once the basic setup works, do not keep every selector and workflow inside one test file.
A scalable structure could look like:
MyAppUITests/
├── Tests/
│   ├── LoginTests.swift
│   ├── CheckoutTests.swift
│   └── ProfileTests.swift
│
├── Screens/
│   ├── LoginScreen.swift
│   ├── DashboardScreen.swift
│   └── CheckoutScreen.swift
│
├── Components/
│   ├── NavigationBar.swift
│   └── AlertComponent.swift
│
├── Helpers/
│   ├── TestData.swift
│   ├── WaitHelper.swift
│   └── ScreenshotHelper.swift
│
└── Configuration/
    └── TestEnvironment.swift
This creates a clean separation:
Test
 ↓
Screen
 ↓
Component
 ↓
Application UI
Example Screen Object
import XCTest

final class LoginScreen {

    private let app: XCUIApplication

    init(app: XCUIApplication) {
        self.app = app
    }

    private var emailField: XCUIElement {
        app.textFields["emailField"]
    }

    private var passwordField: XCUIElement {
        app.secureTextFields["passwordField"]
    }

    private var loginButton: XCUIElement {
        app.buttons["loginButton"]
    }

    func login(
        email: String,
        password: String
    ) {
        emailField.tap()
        emailField.typeText(email)

        passwordField.tap()
        passwordField.typeText(password)

        loginButton.tap()
    }
}
Then:
func testSuccessfulLogin() {
    let app = XCUIApplication()

    app.launch()

    let loginScreen = LoginScreen(app: app)

    loginScreen.login(
        email: "qa@example.com",
        password: "Password123"
    )

    XCTAssertTrue(
        app.staticTexts["Dashboard"]
            .waitForExistence(timeout: 5)
    )
}
This is considerably easier to maintain than duplicating selectors across dozens of test cases.
CI/CD Considerations
The final stage of XCUITest setup on macOS and Xcode is automation beyond the developer’s machine.
A typical pipeline can look like:
Git Push
   ↓
Build
   ↓
Unit Tests
   ↓
Integration Tests
   ↓
XCUITest Smoke Tests
   ↓
Extended UI Regression
   ↓
Test Results
   ↓
Report
   ↓
Deployment
Use xcodebuild for command-line execution and store the resulting test artifacts.
Apple documents .xcresults bundles as Xcode test-result artifacts that can contain session results, coverage when enabled, and logs. (Apple Developer)
This makes command-line execution valuable for CI systems such as:
- GitHub Actions
- GitLab CI
- Jenkins
- Bitrise
- Xcode Cloud
- Other macOS-based CI infrastructure
The CI machine should have a deterministic:
- macOS version
- Xcode version
- simulator runtime
- dependency state
- signing configuration
- test scheme
That reduces “works on my Mac” failures.
Best Practices for SDETs
A reliable XCUITest setup on macOS and Xcode is more than getting one test to pass.
1. Keep the environment reproducible
Record:
macOS
Xcode
Swift
iOS Runtime
Simulator
Dependencies
2. Use stable identifiers
Prefer:
app.buttons["checkoutButton"]over:
app.buttons.element(boundBy: 4)3. Avoid arbitrary sleeps
Synchronize against real UI state.
4. Keep UI tests focused
Do not move every business-rule test into UI automation.
5. Use the testing pyramid
Apple recommends a larger number of fast, isolated unit tests, fewer integration tests, and a smaller number of UI tests focused on common use cases. (Apple Developer)
6. Run critical tests on every change
Keep the pull-request suite small.
7. Run broader regression separately
Longer UI suites can execute on scheduled or release pipelines.
8. Use physical devices strategically
Simulator coverage is excellent, but hardware validation still matters.
9. Capture useful evidence
Screenshots, logs, and test-result bundles make failures easier to investigate.
10. Treat setup as infrastructure
Your XCUITest environment is part of the automation framework—not an afterthought.
AI Overview & Answer Engine Optimization
What is XCUITest?
XCUITest is Apple’s native iOS UI automation approach built around XCTest and XCUIAutomation.
What is required for XCUITest?
A compatible Mac, macOS version, Xcode installation, iOS SDK/runtime, application project, UI test target, and simulator or physical device.
Can XCUITest run without an iPhone?
Yes. iOS Simulator can execute UI tests, although physical devices are required for hardware-specific and higher-fidelity validation.
How do I create an XCUITest?
Create an XCTest UI test target in Xcode, subclass XCTestCase, create an XCUIApplication, launch it, locate UI elements, perform actions, and assert expected states.
How do I run XCUITest from Terminal?
Use xcodebuild test with an appropriate scheme and destination.
Final Takeaways
Setting up native iOS automation does not require a complicated external automation stack.
The essential path is:
Compatible macOS
      ↓
Install Xcode
      ↓
Install iOS Runtime
      ↓
Create/Open iOS App
      ↓
Create UI Test Target
      ↓
Configure Target Application
      ↓
Create XCUIApplication
      ↓
Locate XCUIElements
      ↓
Interact + Assert
      ↓
Run on Simulator
      ↓
Run on Physical Device
      ↓
Automate with xcodebuild
      ↓
Integrate into CI/CD
The most important lesson is to build the environment correctly before building a large automation framework.
Once Xcode can build the application, the simulator can launch it, the UI test target can control it, and your selectors can reliably locate elements, you have the foundation required for a scalable iOS automation strategy.
People Asked Questions
What is the easiest way to start XCUITest?
Install a compatible Xcode version on macOS, create or open an iOS project, add an XCTest UI test target, select an iOS Simulator, and create a test using XCUIApplication.
Do I need an iPhone for XCUITest?
No. You can start with an iOS Simulator. A physical iPhone becomes important when you need to validate real hardware, device-specific behavior, or release-critical scenarios. (Apple Developer)
Does Xcode include XCTest?
Yes. Xcode includes XCTest for unit, UI, and performance testing. Current Xcode releases also include Swift Testing for newer unit and integration-test development. (Apple Developer)
What is XCUIApplication?
XCUIApplication is a proxy used by a UI test to launch, monitor, and terminate the target application. (Apple Developer)
What is XCUIElement?
XCUIElement represents a UI element in an application and provides interaction and state-querying capabilities. On iOS, it supports actions such as tapping, swiping, pinching, and rotating. (Apple Developer)
Why are accessibility identifiers important?
Accessibility identifiers provide stable names that automation can use to locate UI elements. They are generally more maintainable than selectors based on screen position.
Can XCUITest run in CI/CD?
Yes. Xcode provides command-line test execution through xcodebuild, making XCUITest suitable for macOS-based CI/CD environments. (Apple Developer)
Should all tests be XCUITest tests?
No. A balanced test strategy should use fast unit tests for application logic, integration tests for component boundaries, and a smaller set of UI tests for important user workflows. (Apple Developer)
Internal Blog Links
- XCUITest iOS Testing: What it is and Why it Matters
- XCTest vs XCUITest: Understanding Apple’s Testing Frameworks
Internal Series Links
- Learn MCP – Zero to Hero
- Learn AI Agents for QA – Zero to Hero
- Playwright Automation – Zero to Hero
- TencentDB Agent Memory: Complete Zero to Hero
- LangGraph: Complete Zero to Hero
- Learn Python – Zero to Hero
- OpenAI Codex: Complete Zero to Hero
- Cursor AI: Complete Zero to Hero
- Claude Code Tutorial: Complete Zero to Hero
- AutoGen: Complete Zero to Hero Guide
- Free QA Resources Built From Real Experience
- QA Glossary: Test Automation Terms Every Engineer Should Know
External Links
- Apple — Xcode System Requirements — Current Xcode versions, supported macOS releases, SDKs, deployment targets, simulators, and Swift versions.
- Apple — XCTest Documentation — Official XCTest documentation covering unit, UI, performance, assertions, test execution, and asynchronous testing.
- Apple — Adding Tests to Your Xcode Project — Official guidance for creating test targets and configuring XCTest UI tests.
- Apple — Xcode Testing — Testing strategy, test pyramid, UI testing, code coverage, and test results.
- Apple — Running Apps on Simulators and Physical Devices — Simulator and physical-device configuration, destinations, signing, and execution.
- Apple — Running Tests and Interpreting Results — Running tests in Xcode and through
xcodebuild, including test-result bundles. - Apple — XCUIApplication Documentation — Official API reference for launching and controlling the application under test.
- Apple — XCUIElement Documentation — UI element interaction, querying, and synchronization capabilities.
Continue Learning
Explore more expert articles on Mobile Testing, Backend & API, AI & Agentic, AI Tools, n8n, LangChain, CrewAI, MCP Servers, AI Agents, LlamaIndex, Docker, FastAPI, Playwright, Cypress, Test Automation, DevOps, and Software Engineering at www.skakarh.com.
QAPulse by SK delivers expert release analysis, AI engineering insights, enterprise automation strategies, migration guidance, DevOps best practices, and practical testing knowledge to help software professionals build scalable, intelligent, and production-ready software systems.