 QA
QA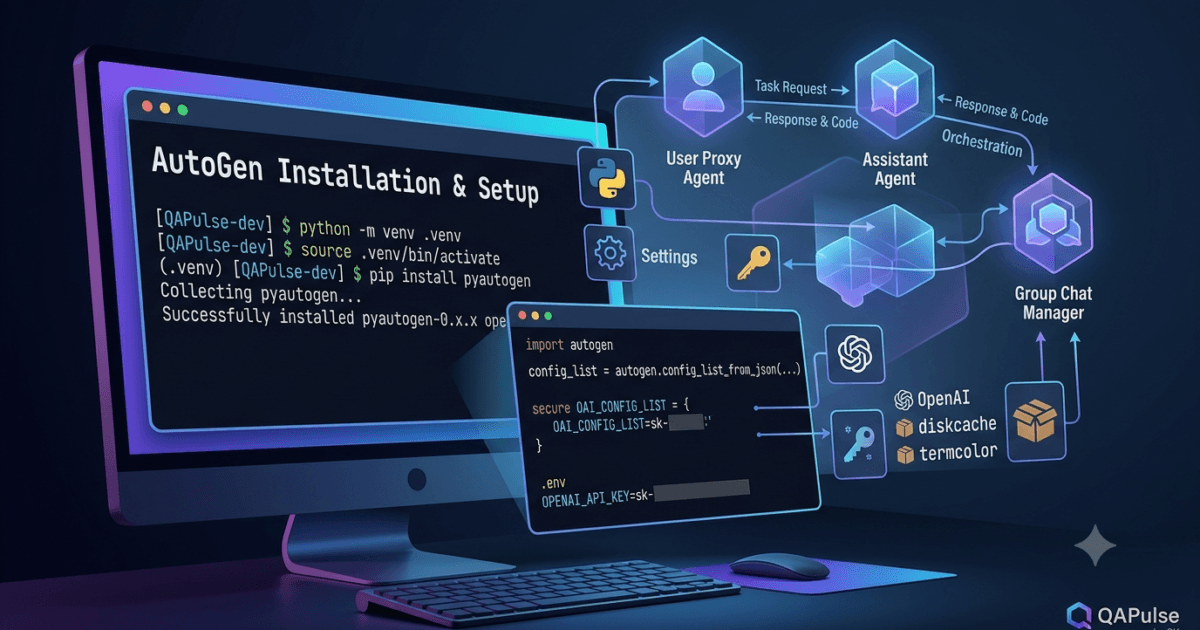
If Day 1 was about understanding what AutoGen is and why agent architecture matters, Day 2 is where the theory becomes a working development environment.
Before building agents, multi-agent workflows, tool integrations, or AI coding systems, you need a clean and reproducible AutoGen setup.
That sounds simple.
But installation is more than running:
pip install autogen-agentchatA reliable setup requires understanding:
- Python environments
- AutoGen packages
- model providers
- API keys
- project structure
- dependency management
- environment variables
- version compatibility
- reproducibility
And there is one important 2026 consideration.
The official Microsoft AutoGen repository currently describes AutoGen as being in maintenance mode and recommends Microsoft Agent Framework for new projects.
That does not make learning AutoGen pointless.
It makes understanding the ecosystem even more important.
What You Will Build Today
By the end of this guide, you should have a development environment that looks roughly like this:
AutoGen Project
│
├── .venv/
├── .env
├── requirements.txt
└── main.py
And conceptually:
Python
   ↓
Virtual Environment
   ↓
AutoGen
   ↓
Model Provider
   ↓
API Key
   ↓
Ready for Agents
We are deliberately not building a complete agent yet.
The objective is to get the foundation right first.
What Do You Actually Need for AutoGen?
The basic requirements are straightforward.
| Component | Purpose |
|---|---|
| Python | Runs the application |
| Virtual environment | Isolates dependencies |
| AutoGen packages | Provides agent framework capabilities |
| Model provider | Supplies the underlying AI model |
| API key | Authenticates with the model provider |
| Code editor | Used to develop the application |
| Terminal | Used to install and run the project |
The important distinction is this:
AutoGen is not the AI model.
Your architecture is closer to:
Your Python Application
        ↓
     AutoGen
        ↓
  Model Client
        ↓
    AI Model
The framework coordinates the application.
The model provides the underlying intelligence.
Step 1: Check Your Python Installation
Start by checking Python:
python --versionOn some systems, you may need:
python3 --versionYou should see a supported Python 3 version.
A clean development environment is important because AI frameworks evolve quickly and dependency conflicts can become difficult to diagnose.
You can also check which Python executable is being used:
which pythonOn Windows:
where pythonThis becomes particularly useful when you have multiple Python installations.
Why a Virtual Environment Matters
One of the most common beginner mistakes is installing everything globally.
For example:
pip install autogen-agentchatdirectly into the system Python environment.
It may work.
Until another project requires a conflicting dependency.
Then you have:
Project A
   ↓
Dependency Version 1

Project B
   ↓
Dependency Version 2

Global Python
   ↓
Conflict
A virtual environment isolates the project.
System Python
│
├── Project A → Environment A
│
├── Project B → Environment B
│
└── AutoGen Project → Environment C
This is standard Python engineering practice.
Step 2: Create Your Project
Create a directory:
mkdir autogen-zero-to-hero
cd autogen-zero-to-hero
Then create a virtual environment:
python -m venv .venvActivate it.
On macOS/Linux:
source .venv/bin/activateOn Windows PowerShell:
.venv\Scripts\Activate.ps1Once activated, your terminal should indicate that the virtual environment is active.
You can verify:
python --versionAnd:
pip --versionThe important thing is that pip is associated with the virtual environment.
The Better Habit: Use Python to Run pip
Instead of relying entirely on:
pip install ...you can use:
python -m pip install ...This makes it clearer which Python installation is receiving the package.
For example:
python -m pip install --upgrade pipThis is a small habit, but it prevents many environment-related problems.
Step 3: Install AutoGen
For the AgentChat layer, the official AutoGen documentation uses:
pip install -U "autogen-agentchat"The official documentation also provides an optional extension package for OpenAI-compatible model clients:
pip install -U "autogen-ext[openai]"For a learning project, the installation can therefore look like:
python -m pip install -U autogen-agentchat
python -m pip install -U "autogen-ext[openai]"
Do not blindly copy installation commands from old tutorials.
AI frameworks change quickly.
Always verify package names and installation instructions against the official documentation.
Understanding the Packages
This is where many beginners get confused.
They see packages such as:
autogen-agentchat
autogen-core
autogen-ext
and assume they are interchangeable.
They aren’t.
A simplified mental model is:
AutoGen
│
├── AgentChat
│   └── Higher-level agent applications
│
├── Core
│   └── Lower-level agent infrastructure
│
└── Extensions
    └── Model/client integrations
AgentChat provides higher-level abstractions for building agent applications.
AutoGen Core provides lower-level primitives.
Extensions provide integrations with external systems and model clients.
The official documentation describes AgentChat as a higher-level API for building multi-agent applications, while Core provides lower-level building blocks.
Why This Separation Matters
Imagine a traditional software stack:
Application
   ↓
Framework
   ↓
Infrastructure
   ↓
External Services
AutoGen follows a similar conceptual separation.
You don’t need to understand every internal component before writing your first application.
For this series, start at the higher-level AgentChat layer.
Later, when you need deeper control, Core becomes much more important.
Step 4: Verify the Installation
After installation, check the package:
python -m pip show autogen-agentchatYou should see package information including the installed version.
You can also test the import:
import autogen_agentchat

print("AutoGen AgentChat is installed.")
Save it as:
check_installation.pyThen run:
python check_installation.pyIf it runs successfully, your Python environment can locate the package.
That is your first installation milestone.
Step 5: Understand the Model Provider
Installing AutoGen does not automatically give you an AI model.
This is an important distinction.
Think about it like this:
AutoGen
   =
Application Framework
while:
OpenAI / Azure / Other Provider
   =
Model Service
Your application connects the two.
Conceptually:
Python
  ↓
AutoGen
  ↓
Model Client
  ↓
Model Provider
  ↓
LLM
This architecture will become increasingly important as the series progresses.
API Keys Are Credentials
If your model provider requires an API key, do not hard-code it into your Python source.
Bad:
api_key = "sk-your-secret-key"This creates a security problem.
Your source code may eventually be:
- committed to Git
- uploaded to GitHub
- shared with teammates
- copied into CI/CD
- exposed through logs
Instead, use an environment variable.
For example:
export OPENAI_API_KEY="your-api-key"On Windows PowerShell:
$env:OPENAI_API_KEY="your-api-key"For local projects, you can also use a .env file.
Step 6: Create a .env File
Your project can contain:
autogen-zero-to-hero/
│
├── .venv/
├── .env
├── main.py
└── requirements.txt
The .env file could contain:
OPENAI_API_KEY=your_api_key_hereNever commit your real credentials.
Your .gitignore should include:
.venv/
.env
__pycache__/
*.pyc
This is not an AutoGen-specific trick.
It is basic software security.
Environment Variables vs Hard-Coded Secrets
| Approach | Security | Recommended |
|---|---|---|
| Hard-coded API key | Poor | ❌ |
.env locally | Good for local development | ✅ |
| OS environment variable | Good | ✅ |
| Secret manager | Excellent for production | ✅ |
| API key committed to Git | Dangerous | ❌ |
The development environment you build today should already follow production-minded habits.
Step 7: Create a Minimal Configuration
A common pattern is to load configuration through environment variables.
For example:
import os

api_key = os.getenv("OPENAI_API_KEY")

if not api_key:
    raise RuntimeError("OPENAI_API_KEY is not configured")

print("API key configuration detected.")
Notice what the code does not do.
It does not print the key.
It only confirms that configuration exists.
That’s an important security habit.
Step 8: Create Your First Project Structure
Don’t over-engineer Day 2.
Start with:
autogen-zero-to-hero/
│
├── .venv/
├── .env
├── .gitignore
├── main.py
└── requirements.txt
Later, the project can evolve into something like:
autogen-zero-to-hero/
│
├── agents/
├── tools/
├── workflows/
├── config/
├── tests/
├── main.py
├── .env
├── .gitignore
└── requirements.txt
But creating twenty directories before writing your first working program is unnecessary.
Start small.
Grow with the architecture.
Step 9: Freeze Your Dependencies
Once your environment works, capture the installed dependencies:
python -m pip freeze > requirements.txtNow another developer can recreate a similar environment with:
python -m pip install -r requirements.txtThis is especially important for AI applications because package versions can significantly affect behavior.
Your project should not depend on:
“It worked on my machine.”
Instead, aim for:
“Here is the environment required to reproduce it.”
Version Pinning Strategy
There are different approaches.
Loose Versions
autogen-agentchatSimple, but future updates can change behavior.
Exact Version
autogen-agentchat==X.Y.ZMore reproducible, but upgrades become deliberate.
Version Range
autogen-agentchat>=X.Y,<X+1Balances flexibility and control.
For learning projects, generating requirements.txt from the working environment is a practical starting point.
For production systems, dependency management should be more deliberate.
Installation Comparison
| Strategy | Beginner Friendly | Reproducible | Production Friendly |
|---|---|---|---|
| Global pip install | High | Low | Low |
| Virtual environment | High | Medium | High |
| Virtual environment + requirements.txt | High | High | High |
| Containerized environment | Medium | Very High | Very High |
For this series:
Virtual Environment
        +
requirements.txt
is a sensible foundation.
Later, production deployment can introduce containers and CI/CD.
Common Installation Problems
Problem 1: python Command Not Found
You may have multiple Python installations.
Try:
python3 --versionor on Windows:
py --versionThe solution is to ensure the correct Python installation is available in your PATH.
Problem 2: pip Installs to the Wrong Python
Instead of:
pip install ...use:
python -m pip install ...This associates pip with the Python interpreter you’re actually using.
Problem 3: Import Error
For example:
ModuleNotFoundErrorFirst check that your virtual environment is activated.
Then:
python -m pip show autogen-agentchatIf the package isn’t listed, install it into the active environment.
Problem 4: API Authentication Failure
If the package is installed but the model request fails, installation may not be the problem.
Check:
API key
Environment variable
Provider configuration
Model configuration
Account permissions
Separate environment problems from application problems.
This distinction saves a lot of debugging time.
The Most Important Debugging Principle
When something doesn’t work, don’t immediately change five things.
Use layers.
Layer 1
Python works?
        ↓
Layer 2
Virtual environment works?
        ↓
Layer 3
AutoGen installed?
        ↓
Layer 4
Import works?
        ↓
Layer 5
Credentials configured?
        ↓
Layer 6
Model provider reachable?
        ↓
Layer 7
Application logic works?
This gives you a systematic debugging strategy.
Without layers, beginners often end up reinstalling everything.
Installation vs Application Problems
These are different.
| Symptom | Likely Area |
|---|---|
python not found | Python installation |
| Package not found | Environment/dependency |
| Import error | Package/environment |
| Authentication error | API credentials |
| Model unavailable | Provider/model configuration |
| Agent behaves incorrectly | Application logic |
| Unexpected agent response | Prompt/model/agent behavior |
This distinction becomes even more valuable later when your AutoGen systems become more complicated.
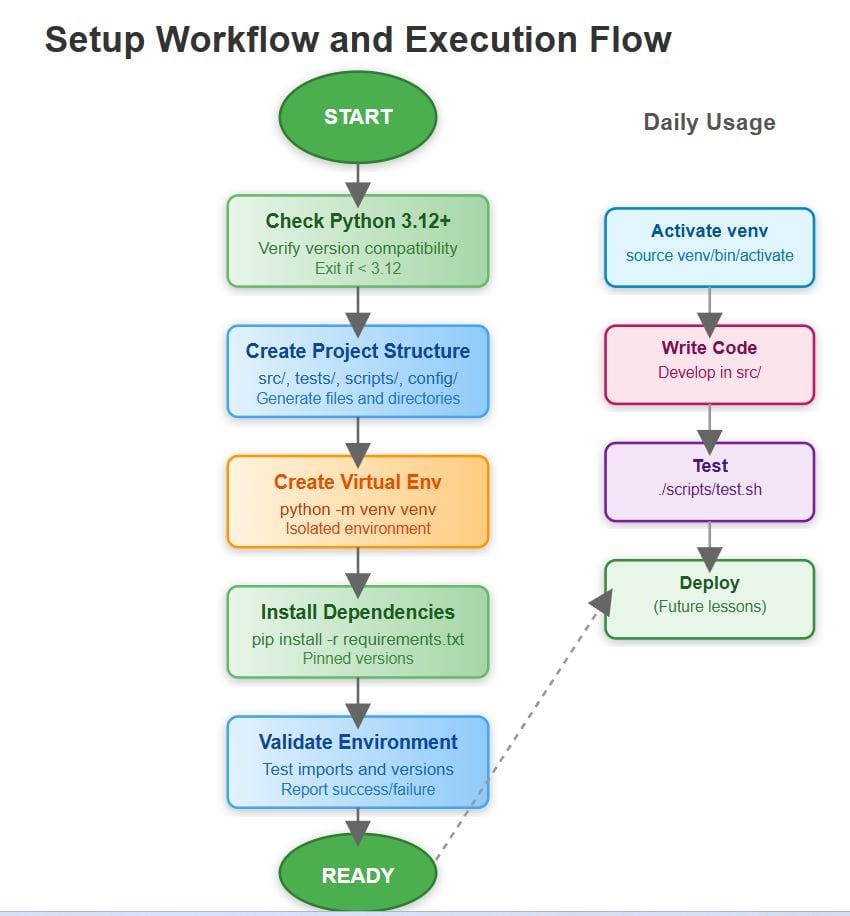
AutoGen Installation Strategy for Beginners
Use this sequence:
1. Install Python
        ↓
2. Create project
        ↓
3. Create virtual environment
        ↓
4. Activate environment
        ↓
5. Upgrade pip
        ↓
6. Install AutoGen packages
        ↓
7. Configure model provider
        ↓
8. Configure credentials
        ↓
9. Test imports
        ↓
10. Freeze dependencies
Don’t skip directly from:
Install AutoGento:
Build production systemThe environment is part of the engineering system.
Interactive Challenge
Before moving forward, try to complete this checklist without looking back:
□ Python installed

□ Virtual environment created

□ Virtual environment activated

□ pip upgraded

□ AutoGen AgentChat installed

□ Required model-client extension installed

□ API credentials configured securely

□ .env excluded from Git

□ AutoGen import works

□ requirements.txt created
Now answer this question:
If
import autogen_agentchatworks but an AI request fails, is AutoGen necessarily broken?
No.
You have already proved that the package can be imported.
The failure may be further down the stack:
Python
  ✓
Environment
  ✓
AutoGen
  ✓
Model Client
  ?
Credentials
  ?
Provider
  ?
Model
  ?
This is how an engineer should approach the problem.
A Useful Mental Model
Think of your AutoGen environment as a pipeline:
Developer
   ↓
Python Environment
   ↓
AutoGen
   ↓
Model Client
   ↓
Authentication
   ↓
AI Model
   ↓
Agent Application
Each layer has a responsibility.
Each layer can fail independently.
And each layer can be tested independently.
That mindset will become increasingly important as we move from installation into actual agent development.
Why Setup Quality Matters
It may feel like setup is boring compared with building autonomous agents.
But poor setup creates technical debt immediately.
A poorly configured project can lead to:
Dependency conflicts
       ↓
Unreproducible environments
       ↓
Authentication problems
       ↓
Debugging confusion
       ↓
Deployment failures
A clean project gives you:
Isolation
   ↓
Reproducibility
   ↓
Security
   ↓
Debuggability
   ↓
Confidence
That is why professional AI engineering starts with the environment.
What Comes Next
Once the environment is ready, the next logical step is to create something that actually behaves like an AI agent.
That means moving from:
AutoGen installedto:
AutoGen agent createdUnderstanding the AutoGen Development Environment
Installing AutoGen is only one part of preparing an AutoGen project.
A useful development environment should answer four questions:
1. Where does my Python code run?
2. Which AutoGen packages does my project use?
3. Which AI model provider does the application use?
4. Where are configuration and credentials stored?
Once these are separated, AutoGen becomes much easier to reason about.
A practical architecture looks like this:
┌──────────────────────────────┐
│       Your Application       │
├──────────────────────────────┤
│          AutoGen             │
├──────────────────────────────┤
│      Model Client Layer      │
├──────────────────────────────┤
│       Model Provider         │
├──────────────────────────────┤
│          AI Model            │
└──────────────────────────────┘
This separation is important because an error in one layer does not necessarily mean another layer is broken.
AutoGen Does Not Replace Your Python Environment
AutoGen runs inside your Python application.
That means the foundation is still ordinary Python engineering.
For example:
def calculate_total(price, quantity):
    return price * quantity
AutoGen does not change how Python itself works.
Instead, it adds abstractions that allow AI agents and related components to become part of the application.
Conceptually:
Python Application
       │
       ├── Normal Python logic
       │
       ├── AutoGen components
       │
       ├── Database code
       │
       └── External APIs
This is an important mindset for developers coming from software engineering.
You are not entering a completely different programming world.
You are adding AI capabilities to an existing software engineering environment.
Python Environment vs AutoGen Environment
These terms are sometimes used interchangeably, but they describe different things.
A Python environment is where your Python interpreter and dependencies live.
An AutoGen environment is your application setup that includes AutoGen, its model integrations, configuration, and your own code.
For example:
Python Environment
│
├── Python
├── pip
├── AutoGen packages
├── Model client packages
└── Other dependencies
Your project sits on top:
AutoGen Project
│
├── Agents
├── Workflows
├── Tools
├── Configuration
└── Application code
Keeping this distinction clear will help when troubleshooting dependency problems.
Why Virtual Environments Are More Than a Beginner Tool
Some developers create virtual environments only because tutorials tell them to.
That’s not enough.
A virtual environment provides dependency isolation.
Imagine two projects:
Project A
AutoGen-related dependencies
Package X version 1

Project B
Different AI framework
Package X version 2
Without isolation:
Global Python
    │
    └── Package X
         └── Which version?
With isolation:
System Python
│
├── Project A
│   └── .venv
│       └── Package X v1
│
└── Project B
    └── .venv
        └── Package X v2
This is why virtual environments become particularly valuable when experimenting with AI frameworks.
AI projects frequently involve multiple rapidly evolving libraries.
A Clean Project Initialization
A clean setup can start with:
mkdir autogen-project
cd autogen-project

python -m venv .venv
Activate it.
macOS/Linux:
source .venv/bin/activate
Windows:
.venv\Scripts\Activate.ps1
Then verify:
python --version
python -m pip --version
The important thing is not the exact terminal appearance.
The important thing is that both commands point to the environment you intended to use.
Verify the Active Python Interpreter
A very useful debugging technique is checking the Python executable.
On macOS/Linux:
which python
On Windows:
where.exe python
You should see a path associated with your virtual environment.
For example:
.../autogen-project/.venv/bin/python
or on Windows:
...\autogen-project\.venv\Scripts\python.exe
If the path points somewhere unexpected, stop and fix the environment before installing more packages.
This simple check can save hours of debugging.
Why python -m pip Is a Good Habit
Consider:
pip install package-name
The command depends on which pip executable your shell resolves.
Compare that with:
python -m pip install package-name
Here, you explicitly tell Python:
Use this Python interpreter to execute its pip module.
That makes the relationship clearer:
python
  │
  └── pip
       │
       └── install package
For repeatable development, this is a useful habit.
Installing AutoGen Components
The AutoGen ecosystem is modular.
For the higher-level AgentChat experience, the official documentation provides:
python -m pip install -U "autogen-agentchat"
For OpenAI-compatible model clients, the official documentation provides:
python -m pip install -U "autogen-ext[openai]"
The exact packages you need depend on the application and model provider.
That distinction matters.
Don’t install every AutoGen-related package simply because it exists.
Install what your application actually requires.
Understanding the AutoGen Package Layers
A simplified view is:
AutoGen
│
├── autogen-agentchat
│      │
│      └── Higher-level agent applications
│
├── autogen-core
│      │
│      └── Lower-level agent infrastructure
│
└── autogen-ext
       │
       └── Extensions and integrations
The official documentation describes AgentChat as a higher-level API and Core as the lower-level framework layer.
This distinction is useful because it prevents a common mistake:
Trying to learn every AutoGen layer before understanding the basic application model.
For most beginners, the higher-level concepts are easier to understand first.
Installation Should Be Reproducible
Suppose you install your dependencies today.
Everything works.
Six months later, you recreate the project.
If your installation process is:
Install whatever is latest
you may not get the same environment.
A better approach is to record dependencies.
For example:
python -m pip freeze > requirements.txt
This creates a dependency snapshot.
A fresh environment can then use:
python -m pip install -r requirements.txt
This doesn’t guarantee perfect reproducibility in every situation, but it is substantially better than relying on memory.
Dependency Management Is Part of AI Engineering
Consider this scenario:
Developer A
    ↓
AutoGen version A
    ↓
Works

Developer B
    ↓
Latest AutoGen
    ↓
Different behavior
Now your team is asking:
Why does the same application behave differently?
The problem may not be your agent logic.
It could be the environment.
That’s why mature projects treat dependencies as part of the application.
Source Code
+
Configuration
+
Dependencies
+
Runtime
=
Application Environment
Environment Variables and Configuration
Your application will eventually need configuration such as:
API keys
Model name
Provider settings
Endpoints
Timeouts
Application settings
These should not all be embedded directly inside source code.
A common local development pattern is:
.env
Example:
OPENAI_API_KEY=your_api_key
Then Python can read it through the environment:
import os

api_key = os.getenv("OPENAI_API_KEY")

if not api_key:
    raise RuntimeError("OPENAI_API_KEY is not configured")
Notice that the program validates configuration without exposing the secret.
Why Secrets Should Never Be in Git
This is dangerous:
API_KEY = "real-secret-key"
It becomes even more dangerous when pushed to:
GitHub
GitLab
Bitbucket
CI/CD logs
Docker images
Public repositories
A leaked API key can result in unauthorized usage and unexpected costs.
Instead:
Source Code
    │
    └── Reads configuration
             │
             ▼
       Environment
             │
             └── Secret
This separation is a fundamental security practice.
.gitignore for an AutoGen Project
A minimal .gitignore can include:
.venv/
.env
__pycache__/
*.pyc
You can expand it later based on your editor, operating system, testing framework, and deployment environment.
The most important rule is:
.env
should not accidentally become part of your Git repository.
.env Is Not a Production Secret Manager
A .env file is convenient for local development.
It should not be confused with a complete production secrets-management strategy.
The progression is generally:
Local development
       ↓
.env / environment variables
       ↓
CI/CD
       ↓
Managed secrets
       ↓
Production
Production systems may use cloud secret managers, CI/CD secret stores, or other dedicated mechanisms.
The exact solution depends on your infrastructure.
Model Provider Configuration
AutoGen sits between your application and model capabilities.
For example:
Your Python Code
      ↓
AutoGen
      ↓
Model Client
      ↓
Provider
      ↓
Model
This means your application needs to know which model service it should communicate with.
A model configuration typically involves concepts such as:
Provider
Model
Credentials
Endpoint
Generation settings
These values should be treated as configuration rather than hard-coded assumptions.
One Framework, Multiple Model Options
One of the useful ideas behind an agent framework is that your application architecture does not have to be completely tied to one model.
Conceptually:
                 ┌── Model Provider A
                 │
AutoGen ─────────┼── Model Provider B
                 │
                 └── Compatible Provider C
The exact compatibility depends on the AutoGen client and provider configuration.
This abstraction becomes useful when evaluating:
- model quality
- latency
- cost
- privacy
- availability
- vendor lock-in
The model is an infrastructure choice.
The agent architecture is an application design choice.
Keeping those concepts separate is powerful.
Installation Comparison
| Setup | Advantages | Disadvantages | Best Use |
|---|---|---|---|
| Global Python | Fast to start | Dependency conflicts | Temporary experiments |
| Virtual environment | Isolated | Requires activation | Learning and development |
| Virtual environment + requirements | Reproducible | Needs dependency maintenance | Team projects |
| Container | Highly reproducible | More setup | CI/CD and production |
For the AutoGen learning journey, the most practical choice is:
Virtual Environment
+
requirements.txt
+
environment variables
It provides a good balance between simplicity and engineering discipline.
Create a Minimal Verification Script
Before building anything complicated, create:
verify_environment.py
For example:
import sys

print("Python:", sys.version)

try:
    import autogen_agentchat
    print("AutoGen AgentChat: OK")
except ImportError as exc:
    print("AutoGen AgentChat: FAILED")
    print(exc)
Run:
python verify_environment.py
The goal is not to build an AI system.
The goal is to prove that the environment is capable of importing the framework.
That gives you a known-good baseline.
Environment Verification as a Testing Concept
This is actually a useful SDET mindset.
Instead of immediately running a large application, create a small verification test.
Think of it as:
Environment
    ↓
Smoke Check
    ↓
AutoGen Import
    ↓
Configuration Check
    ↓
Ready
This is similar to a smoke test in a traditional software system.
You are validating the foundation before testing the application.
A Simple Environment Smoke Test
You can expand the previous example:
import os
import sys

print("Python:", sys.version)

try:
    import autogen_agentchat
    print("AutoGen: OK")
except ImportError:
    print("AutoGen: FAILED")

if os.getenv("OPENAI_API_KEY"):
    print("Model API configuration: DETECTED")
else:
    print("Model API configuration: NOT DETECTED")
This doesn’t validate that the API key is actually valid.
It only confirms that configuration exists.
That distinction matters.
Configuration exists
        ≠
Configuration works
A Better Validation Pyramid
Think about environment validation in layers:
Level 1
Python starts
       ↓
Level 2
Virtual environment works
       ↓
Level 3
AutoGen imports
       ↓
Level 4
Configuration exists
       ↓
Level 5
Model client initializes
       ↓
Level 6
Model request succeeds
Each level gives you more confidence.
If Level 3 fails, don’t start debugging Level 6.
Fix the lower layer first.
Common Mistake: Testing Everything at Once
A beginner might write a large program and immediately run it:
Python
+
AutoGen
+
Agent
+
Model
+
API
+
Tools
+
Environment
Then receives an error.
What caused it?
Almost anything.
A better engineering approach is incremental verification:
Python ✓
   ↓
AutoGen ✓
   ↓
Configuration ✓
   ↓
Model connection ✓
   ↓
Agent ✓
   ↓
Workflow ✓
This approach dramatically reduces the debugging search space.
Interactive Exercise: Diagnose the Failure
Imagine you run:
python main.py
and receive:
ModuleNotFoundError: No module named 'autogen_agentchat'
What should you check first?
Not the API key.
Not the model.
Not the prompt.
Not the agent architecture.
Check:
Is the correct virtual environment active?
Then:
python -m pip show autogen-agentchat
If nothing appears, the package isn’t installed in the environment associated with that Python interpreter.
Now consider another error:
AuthenticationError
The package import worked.
Therefore:
Python ✓
AutoGen ✓
The investigation should move toward:
Credentials
Provider
Model configuration
This is how you should think about AutoGen troubleshooting.
Interactive Exercise: Build Your Environment Map
Write down your own environment:
Python Version:
____________________

Virtual Environment:
____________________

AutoGen Package:
____________________

Model Provider:
____________________

Model:
____________________

Configuration Method:
____________________

Dependency File:
____________________
Then answer:
If you move this project to another computer, what information would that developer need?
A strong answer should include more than source code.
They need:
Python requirement
+
Dependencies
+
Configuration requirements
+
Provider credentials
+
Setup instructions
That is the beginning of reproducible engineering.
AutoGen Setup for an SDET
For a QA/SDET engineer, there is another useful perspective.
You already understand environments such as:
Java
Maven
Selenium
TestNG
or:
Node.js
npm
Playwright
AutoGen has a similar ecosystem pattern:
Python
   ↓
pip / environment
   ↓
AutoGen
   ↓
Model client
   ↓
AI model
Compare the conceptual structure:
| Traditional Automation | AutoGen Application |
|---|---|
| Programming language | Python |
| Dependency manager | pip |
| Test framework | AutoGen |
| Browser/API under test | AI model/service |
| Test configuration | Environment variables |
| Test execution | Agent/workflow execution |
| Assertions/evaluation | AI + application evaluation |
The technologies are different, but the engineering mindset remains familiar.
The Most Important Setup Principle
Don’t think:
“I installed AutoGen, so I’m done.”
Think:
“I created a reproducible environment in which AutoGen applications can be developed, tested, and eventually deployed.”
That small change in mindset separates experimentation from engineering.
Your setup should eventually support:
Development
     ↓
Testing
     ↓
Version Control
     ↓
CI/CD
     ↓
Deployment
Even though the initial project is small, the foundation should not create unnecessary obstacles later.
AutoGen Setup Architecture
At this point, your mental model should look like:
                    Developer
                        │
                        ▼
                Python Project
                        │
                        ▼
                 Virtual Env
                        │
                        ▼
                     AutoGen
                        │
                 ┌──────┴──────┐
                 ▼             ▼
           AgentChat        Extensions
                 │             │
                 └──────┬──────┘
                        ▼
                  Model Client
                        │
                        ▼
                  Model Provider
                        │
                        ▼
                    AI Model
Around this architecture sit:
Configuration
Security
Dependencies
Testing
Logging
Version Control
These aren’t optional decorations.
They are part of a real AI application.
A Practical Setup Checklist
Before considering the environment ready, verify:
□ Python is installed

□ Correct Python version is being used

□ Project directory exists

□ Virtual environment exists

□ Virtual environment is active

□ pip belongs to the active environment

□ AutoGen AgentChat is installed

□ Required AutoGen extensions are installed

□ AutoGen imports successfully

□ Model provider has been selected

□ Credentials are stored outside source code

□ .env is ignored by Git

□ Dependencies are recorded

□ Environment smoke test passes
A project that passes this checklist has a solid development foundation.
The Strategic Difference Between “Installed” and “Ready”
These two states are not the same.
Installed
AutoGen package exists
Ready
Python works
+
Environment is isolated
+
AutoGen is installed
+
Dependencies are recorded
+
Provider is configured
+
Credentials are protected
+
Imports work
+
Environment can be reproduced
The second state is what you want.
Current AutoGen Consideration
There is one ecosystem-level detail that should remain visible whenever you build or update an AutoGen project.
Microsoft’s official AutoGen repository currently states that AutoGen is in maintenance mode, meaning the project is not receiving new features or enhancements, and recommends Microsoft Agent Framework for new projects.
That makes version awareness especially important.
For learning, existing AutoGen concepts and documentation remain useful.
For a new production system, however, you should evaluate the current Microsoft recommendation rather than assuming that an older AutoGen tutorial represents the current preferred architecture.
This is a general lesson for AI engineering:
Tutorial date
      ≠
Current ecosystem status
Always verify the official project documentation before starting a new production implementation.
Installation as an Engineering Skill
The deeper lesson from setup is not a particular command.
It is the ability to create a controlled environment.
You should be able to explain:
Where does my code run?

Which dependencies does it require?

Which AutoGen layer am I using?

Which model provider am I connecting to?

Where are credentials stored?

How can another developer reproduce this environment?

How will I diagnose failures?
If you can answer those questions, you aren’t merely installing a package.
You’re establishing an engineering foundation for an AI application.
Designing a Reliable AutoGen Project Foundation
A working AutoGen installation is useful, but a well-structured project foundation is what makes the environment maintainable.
AI applications tend to grow quickly.
A project that begins with one Python file can eventually contain:
Agents
Tools
Model clients
Workflows
Memory
RAG
Tests
Configuration
Logging
Deployment
If the structure is careless from the beginning, adding those components becomes harder than necessary.
The goal is not to create a huge enterprise architecture on day one.
The goal is to create enough structure that the project can grow without becoming chaotic.
Start Small, But Start Intentionally
A good initial structure is:
autogen-project/
│
├── .venv/
├── .env
├── .gitignore
├── main.py
└── requirements.txt
This is intentionally simple.
You do not need:
20 directories
15 configuration files
multiple abstraction layers
before writing useful code.
A beginner-friendly principle is:
Add structure when complexity requires it, not because a template contains it.
As the application grows, the structure can evolve.
autogen-project/
│
├── agents/
├── tools/
├── workflows/
├── config/
├── tests/
├── utils/
├── main.py
├── .env
├── .gitignore
└── requirements.txt
The important part is that each directory eventually represents a meaningful responsibility.
Why Separation of Responsibilities Matters
Consider this:
import os

api_key = os.getenv("OPENAI_API_KEY")

# agent configuration

# model configuration

# tools

# prompts

# application logic

# execution
It may work.
But as the application grows, this becomes difficult to maintain.
A better architecture separates responsibilities:
Configuration
      ↓
Model Setup
      ↓
Agent Definition
      ↓
Tools
      ↓
Workflow
      ↓
Application Entry Point
This doesn’t mean every component needs its own file immediately.
It means you should understand where each responsibility belongs.
Configuration Should Be External
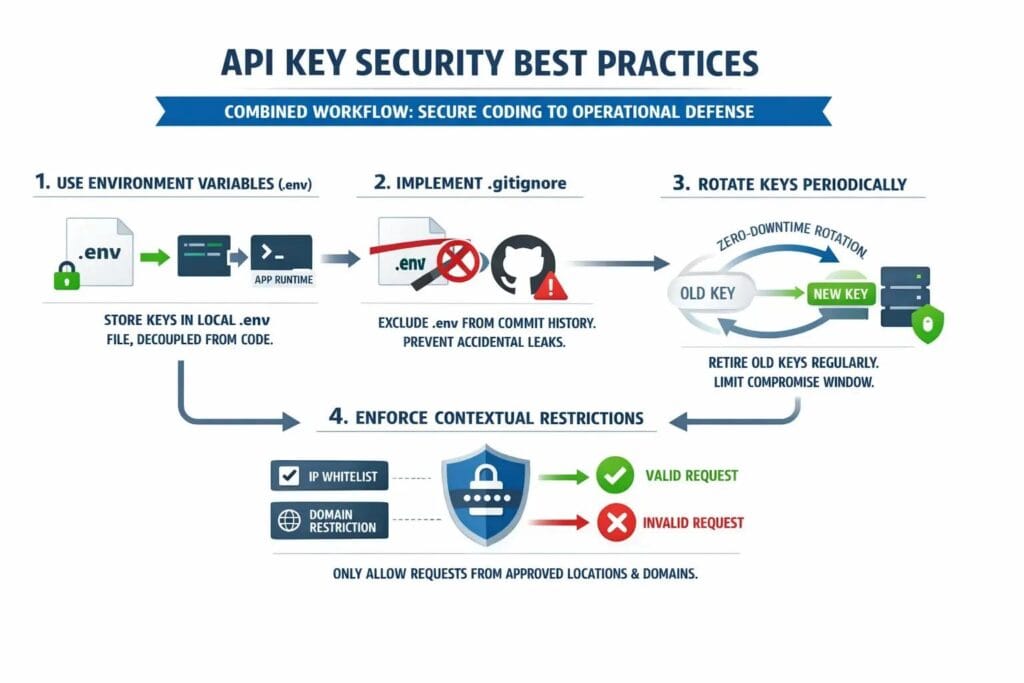
Configuration changes more frequently than application logic.
For example:
MODEL_NAME
API_ENDPOINT
API_KEY
TEMPERATURE
TIMEOUT
Putting these values directly inside your application makes configuration harder.
Instead, use environment variables.
For example:
import os

MODEL_NAME = os.getenv("MODEL_NAME", "default-model")
Now the code doesn’t need to change when the configuration changes.
You can provide:
MODEL_NAME=some-model
through your environment.
The application reads it dynamically.
This becomes especially useful when the same code runs in:
Local
   ↓
Testing
   ↓
Staging
   ↓
Production
Each environment can have different configuration without requiring different source code.
Configuration vs Secrets
These two concepts should be separated.
Configuration might include:
MODEL_NAME=...
TEMPERATURE=...
TIMEOUT=...
Secrets include:
API_KEY=...
DATABASE_PASSWORD=...
TOKEN=...
Both can be supplied through environment variables, but secrets deserve additional protection.
A useful mental model is:
Application Code
      │
      ├── Reads configuration
      │
      ▼
Environment
      │
      ├── Non-sensitive settings
      │
      └── Sensitive credentials
Never treat an API key like ordinary application data.
Use .env Carefully
For local development, a .env file can make configuration convenient:
MODEL_NAME=your-model
OPENAI_API_KEY=your-secret
Python applications commonly load environment configuration through packages such as python-dotenv.
For example:
python -m pip install python-dotenv
Then:
from dotenv import load_dotenv
import os

load_dotenv()

api_key = os.getenv("OPENAI_API_KEY")
This is convenient for local development.
But remember:
.env
should not be committed to a public repository when it contains real secrets.
Create a Safe .gitignore
A minimal file:
.venv/
.env
__pycache__/
*.pyc
If you use VS Code, macOS, Windows, or other development tools, additional entries may be appropriate.
The most important principle is:
Credentials stay outside version control.
Why Git Hygiene Matters for AI Applications
AI applications frequently contain credentials for:
- model providers
- vector databases
- cloud services
- external APIs
- monitoring platforms
- databases
One accidental commit can expose multiple services.
A safer architecture is:
Git Repository
│
├── Source Code
├── Configuration Template
└── Documentation

Local Environment
│
└── Real Secrets
You can provide a template:
.env.example
For example:
MODEL_NAME=your-model
OPENAI_API_KEY=your-api-key
This file contains placeholders rather than actual credentials.
That gives another developer an understanding of the required configuration without exposing your secrets.
.env vs .env.example
| File | Contains | Commit to Git? |
|---|---|---|
.env | Real local values | No |
.env.example | Placeholder values | Yes |
| Environment variables | Runtime values | Depends on platform |
| Secret manager | Production secrets | Managed externally |
This simple pattern scales well.
Dependency Management Strategy
An AutoGen project will rarely depend on AutoGen alone.
You might eventually have:
AutoGen
Model client
dotenv
HTTP client
Database client
Testing framework
Logging tools
RAG dependencies
That’s why dependency management matters.
At minimum:
python -m pip freeze > requirements.txt
Then another environment can install:
python -m pip install -r requirements.txt
But there is an important distinction between a snapshot and a dependency strategy.
pip freeze records what is currently installed.
It doesn’t automatically tell you:
Which packages does my application actually need?
For larger projects, dependency management should be intentional.
Keep the Runtime Environment Understandable
Suppose your environment contains:
150 packages
but your application directly requires only:
8 packages
You now have more dependency surface than necessary.
More dependencies can mean:
More updates
More compatibility issues
More vulnerabilities to monitor
More installation time
More debugging complexity
The goal isn’t necessarily to minimize every package.
The goal is to understand what your application depends on.
AutoGen Installation Strategy
A practical approach is:
Create environment
       ↓
Install required AutoGen packages
       ↓
Install required model integration
       ↓
Install only supporting dependencies
       ↓
Verify
       ↓
Record dependencies
For example:
python -m pip install -U autogen-agentchat
python -m pip install -U "autogen-ext[openai]"
Then:
python -m pip freeze > requirements.txt
Always verify the current official AutoGen documentation before copying package commands into a new project because package organization and supported integrations can change.
Build a Minimal Application Entry Point
Your main.py should initially remain simple.
For example:
def main():
    print("AutoGen environment is ready.")


if __name__ == "__main__":
    main()
Run:
python main.py
You now have an application entry point.
This may seem trivial.
It is useful because you have separated:
Environment Verification
from:
Application Execution
That distinction becomes valuable as the project grows.
Why main() Is Better Than Random Top-Level Code
Compare:
print("Starting application")
# lots of application code
with:
def main():
    print("Starting application")


if __name__ == "__main__":
    main()
The second structure makes the execution boundary explicit.
Later, you can have:
def main():
    config = load_config()
    model = create_model(config)
    agent = create_agent(model)
    run_application(agent)


if __name__ == "__main__":
    main()
The application becomes easier to reason about.
Add Configuration Validation
Instead of allowing the application to fail deep inside the workflow, validate configuration early.
For example:
import os


def load_config():
    api_key = os.getenv("OPENAI_API_KEY")

    if not api_key:
        raise RuntimeError(
            "OPENAI_API_KEY environment variable is missing"
        )

    return {
        "api_key": api_key
    }
Then:
def main():
    config = load_config()
    print("Configuration loaded successfully")


if __name__ == "__main__":
    main()
This gives you a predictable startup process.
Application starts
       ↓
Configuration validated
       ↓
Dependencies initialized
       ↓
Application runs
Instead of:
Application starts
       ↓
Several operations happen
       ↓
Random authentication failure
       ↓
Confusing traceback
Early validation is a strong engineering pattern.
Fail Fast
The idea is simple:
If a required dependency is missing, fail immediately with a useful message.
For example:
if not api_key:
    raise RuntimeError(
        "OPENAI_API_KEY is missing. "
        "Configure it before starting the application."
    )
That’s much more useful than allowing the application to fail later with a less obvious error.
This principle is especially useful in agent applications because workflows can contain many moving parts.
Environment Validation as a Smoke Test
You can create:
tests/
└── test_environment.py
For example:
def test_autogen_import():
    import autogen_agentchat
Run it with your chosen test runner.
For example, with pytest:
python -m pip install pytest
pytest
A successful result gives you a basic environment smoke test.
This is particularly relevant to QA and SDET engineers because the environment itself can be treated as something that needs validation.
Installation Testing vs Application Testing
These are different.
| Testing Type | Question |
|---|---|
| Installation test | Can Python find AutoGen? |
| Configuration test | Are required settings present? |
| Connectivity test | Can the model provider be reached? |
| Application test | Does the agent perform correctly? |
| Workflow test | Does the overall process behave correctly? |
| Evaluation | Is the AI output actually good? |
Don’t mix these together.
A successful import doesn’t prove the agent works.
A successful API call doesn’t prove the agent produces correct results.
A successful agent run doesn’t prove the system is production-ready.
Each layer needs its own validation.
Think in Layers
A useful AutoGen engineering model is:
Layer 1
Runtime
   ↓
Layer 2
Dependencies
   ↓
Layer 3
Configuration
   ↓
Layer 4
Model connectivity
   ↓
Layer 5
Agent behavior
   ↓
Layer 6
Workflow behavior
   ↓
Layer 7
Application outcome
This becomes extremely important when debugging AI systems.
Traditional software often has deterministic failure paths.
AI applications can have:
Infrastructure failures
+
Configuration failures
+
Model failures
+
Prompt failures
+
Tool failures
+
Agent coordination failures
+
Unexpected model behavior
A layered design makes these easier to isolate.
Don’t Confuse Installation With Readiness
Consider these two projects.
Project A
AutoGen installed
main.py exists
API key copied into source
No requirements file
No environment isolation
Project B
Virtual environment
AutoGen dependencies
Model configuration
Environment variables
.gitignore
requirements.txt
Smoke checks
Clear project structure
Both might technically execute.
But Project B has a much stronger foundation.
The difference is engineering discipline.
A Useful Comparison
| Characteristic | Quick Experiment | Engineering-Ready Setup |
|---|---|---|
| Virtual environment | Optional | Yes |
| Dependencies recorded | Usually no | Yes |
| Secrets protected | Sometimes | Yes |
| Configuration separated | Rarely | Yes |
| Environment validation | Rarely | Yes |
| Reproducibility | Low | High |
| Team collaboration | Difficult | Easier |
| CI/CD readiness | Low | Higher |
| Debugging | Ad hoc | Layered |
You don’t need a production infrastructure platform to start.
You need good habits.
Interactive Challenge: Find the Problems
Consider:
autogen-project/
│
├── main.py
└── README.md
Inside main.py:
API_KEY = "real-secret"
And installation was done with:
pip install autogen-agentchat
What problems can you identify?
There are several:
No virtual environment
No dependency record
Secret in source code
No configuration separation
Potential pip/Python mismatch
No environment validation
Now improve it conceptually:
autogen-project/
│
├── .venv/
├── .env
├── .env.example
├── .gitignore
├── main.py
├── requirements.txt
└── README.md
This is already much more maintainable.
Interactive Challenge: Explain the Architecture
Without looking at the article, explain this diagram:
Python
  ↓
Virtual Environment
  ↓
AutoGen
  ↓
Model Client
  ↓
Model Provider
  ↓
AI Model
Now answer:
Which component provides the actual language-model intelligence?
The AI model.
Which component organizes agent-based application behavior?
AutoGen.
Which component authenticates access to the model service?
Typically the model provider’s credentials/configuration, used through the relevant client integration.
Where should sensitive credentials live?
Outside source code, using an appropriate environment or secrets-management mechanism.
If you can explain those relationships, your setup understanding is stronger than simply memorizing installation commands.
A Practical Development Workflow
For every new AutoGen experiment, use a repeatable workflow:
1. Create project
       ↓
2. Create virtual environment
       ↓
3. Activate environment
       ↓
4. Install dependencies
       ↓
5. Configure environment
       ↓
6. Validate imports
       ↓
7. Validate model configuration
       ↓
8. Run application
       ↓
9. Record working dependencies
This becomes your development loop.
Why This Matters for AI Agents
An AI agent is not just:
Prompt + LLM
A real application may eventually look more like:
User
 ↓
Application
 ↓
Agent
 ├── Model
 ├── Tools
 ├── Memory
 ├── Context
 ├── Instructions
 └── Other Agents
 ↓
Result
Every one of those components can introduce configuration and dependency requirements.
Therefore, the quality of the underlying environment matters more as the application becomes more sophisticated.
AutoGen and Reproducibility
Imagine your project works perfectly on your laptop.
A teammate clones the repository and runs:
python main.py
It fails.
They ask:
What did you install?
You answer:
A few packages.
That’s not reproducible.
A better repository provides:
README.md
requirements.txt
.env.example
.gitignore
with documented setup commands.
Then the developer can follow a defined process.
Clone
 ↓
Create environment
 ↓
Install dependencies
 ↓
Configure environment
 ↓
Run verification
 ↓
Run application
That is a much more professional workflow.
Documentation Is Part of Setup
Even a small project should have a basic README.
For example:
# AutoGen Project

## Setup

Create a virtual environment:

```bash
python -m venv .venv
Activate it and install dependencies:
python -m pip install -r requirements.txt
Configure environment variables using .env.
Run:
python main.py
Good documentation reduces dependency on the original developer.

That's especially important for team-based AI engineering.

## A Setup Architecture That Can Grow

A practical evolution looks like this:

```text
Stage 1

main.py
.env
requirements.txt
Then:
Stage 2

agents/
tools/
config/
tests/
main.py
Then:
Stage 3

agents/
tools/
workflows/
memory/
rag/
config/
tests/
scripts/
main.py
Then eventually:
Stage 4

Application
├── Agent layer
├── Tool layer
├── Orchestration
├── Data layer
├── Evaluation
├── Observability
├── Security
└── Deployment
The architecture should evolve with the application.
Don’t prematurely build Stage 4 when your application is still a single script.
Strategy: Build a Known-Good Baseline
The most valuable setup strategy is to establish a known-good baseline.
Your baseline should answer:
Can Python run?
        ↓
Can AutoGen import?
        ↓
Is configuration available?
        ↓
Can the model client initialize?
        ↓
Can a minimal application execute?
Once that baseline works, every future change can be compared against it.
If something breaks after adding a new dependency:
Before change → Working
After change  → Broken
you have immediately narrowed the investigation.
This is exactly how controlled software testing works.
Strategy: Change One Thing at a Time
Suppose you simultaneously change:
AutoGen version
+
Model provider
+
Python version
+
Dependencies
+
Application architecture
and something fails.
You have no clear idea what caused it.
Instead:
Change 1
 ↓
Verify

Change 2
 ↓
Verify

Change 3
 ↓
Verify
This is slower per change but much faster when troubleshooting.
Strategy: Keep the First Environment Boring
Your first AutoGen project doesn’t need:
Docker
Kubernetes
Cloud deployment
Distributed workers
Complex orchestration
Multiple databases
Start with:
Python
+
Virtual environment
+
AutoGen
+
Model provider
+
Simple application
Boring infrastructure is often a feature.
Complexity should be earned by requirements.
Strategy: Treat AI Dependencies as Production Dependencies
Don’t think of AI libraries as temporary experimentation packages.
If your application depends on:
AutoGen
Model client
Vector database
Embedding library
Tooling
those dependencies can affect:
Correctness
Performance
Security
Cost
Compatibility
Deployment
Therefore, manage them with the same seriousness you would give any other application dependency.
A Small but Important Security Exercise
Look at this code:
import os

api_key = os.getenv("OPENAI_API_KEY")

print(api_key)
Technically, it may work.
But should you do it?
No.
Printing secrets can expose them through:
Terminal history
CI logs
Application logs
Monitoring systems
Screenshots
Instead:
if api_key:
    print("API key detected")
else:
    print("API key missing")
Validate secrets without exposing them.
That habit will become increasingly important when AI applications move into CI/CD and production environments.
The Engineering Mindset
The biggest lesson from AutoGen setup isn’t:
pip install autogen-agentchat
The bigger lesson is:
Control your environment.
Control your dependencies.
Control your configuration.
Protect your secrets.
Validate each layer.
Document how to reproduce it.
These principles apply to almost every serious software project.
AutoGen simply gives you a new kind of application to build on top of them.
Current AutoGen Reality
AutoGen’s current project status should influence how you approach the technology.
The official Microsoft repository currently identifies AutoGen as being in maintenance mode and recommends Microsoft Agent Framework for new projects.
That means a technically responsible AutoGen learning environment should include version awareness.
Before following an old tutorial, check:
Is this package still current?
Is this API still documented?
Is this integration still supported?
Is this architecture still recommended?
This is a valuable engineering habit beyond AutoGen.
Framework knowledge has a shelf life.
Engineering principles last much longer.
The Setup Mindset to Keep
When you create an AutoGen project, don’t ask only:
“Does it run?”
Ask:
“Can I explain why it runs, reproduce the environment, protect the credentials, identify the dependencies, and isolate failures when something breaks?”
That is the difference between copying an AI tutorial and building an AI engineering project.
The foundation should be simple enough to understand, structured enough to maintain, secure enough to share, and reproducible enough for another developer to run.
From a Working Installation to a Reliable AutoGen Environment
There is a major difference between making AutoGen run once and creating an environment you can trust.
A one-time successful command:
python -c "import autogen_agentchat"
proves very little.
A reliable environment should give you confidence that:
Python is correct
        ↓
Dependencies are available
        ↓
AutoGen can be imported
        ↓
Configuration is available
        ↓
Secrets are protected
        ↓
The environment can be reproduced
        ↓
Failures can be isolated
That is the real objective of setup.
Build a Setup That You Can Recreate
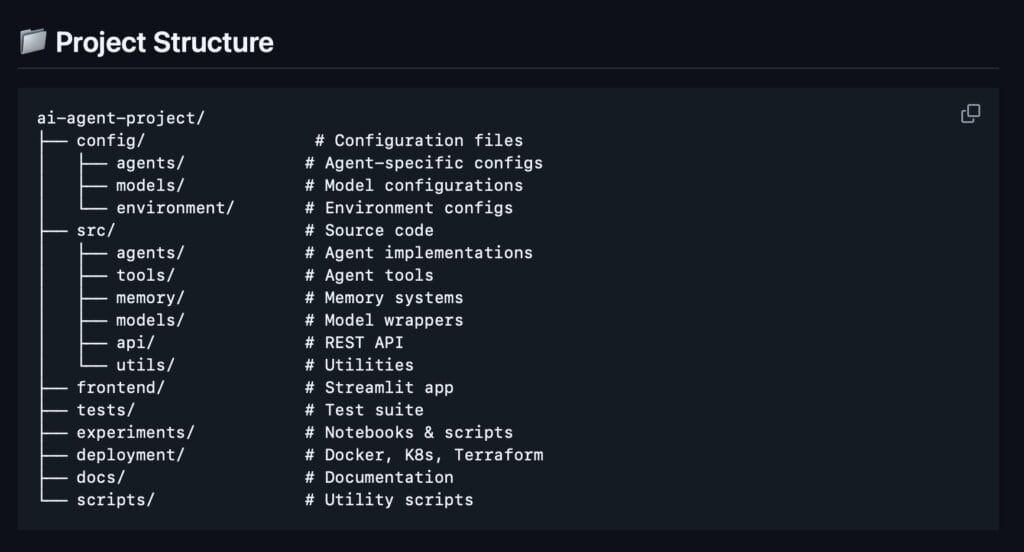
Imagine deleting your entire project environment.
The source code remains.
Can you recreate the environment?
A good project should make the answer:
Yes.
The basic process should be predictable:
python -m venv .venv
Activate the environment and install the documented dependencies:
python -m pip install -r requirements.txt
Then configure the required environment variables.
Finally:
python main.py
The exact commands can vary by operating system and project configuration, but the principle remains the same:
A developer should not need your laptop to run your project.
Create an Environment Verification Script
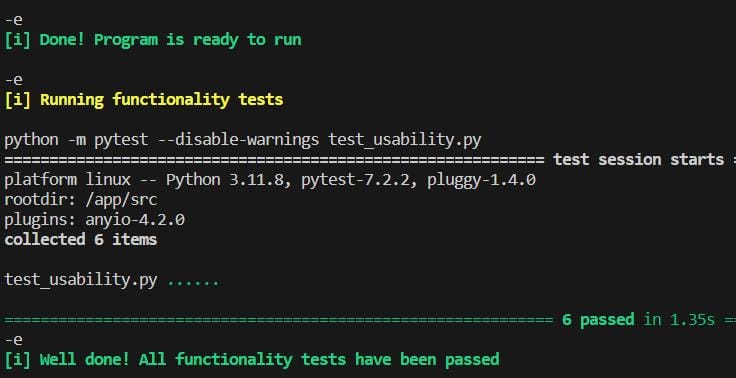
A small verification script can become extremely useful.
For example:
import os
import sys


def verify_environment():
    print("Python:", sys.version)

    try:
        import autogen_agentchat
        print("AutoGen AgentChat: OK")
    except ImportError as exc:
        print("AutoGen AgentChat: FAILED")
        print(exc)
        return False

    if os.getenv("OPENAI_API_KEY"):
        print("Model credentials: DETECTED")
    else:
        print("Model credentials: NOT DETECTED")

    return True


if __name__ == "__main__":
    verify_environment()
Run:
python verify_environment.py
This is not a full application test.
It is an environment smoke check.
That distinction is important.
Why Smoke Checks Matter
Suppose your actual application contains:
Agent
 ↓
Model
 ↓
Tool
 ↓
Database
 ↓
Another Agent
 ↓
Final Response
If the application fails, the possible causes are numerous.
But if you first verify:
Python ✓
AutoGen ✓
Configuration ✓
you have already eliminated several possible failure points.
This is the same mindset used in reliable software testing.
Think Like an SDET
For a QA or SDET engineer, AutoGen setup can be viewed as a test pyramid for the environment.
             Application
                 ▲
                 │
            Workflow Test
                 ▲
                 │
             Agent Test
                 ▲
                 │
          Model Connectivity
                 ▲
                 │
        Configuration Check
                 ▲
                 │
           Import Check
                 ▲
                 │
          Python Runtime
You should not start debugging at the top when the bottom is broken.
If Python itself is wrong, changing prompts will not solve the problem.
If AutoGen cannot import, changing the model won’t solve the problem.
If authentication fails, rewriting the Python environment may be unnecessary.
This layered approach makes debugging much more efficient.
Configuration Should Have a Single Responsibility
Avoid scattering configuration throughout the application.
Instead of:
MODEL_NAME = "some-model"
TIMEOUT = 60
API_KEY = os.getenv("OPENAI_API_KEY")
inside multiple files, centralize configuration.
For example:
import os


class Settings:
    model_name = os.getenv("MODEL_NAME")
    api_key = os.getenv("OPENAI_API_KEY")
    timeout = int(os.getenv("MODEL_TIMEOUT", "60"))
Then application components can consume configuration rather than independently reading environment variables everywhere.
For a small project, this may be more structure than you need.
As configuration grows, however, centralization becomes increasingly useful.
Configuration Architecture
A scalable mental model is:
.env / Environment
        ↓
Configuration Loader
        ↓
Application Settings
        ↓
Agents / Tools / Workflows
Instead of:
Agent A → reads environment
Agent B → reads environment
Tool A  → reads environment
Tool B  → reads environment
Workflow → reads environment
The first architecture is easier to reason about.
Configuration Validation
Don’t wait until a model call to discover that a required setting is missing.
Validate early.
For example:
import os


def require_environment_variable(name):
    value = os.getenv(name)

    if not value:
        raise RuntimeError(
            f"Required environment variable '{name}' is missing."
        )

    return value
Then:
api_key = require_environment_variable("OPENAI_API_KEY")
Now the failure is explicit.
Instead of:
Somewhere deep inside the application:
Authentication failed
you get:
Application startup:
OPENAI_API_KEY is missing
That is a much better developer experience.
Don’t Overload .env
A .env file should not become a dumping ground for everything.
Keep configuration meaningful.
For example:
MODEL_NAME=...
MODEL_TIMEOUT=60
OPENAI_API_KEY=...
is reasonable.
But hundreds of unrelated settings can make configuration difficult to understand.
As the system grows, group configuration logically.
For example:
Model configuration
Application configuration
Database configuration
Observability configuration
Security configuration
The exact implementation depends on the project.
The principle is what matters:
Configuration should be understandable.
Development Configuration vs Production Configuration
A local development environment might use:
.env
A CI/CD environment might use:
CI/CD secret variables
A production deployment might use:
Managed secret storage
The architecture becomes:
Local
  ↓
.env

CI
  ↓
CI secret store

Production
  ↓
Managed secrets
The application should ideally consume configuration consistently regardless of where it runs.
Compare the Approaches
| Approach | Local Development | Team Collaboration | Production |
|---|---|---|---|
| Hard-coded secrets | ❌ | ❌ | ❌ |
.env | ✅ | ⚠️ | ❌ |
| Environment variables | ✅ | ✅ | ✅ |
| CI/CD secrets | ⚠️ | ✅ | ✅ |
| Managed secret manager | ⚠️ | ✅ | ✅ |
The point is not that .env is bad.
It is extremely useful for local development.
The problem occurs when a local-development convenience becomes a production security strategy.
Make Your Repository Self-Explanatory
A good AutoGen project should explain how it works.
A basic README might contain:
# AutoGen Project

## Requirements

- Python
- AutoGen dependencies
- Model provider credentials

## Setup

Create a virtual environment:

python -m venv .venv

Install dependencies:

python -m pip install -r requirements.txt

Configure environment variables using `.env`.

Run the application:

python main.py
This turns tribal knowledge into project documentation.
Another developer should not have to message you:
“How do I run this?”
Add a Setup Failure Guide
For a serious engineering project, even a small troubleshooting section can help.
Example:
ModuleNotFoundError
→ Check virtual environment and package installation

Authentication error
→ Check credentials and provider configuration

Wrong Python version
→ Check python --version

Package conflict
→ Recreate environment and verify dependencies

Environment variable missing
→ Check .env or runtime configuration
This becomes particularly valuable in team environments.
Recreate the Environment on Purpose
One of the best ways to test whether your setup is actually reproducible is to recreate it.
Remove the virtual environment:
rm -rf .venv
Then create it again:
python -m venv .venv
Activate it and reinstall:
python -m pip install -r requirements.txt
Then run your verification:
python verify_environment.py
If everything works again, you have much stronger evidence that your setup is reproducible.
On Windows, the command for removing the environment can differ, so use the appropriate filesystem command for your shell.
Reproducibility Is a Feature
Compare these two projects.
Project A
"It works on my machine."
Project B
Clone repository
      ↓
Create environment
      ↓
Install requirements
      ↓
Configure environment
      ↓
Run verification
      ↓
Start application
Project B is much easier to maintain.
Reproducibility reduces:
Setup time
Debugging time
Onboarding time
Deployment surprises
The Dependency Trap
AI frameworks can have many dependencies.
Imagine:
AutoGen
 ↓
Model client
 ↓
HTTP library
 ↓
Authentication library
 ↓
Other dependencies
Then another library introduces:
Different dependency version
Suddenly:
Package A
requires X >= 2

Package B
requires X < 2
Now the environment has a conflict.
This is why dependency management matters.
The solution isn’t to avoid libraries.
The solution is to understand your dependency graph and keep the environment controlled.
When to Recreate the Virtual Environment
If the environment becomes badly corrupted, repeatedly installing and uninstalling packages may create more confusion.
Sometimes the cleanest solution is:
Delete environment
        ↓
Create environment
        ↓
Install known dependencies
        ↓
Verify
This is one reason requirements files and documented setup instructions are valuable.
A disposable environment is easier to rebuild than a mysterious environment that has accumulated months of package changes.
Keep Experiments Isolated
AI development involves experimentation.
You may want to try:
Different model
Different provider
Different AutoGen package
Different integration
Different dependency
Don’t let every experiment permanently alter your main environment.
You can create separate environments:
autogen-baseline/
autogen-experiment/
autogen-provider-test/
or use appropriate dependency and project management strategies.
The important idea is:
Experiments should not silently destabilize the baseline environment.
Environment Baseline
Once your environment works, document the baseline.
For example:
Python:
<verified version>

AutoGen:
<verified version>

Model integration:
<verified integration>

Operating system:
<development OS>

Dependency file:
requirements.txt
This information can become extremely valuable when debugging a problem later.
Why Version Awareness Matters More With AI
Traditional libraries also evolve.
But AI ecosystems can change particularly quickly.
A tutorial may show:
old_api()
while the current documentation shows:
new_api()
You copy the old tutorial and encounter:
ImportError
AttributeError
ConfigurationError
The problem may not be your understanding.
The tutorial may simply be outdated.
That’s why version-aware development is essential.
Official Documentation Should Be Your Source of Truth
For AutoGen installation and API details, prefer Microsoft’s official AutoGen documentation and repository over random tutorials.
Official resources:
The official repository currently notes that AutoGen is in maintenance mode and recommends Microsoft Agent Framework for new projects.
That status should be considered whenever you evaluate AutoGen for a new production system.
AutoGen Setup Is Also Architecture Preparation
The environment you create today affects what you can comfortably build later.
For example:
Clean Environment
      ↓
Agent
      ↓
Tools
      ↓
Multiple Agents
      ↓
Memory
      ↓
RAG
      ↓
Observability
      ↓
Testing
      ↓
Deployment
A weak foundation becomes increasingly painful as complexity grows.
A controlled foundation gives you room to experiment.
Don’t Build Production Complexity Too Early
There is another important lesson.
Good engineering does not mean adding every engineering practice immediately.
You don’t need to start with:
Kubernetes
Service mesh
Distributed workers
Multiple databases
Complex CI/CD
for a tiny AutoGen experiment.
You need:
Python
Virtual environment
AutoGen
Model configuration
Secure credentials
Dependency management
Basic verification
Then complexity can be introduced when the application actually requires it.
The YAGNI Principle Applies to AI
YAGNI means:
You Aren’t Gonna Need It.
For an early AutoGen project, don’t create:
agents/
orchestrators/
memory/
plugins/
services/
repositories/
factories/
just because a large architecture diagram looks impressive.
If your application is currently:
def main():
    print("Hello AutoGen")
then a simple project structure is perfectly acceptable.
Architecture should respond to complexity.
It shouldn’t manufacture complexity.
A Balanced AutoGen Project
A useful progression is:
Small
│
├── main.py
├── .env
├── .gitignore
└── requirements.txt
Then when needed:
Medium
│
├── agents/
├── tools/
├── config/
├── tests/
├── main.py
└── requirements.txt
Then when the system genuinely becomes complex:
Large
│
├── agents/
├── tools/
├── workflows/
├── memory/
├── rag/
├── config/
├── evaluation/
├── observability/
├── tests/
├── scripts/
└── deployment/
This is a healthier way to scale architecture.
Interactive Challenge: Design Your Own Setup
Without copying the previous examples, sketch your project:
autogen-project/
│
├── __________________
├── __________________
├── __________________
├── __________________
└── __________________
Now answer:
- Where will Python dependencies be isolated?
- Where will credentials live?
- How will dependencies be reproduced?
- How will you verify the environment?
- How will another developer understand the setup?
If you cannot answer those five questions, the environment isn’t fully designed yet.
Interactive Challenge: Troubleshooting
Imagine this situation:
python main.py
returns:
ModuleNotFoundError:
No module named 'autogen_agentchat'
Your first response should not be:
“AutoGen is broken.”
Instead investigate systematically:
python --version
python -m pip --version
python -m pip show autogen-agentchat
Then check:
which python
or on Windows:
where.exe python
Now suppose the package is installed but the import still fails.
Ask:
Is this the same Python environment?
This question is simple but extremely powerful.
Interactive Challenge: Configuration Failure
Now imagine:
AutoGen import: OK

API request:
Authentication failed
What has already been proven?
Python ✓
Virtual environment ✓
AutoGen package ✓
Import ✓
What should you investigate?
Credentials
Provider
Endpoint
Model configuration
Account permissions
This is much more efficient than reinstalling AutoGen.
Interactive Challenge: Security Review
Review this:
MODEL = "some-model"
API_KEY = "real-secret-key"

print(API_KEY)
Identify three problems.
A strong answer:
1. Secret is hard-coded.
2. Secret can be committed to source control.
3. Secret is being printed.
Now redesign it:
import os

MODEL = os.getenv("MODEL_NAME")
API_KEY = os.getenv("OPENAI_API_KEY")

if not API_KEY:
    raise RuntimeError("API key is not configured")
This is a much safer foundation.
Setup Strategy for AI Engineers
A strong AutoGen setup strategy can be summarized as:
CONTROL
   ↓
Isolate dependencies

CONFIGURE
   ↓
Separate application settings

PROTECT
   ↓
Secure credentials

VERIFY
   ↓
Test each layer

DOCUMENT
   ↓
Explain reproduction

REPRODUCE
   ↓
Recreate the environment

EXPAND
   ↓
Add complexity only when required
This strategy is more valuable than memorizing individual installation commands.
Commands change.
Engineering principles survive.
A Setup Checklist You Can Actually Use
Before declaring your AutoGen environment ready:
□ Python version verified

□ Correct Python interpreter verified

□ Virtual environment created

□ Virtual environment activated

□ pip associated with correct interpreter

□ AutoGen packages installed

□ Required model integration installed

□ Configuration separated from code

□ API credentials stored securely

□ .env excluded from Git

□ .env.example created if appropriate

□ requirements.txt created

□ Import smoke test passes

□ Configuration smoke test passes

□ README contains setup instructions

□ Environment can be recreated
If all of these are true, you have something much better than a package installation.
You have a development foundation.
What AutoGen Setup Teaches About AI Engineering
There is a broader lesson here.
AI engineering is not only about:
Prompts
Models
Agents
It is also about:
Environments
Dependencies
Security
Configuration
Testing
Reproducibility
Observability
Deployment
An AI system is still software.
It inherits the engineering problems of software while introducing additional AI-specific challenges.
That’s why strong software engineering fundamentals remain valuable in the age of AI agents.
Installation, Setup, and Engineering Discipline
The commands used to install AutoGen are relatively small.
The engineering thinking behind them is much larger.
You should now understand the difference between:
Installing a package
and:
Preparing an AI application environment
The first can take seconds.
The second requires deliberate decisions about:
Isolation
Dependencies
Configuration
Security
Reproducibility
Testing
Documentation
That distinction will influence everything you build with AI frameworks.
Internal Links:
- Learn MCP – Zero to Hero
- Learn AI Agents for QA – Zero to Hero
- Playwright Automation – Zero to Hero
- LangGraph: Complete Zero to Hero
- Learn Python – Zero to Hero
- OpenAI Codex: Complete Zero to Hero
- Cursor AI: Complete Zero to Hero
- Claude Code Tutorial: Complete Zero to Hero
- AutoGen: Complete Zero to Hero Guide
- Free QA Resources Built From Real Experience
- QA Glossary: Test Automation Terms Every Engineer Should Know
External Links:
- Official AutoGen Repository: Microsoft AutoGen GitHub Repository
- Official AutoGen Documentation: AutoGen Official Documentation
- AutoGen Agents Documentation: AutoGen Agents Documentation
- AutoGen Agent and Multi-Agent Concepts: AutoGen Agent and Multi-Agent Applications
- AutoGen Messages: AutoGen Message Documentation
People Asked Questions
What is AutoGen installation?
AutoGen installation is the process of preparing the Python environment, installing the required AutoGen packages and model integrations, configuring credentials, and verifying that the environment works correctly.
How do I install AutoGen in Python?
Create and activate a Python virtual environment, then install the AutoGen packages required by your application. Verify the installation by importing the relevant AutoGen modules.
Do I need a virtual environment for AutoGen?
A virtual environment is strongly recommended because it isolates AutoGen and its dependencies from other Python projects and reduces dependency conflicts.
How do I check whether AutoGen is installed?
You can inspect installed packages with pip and verify the relevant AutoGen module by importing it from Python.
Where should I store my AutoGen API key?
For local development, store credentials in environment variables or a local .env file that is excluded from Git. Production systems should use an appropriate secret-management mechanism.
Why is AutoGen giving me ModuleNotFoundError?
Common causes include using the wrong Python interpreter, an inactive virtual environment, installing the package into a different environment, or using outdated package/import instructions.
Is AutoGen still actively developed?
The official AutoGen repository currently describes AutoGen as being in maintenance mode and recommends Microsoft Agent Framework for new projects.
Is AutoGen good for beginners?
AutoGen can be useful for learning agent-based application concepts, but beginners should follow the current documentation and understand the project’s current maintenance status before choosing it for a new production system.
AI Overview Optimization
AutoGen installation requires a Python environment, the required AutoGen packages, a compatible model integration, secure configuration, and environment verification. The recommended approach is to use a virtual environment, keep API credentials outside source code, record dependencies, and verify each layer before building an agent.
This gives search engines and AI answer engines a clean answer to extract.
AI-Friendly Definition
AutoGen installation is the process of preparing a Python development environment, installing the required AutoGen framework components and model integrations, configuring credentials, and verifying that the environment can run an AutoGen application.
AI-Friendly Comparison
| Question | Short Answer |
|---|---|
| What is AutoGen? | A framework for building agent-based AI applications. |
| What is AutoGen installation? | Preparing Python, dependencies, configuration, and verification. |
| Do I need Python? | Yes, AutoGen applications are built in Python. |
| Should I use a virtual environment? | Yes, it is recommended for dependency isolation. |
| Where should API keys go? | Environment variables or appropriate secret storage. |
| Is installation enough? | No. The environment should also be verified and reproducible. |
| Is AutoGen actively developed? | The official repository currently describes it as being in maintenance mode. |
AI Answer Engine Strategy
Structure important answers using:
Definition → Steps → Example → Comparison → Troubleshooting → Best Practice
For example:
What is AutoGen installation?
        ↓
What do you need?
        ↓
How do you install it?
        ↓
How do you verify it?
        ↓
What can go wrong?
        ↓
How should you configure it securely?
Conclusion
Setting up AutoGen correctly is not about collecting installation commands.
It is about establishing a controlled environment in which AI applications can be developed safely and repeatedly.
A strong setup separates:
Application Code
       ↓
Framework Dependencies
       ↓
Model Integration
       ↓
Configuration
       ↓
Secrets
It uses virtual environments to prevent dependency conflicts, environment variables to separate configuration from source code, dependency files to improve reproducibility, and smoke checks to validate the environment before application behavior is investigated.
For developers coming from QA, SDET, backend, or traditional software engineering, the mindset should feel familiar.
You already know that reliable systems require:
Controlled environments
+
Repeatable execution
+
Clear dependencies
+
Validation
+
Failure isolation
AI applications need exactly the same discipline.
The difference is that the application being built is now capable of reasoning, using models, interacting with tools, and eventually coordinating multiple agents.
There is also an important ecosystem-awareness lesson.
The official AutoGen project is currently in maintenance mode, with Microsoft recommending Microsoft Agent Framework for new projects. That means AutoGen should be approached with version awareness and current documentation rather than blindly following older tutorials.
Learning AutoGen can still provide valuable understanding of agent-based architecture and multi-agent application design, while production technology choices should be evaluated against the current ecosystem.
The best developer is not the person who memorizes:
pip install ...
The best developer understands:
What is being installed?
Why is it required?
Where does it run?
How is it configured?
How is it secured?
How is it tested?
How is it reproduced?
How will it be maintained?
That is the mindset required to build reliable AI systems.
Final Key Takeaways
- AutoGen runs inside a Python application, so Python environment management remains fundamental.
- Use a virtual environment instead of installing project dependencies globally.
- Use
python -m pipwhen you want to make the relationship between the Python interpreter and pip explicit. - Install only the AutoGen components your application actually needs.
- AgentChat and AutoGen Core represent different abstraction levels, so beginners should avoid unnecessary complexity.
- AutoGen is not an AI model. It provides framework capabilities around agent-based applications; the underlying model comes from a model provider.
- Keep configuration outside application logic whenever practical.
- Never hard-code real API keys into source code.
- Never commit
.envfiles containing real credentials. - Use
.env.exampleto document required configuration without exposing secrets. - Record dependencies so the environment can be recreated.
- Test the environment in layers instead of debugging the entire AI application at once.
- A successful import does not prove that model connectivity works.
- A successful model request does not prove that an agent workflow is correct.
- Fail fast when required configuration is missing.
- Keep the initial project simple. Architecture should grow with actual complexity.
- Use smoke tests to establish a known-good environment baseline.
- Document setup instructions so another developer can reproduce the project without your machine.
- Treat AI dependencies as real software dependencies, because they affect compatibility, security, cost, and reliability.
- Always check current official documentation, especially for rapidly evolving AI frameworks.
- AutoGen’s current official status matters: Microsoft describes AutoGen as being in maintenance mode and recommends Microsoft Agent Framework for new projects.
- The deeper lesson is not the installation command. The deeper lesson is controlled, secure, reproducible AI engineering.
A reliable AI application starts long before its first agent makes a decision.
It starts with a development environment you can trust.
Continue Learning
Explore more expert articles on n8n, Autogen, Postman AI, LangChain, CrewAI, MCP Servers, AI Agents, LlamaIndex, Docker, FastAPI, Playwright, Cypress, Test Automation, DevOps, and Software Engineering at www.skakarh.com.
QAPulse by SK delivers expert release analysis, AI engineering insights, enterprise automation strategies, migration guidance, DevOps best practices, and practical testing knowledge to help software professionals build scalable, intelligent, and production-ready software systems.