 QA
QA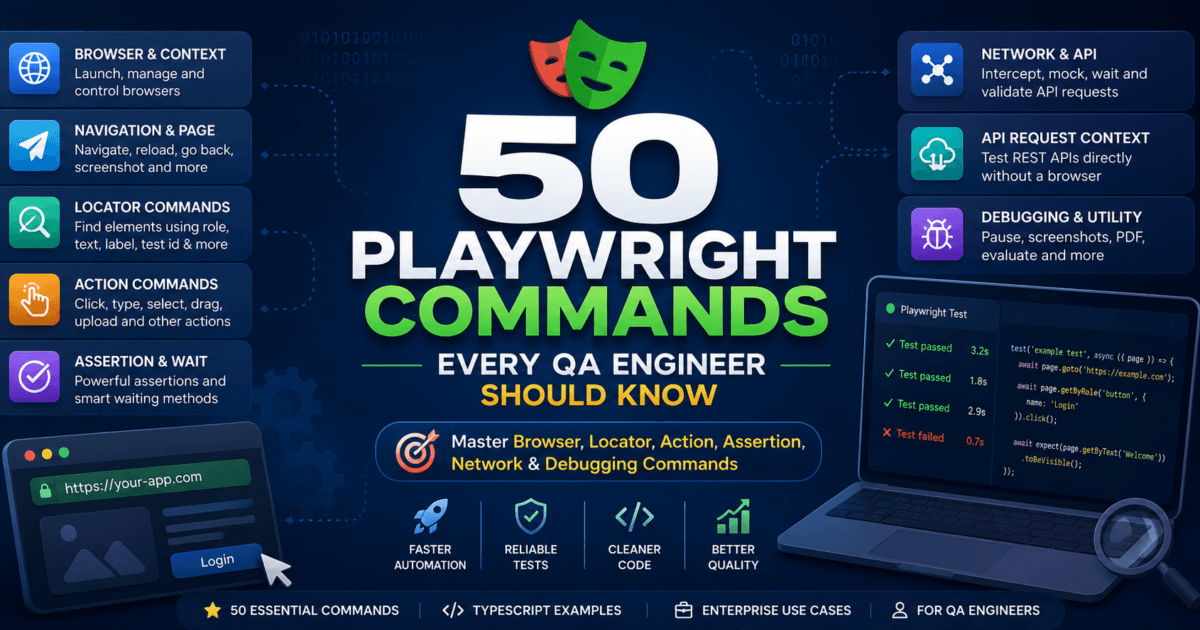
Introduction
Software testing has undergone a remarkable transformation over the past two decades. The era of manually validating web pages and writing simple automation scripts has evolved into a sophisticated discipline known as Quality Engineering (QE). Today’s QA Engineers are expected to deliver reliable software at an unprecedented speed while supporting Agile development, DevOps practices, Continuous Integration/Continuous Deployment (CI/CD), cloud-native applications, and AI-assisted software development.
Modern organizations release software multiple times a day instead of a few times a year. Every deployment introduces new features, bug fixes, security enhancements, and infrastructure changes. This rapid pace makes manual testing alone insufficient for maintaining software quality. Automated testing has become a critical pillar of modern software delivery, enabling teams to validate functionality, detect regressions early, and release updates with confidence.
However, simply writing automated tests is no longer enough. Enterprise automation frameworks must be scalable, maintainable, readable, and resilient against constant application changes. This is where Playwright has emerged as one of the most influential browser automation frameworks available today.
Playwright is more than another testing tool—it represents a modern philosophy for browser automation. Instead of forcing engineers to solve synchronization problems manually, Playwright intelligently handles browser interactions, automatically waits for elements to become actionable, supports multiple browsers from a unified API, and provides powerful debugging capabilities. These innovations enable QA Engineers to focus on validating business functionality rather than fighting unstable automation scripts.
This comprehensive guide has been designed to help you master the 50 most essential Playwright commands that every QA Engineer, SDET, Automation Architect, and software testing professional should know. Rather than merely introducing APIs, it explains the engineering principles behind each command, demonstrates practical enterprise use cases, and provides production-ready TypeScript examples that can be applied immediately in real-world automation projects.
Whether you are beginning your Playwright journey, migrating from Selenium, or refining an existing automation framework, this guide will help you develop the technical confidence required to build reliable, maintainable, and scalable browser automation solutions.
Why Automation Testing Has Evolved
Automation testing has always existed to solve one fundamental challenge: delivering high-quality software efficiently. Yet the nature of software itself has changed dramatically, requiring automation frameworks to evolve alongside it.
Early web applications consisted primarily of static HTML pages generated by servers. Browser interactions were relatively predictable, and automation scripts could easily locate elements using IDs, names, or simple XPath expressions. Selenium became the industry standard because it provided a consistent way to control browsers through the WebDriver protocol.
Today’s applications are fundamentally different.
Modern front-end frameworks such as React, Angular, Vue, Svelte, and Next.js continuously modify the user interface without refreshing the page. Components are rendered dynamically, content loads asynchronously through APIs, and user interactions trigger complex JavaScript execution behind the scenes. Features such as lazy loading, infinite scrolling, virtual DOM updates, client-side routing, WebSockets, and real-time notifications have become standard.
As a result, browser automation has become significantly more challenging.
QA Engineers are no longer testing static pages—they are validating highly dynamic digital experiences where timing, synchronization, and browser behavior play a critical role. Traditional automation approaches often require explicit waits, complex synchronization logic, fragile locators, and extensive maintenance to keep tests reliable.
The evolution of automation testing reflects the evolution of software engineering itself. Modern frameworks must now provide:
Intelligent Synchronization
Automation tools should understand when applications are ready for interaction instead of relying on fixed delays or manual waiting mechanisms.
Reliable Cross-Browser Testing
Applications must behave consistently across Chromium, Firefox, and WebKit while maintaining high execution stability.
Seamless CI/CD Integration
Automation should fit naturally into continuous testing pipelines, enabling rapid feedback for developers after every code change.
Scalable Parallel Execution
Large enterprise test suites should execute efficiently across multiple browsers and environments without unnecessary complexity.
Enhanced Debugging Capabilities
When failures occur, engineers require comprehensive diagnostics including screenshots, videos, execution traces, network logs, and browser state information.
Playwright addresses each of these requirements through its modern architecture, enabling QA teams to create automation frameworks that remain stable even as applications evolve.
Challenges of Modern Web Applications
Understanding why Playwright is valuable begins with understanding the challenges presented by contemporary web applications.
Unlike traditional websites, modern applications behave almost like desktop software running inside the browser. They continuously communicate with backend services, update user interfaces dynamically, and execute significant amounts of client-side JavaScript.
These characteristics introduce several automation challenges.
Dynamic User Interfaces
Elements frequently appear, disappear, or change position based on user interactions, API responses, or background processing. Tests that depend on static page structures often become unreliable.
Asynchronous Rendering
Many frameworks render components only after receiving asynchronous data. Automation scripts that interact with elements before rendering completes can fail unpredictably.
Single Page Applications (SPAs)
Modern applications frequently navigate between views without performing full page reloads. Traditional navigation assumptions no longer apply, requiring smarter automation strategies.
Frequent UI Changes
Development teams continuously improve interfaces, rename CSS classes, restructure components, and redesign layouts. Automation frameworks relying on implementation-specific selectors require constant maintenance.
Distributed Architectures
Applications communicate with multiple backend services, third-party APIs, authentication providers, analytics platforms, and microservices. Effective testing requires visibility into these interactions.
Increased Release Velocity
Organizations deploying multiple times per day cannot afford unstable or flaky automation suites that generate false failures and delay releases.
These realities demand an automation framework that understands modern browser behavior rather than simply controlling browser actions.
Why Playwright Was Created
Playwright was developed by Microsoft to address the limitations experienced by automation engineers working with increasingly complex web applications.
Rather than extending older automation models, the Playwright team designed a framework around modern browser capabilities and developer expectations. The objective was clear: create an automation platform that delivers reliability, simplicity, and enterprise scalability without requiring engineers to write excessive synchronization code.
Several core design principles influenced Playwright’s creation.
Built-In Browser Intelligence
Playwright automatically verifies that elements are visible, enabled, stable, attached to the DOM, and capable of receiving user interactions before performing actions. These actionability checks significantly reduce flaky tests.
Unified Cross-Browser Automation
Instead of maintaining different automation strategies for different browsers, engineers can execute the same test suite across Chromium, Firefox, and WebKit using a consistent API.
Modern Developer Experience
Playwright embraces asynchronous programming, TypeScript support, rich debugging tools, and developer-friendly APIs that integrate naturally into contemporary software engineering workflows.
First-Class Testing Capabilities
Beyond browser automation, Playwright includes features such as API testing, network interception, authentication state management, trace recording, video capture, mobile emulation, geolocation simulation, and accessibility-focused locators.
These capabilities transform Playwright from a browser automation library into a comprehensive quality engineering platform suitable for enterprise environments.
Why This Guide Is Different from the Official Documentation
The official Playwright documentation is an outstanding technical reference. It accurately explains APIs, provides concise examples, and serves as the authoritative source for framework behavior.
However, documentation and practical engineering guidance serve different purposes.
Documentation typically answers questions such as:
- What does this command do?
- What parameters does it accept?
- What value does it return?
- How should the syntax be written?
Professional QA Engineers often require additional context.
They need to understand:
- Why should this command be used instead of another?
- Which approach scales best in enterprise projects?
- What mistakes commonly cause flaky tests?
- How does this command compare with Selenium?
- What performance considerations should influence implementation?
- How should this API be integrated into Page Object Models and automation frameworks?
- What interview questions are associated with this topic?
- How do experienced SDETs use this command in production environments?
This guide focuses on those practical engineering questions.
Every major command discussed throughout this series will include detailed explanations, production-ready TypeScript examples, enterprise scenarios, best practices, performance recommendations, migration guidance, common pitfalls, and interview insights. The objective is not simply to teach syntax—it is to help you think like an experienced automation engineer.
Why QA Engineers Should Master Playwright Commands
Learning individual commands is easy. Mastering how those commands work together to create reliable automation is what differentiates exceptional QA Engineers from average automation testers.
Playwright commands form the foundation of every successful automation framework. They control browser sessions, manage isolated contexts, interact with user interfaces, validate application behavior, intercept network traffic, execute JavaScript, capture diagnostics, and integrate seamlessly into enterprise CI/CD pipelines.
Engineers who understand these commands deeply gain several advantages.
Build Stable Automation Frameworks
Intelligent command selection reduces flaky tests, improves maintainability, and minimizes long-term framework maintenance.
Improve Test Execution Speed
Playwright’s efficient architecture and built-in parallelism enable organizations to execute large automation suites significantly faster than many traditional approaches.
Strengthen Enterprise Automation Skills
Understanding browser contexts, advanced locators, tracing, API testing, and network interception prepares engineers for complex enterprise projects rather than basic demonstrations.
Increase Career Opportunities
Playwright expertise is increasingly requested in QA, SDET, automation engineering, and software quality roles. Mastery of modern browser automation technologies strengthens technical profiles and improves long-term career growth.
Future-Proof Your Automation Knowledge
As organizations continue modernizing testing strategies, Playwright adoption continues to grow across startups, technology companies, financial institutions, healthcare platforms, retail businesses, and large enterprise organizations. Learning Playwright today equips QA professionals with skills that remain relevant as browser automation continues to evolve.
By the end of this guide, you will understand not only how to use Playwright commands but also why experienced automation engineers rely on them to build robust, scalable, and production-ready test automation frameworks.
What is Playwright?
Playwright is a modern, open-source end-to-end (E2E) automation framework developed by Microsoft for testing and automating web applications across multiple browsers. It enables QA Engineers, Software Development Engineers in Test (SDETs), developers, and automation architects to interact with web applications just as real users do—clicking buttons, filling forms, uploading files, intercepting network requests, validating APIs, handling authentication, and much more.
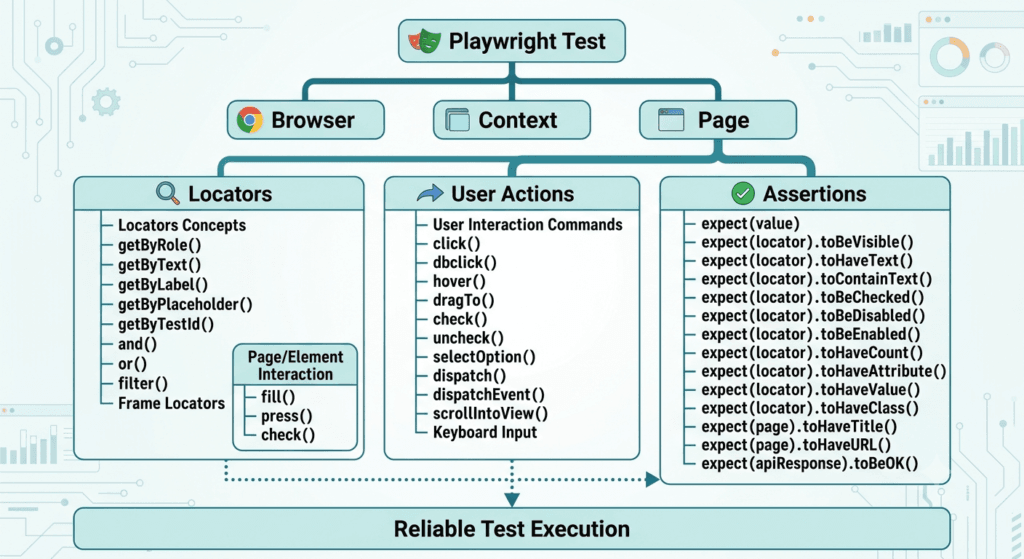
Unlike traditional browser automation tools that rely heavily on external drivers or manual synchronization, Playwright communicates directly with modern browser engines through their native automation protocols. This architectural approach allows Playwright to provide faster execution, intelligent auto-waiting, superior browser stability, and highly reliable cross-browser automation.
Playwright was designed for the modern web. Today’s applications are powered by technologies such as React, Angular, Vue.js, Svelte, Next.js, Nuxt, Remix, Astro, and numerous client-side JavaScript frameworks. These applications dynamically render components, fetch data asynchronously, and update the DOM without full page refreshes. Playwright understands these behaviors and provides built-in mechanisms to interact with them reliably, significantly reducing flaky tests and maintenance overhead.
Another defining characteristic of Playwright is its unified developer experience. Instead of learning different APIs for different browsers, engineers write a single automation script that executes consistently across Chromium, Firefox, and WebKit. This consistency simplifies cross-browser testing while ensuring applications behave correctly for users regardless of their browser choice.
More importantly, Playwright is not just a browser automation library—it is a complete testing ecosystem. It includes browser automation, API testing, network interception, authentication management, mobile emulation, tracing, debugging, screenshots, video recording, parallel execution, accessibility-friendly locators, and seamless CI/CD integration.
For modern Quality Engineering teams, Playwright has become a comprehensive platform rather than merely another testing framework.
Playwright Commands: Browser & Context Commands
Every Playwright test starts by creating a browser session. Before interacting with buttons, forms, or APIs, Playwright must launch a browser and prepare an isolated environment for the test. Browser and Context commands are the foundation of every automation framework, whether you’re running a simple login test or a large-scale regression suite with thousands of test cases.
Command 1: chromium.launch()
What it does
The chromium.launch() command launches a new Chromium browser instance. Chromium is the open-source browser engine that powers Google Chrome, Microsoft Edge, Brave, Opera, and many other modern browsers.
Most Playwright projects use Chromium as the default browser because it closely represents the browsing environment used by the majority of internet users. Once the browser is launched, Playwright can create browser contexts and pages to perform automated interactions.
This command is typically the first executable statement in a Playwright test when manually managing browser instances.
Syntax
const browser = await chromium.launch(options);
Parameters
| Parameter | Type | Required | Description |
|---|---|---|---|
options | LaunchOptions | No | Optional configuration used to control browser startup. |
Some frequently used launch options are:
| Option | Description |
|---|---|
headless | Runs the browser without opening a visible window. |
channel | Launches a specific browser channel such as Chrome or Edge. |
slowMo | Adds a delay between Playwright actions for debugging. |
timeout | Maximum time allowed for launching the browser. |
args | Passes additional Chromium command-line arguments. |
executablePath | Launches a custom Chromium executable instead of the bundled browser. |
TypeScript Example
import { chromium } from '@playwright/test';

async function launchBrowser() {
    const browser = await chromium.launch({
        headless: false
    });

    const page = await browser.newPage();

    await page.goto('https://playwright.dev');

    console.log(await page.title());

    await browser.close();
}

launchBrowser();
Enterprise Use Case
Imagine an online banking application where every code commit triggers a regression pipeline. The automation framework launches a Chromium browser, authenticates users with different roles, validates account balances, performs fund transfers, verifies transaction history, and generates execution reports.
Since most customers access the banking portal using Chromium-based browsers, QA teams execute the majority of smoke, regression, and sanity suites using chromium.launch() before extending validation to Firefox and WebKit.
Command 2: firefox.launch()
What it does
The firefox.launch() command starts a Mozilla Firefox browser instance. It enables QA engineers to execute the same Playwright tests on Firefox without modifying the automation code.
Cross-browser compatibility is a critical quality requirement for enterprise applications. Rendering engines differ between browsers, and subtle variations in JavaScript execution, CSS rendering, fonts, scrolling behavior, or accessibility implementation can introduce browser-specific defects. Running tests with Firefox helps identify these issues before software reaches production.
Syntax
const browser = await firefox.launch(options);
Parameters
| Parameter | Type | Required | Description |
|---|---|---|---|
options | LaunchOptions | No | Optional browser launch configuration. |
Commonly used options include:
| Option | Description |
|---|---|
headless | Executes Firefox in headless mode. |
slowMo | Slows execution to simplify debugging. |
timeout | Maximum time allowed for browser startup. |
firefoxUserPrefs | Applies custom Firefox preferences during launch. |
executablePath | Uses a custom Firefox installation. |
TypeScript Example
import { firefox } from '@playwright/test';

async function launchFirefox() {

    const browser = await firefox.launch({
        headless: true
    });

    const page = await browser.newPage();

    await page.goto('https://playwright.dev');

    await page.screenshot({
        path: 'firefox-homepage.png'
    });

    await browser.close();
}

launchFirefox();
Enterprise Use Case
A healthcare platform is used by hospitals, clinics, and insurance providers across different regions. While most users rely on Chromium-based browsers, a significant percentage of medical staff use Firefox due to organizational policies.
The QA team includes Firefox execution in every nightly regression suite to verify appointment scheduling, electronic health records, billing workflows, and patient dashboards. By using firefox.launch(), the same automation framework validates functionality across multiple browser engines, ensuring a consistent experience for all users regardless of their browser choice.
Command 3: webkit.launch()
What it does
The webkit.launch() command launches a new WebKit browser instance. WebKit is the browser engine behind Apple’s Safari browser and is used on macOS, iOS, and iPadOS.
While Chromium dominates the browser market, many enterprise applications still have a significant percentage of Safari users. Running automated tests on WebKit helps ensure that layouts, JavaScript execution, CSS rendering, animations, and user interactions behave consistently for Apple users.
Playwright’s WebKit implementation allows QA engineers to validate Safari compatibility using the same automation framework and test scripts, reducing the need to maintain separate browser-specific automation suites.
Syntax
const browser = await webkit.launch(options);
Parameters
| Parameter | Type | Required | Description |
|---|---|---|---|
options | LaunchOptions | No | Optional configuration used to customize browser startup. |
Commonly used launch options:
| Option | Description |
|---|---|
headless | Runs WebKit without displaying the browser window. |
slowMo | Adds a delay between Playwright actions. |
timeout | Maximum time allowed for launching the browser. |
executablePath | Launches a custom WebKit executable. |
TypeScript Example
import { webkit } from '@playwright/test';

async function launchWebKit() {
    const browser = await webkit.launch({
        headless: true
    });

    const page = await browser.newPage();

    await page.goto('https://playwright.dev');

    console.log(await page.title());

    await browser.close();
}

launchWebKit();
Enterprise Use Case
Consider an airline booking platform where thousands of customers book flights using Safari on MacBooks, iPhones, and iPads. Before every production deployment, the QA team executes the complete regression suite on WebKit to validate flight search, seat selection, payment processing, boarding pass generation, and booking confirmation pages.
Using webkit.launch() helps identify Safari-specific compatibility issues early, ensuring a consistent booking experience across Apple devices.
Browser Launch Comparison
| Browser Command | Browser Engine | Common Usage |
|---|---|---|
chromium.launch() | Chromium | Chrome, Edge, Brave, Opera testing |
firefox.launch() | Gecko | Firefox compatibility testing |
webkit.launch() | WebKit | Safari compatibility testing |
Although the commands are nearly identical, each launches a different browser engine, allowing the same Playwright test suite to provide comprehensive cross-browser coverage.
Command 4: browser.newContext()
What it does
The browser.newContext() command creates a new Browser Context inside an existing browser instance. A Browser Context is an isolated browser session with its own cookies, local storage, session storage, permissions, cache, and authentication state.
Instead of launching a completely new browser for every test, Playwright recommends creating multiple browser contexts. This approach is faster, consumes fewer system resources, and enables parallel execution while keeping each test independent.
Think of a Browser Context as a brand-new browser profile. Two contexts running inside the same browser cannot access each other’s cookies, sessions, or stored data.
Syntax
const context = await browser.newContext(options);
Parameters
| Parameter | Type | Required | Description |
|---|---|---|---|
options | BrowserContextOptions | No | Configures the browser context before it is created. |
Frequently used context options:
| Option | Description |
|---|---|
viewport | Sets the browser window dimensions. |
locale | Defines the browser language. |
timezoneId | Simulates different geographic time zones. |
geolocation | Sets a virtual GPS location. |
permissions | Grants browser permissions such as camera or notifications. |
storageState | Loads previously saved authentication data. |
colorScheme | Simulates light or dark mode. |
userAgent | Uses a custom browser user agent string. |
TypeScript Example
import { chromium } from '@playwright/test';

async function createContext() {

    const browser = await chromium.launch();

    const context = await browser.newContext({
        viewport: {
            width: 1440,
            height: 900
        },
        locale: 'en-US'
    });

    const page = await context.newPage();

    await page.goto('https://playwright.dev');

    await browser.close();
}

createContext();
Enterprise Use Case
Imagine an online marketplace where one automated scenario requires both a buyer and a seller.
Instead of launching two browsers, the automation framework creates two independent browser contexts:
- Buyer Context
- Seller Context
Each context maintains its own authentication session, allowing both users to interact with the application simultaneously without affecting each other’s data.
Chromium Browser
       │
       ├───────────────┐
       │               │
       ▼               ▼
Buyer Context     Seller Context
       │               │
       ▼               ▼
 Buyer Page       Seller Page
This architecture enables QA teams to automate real-world collaboration scenarios such as order placement, approval workflows, live chat, inventory updates, and administrative actions efficiently.
Command 5: context.newPage()
What it does
The context.newPage() command creates a new browser tab (Page) inside an existing Browser Context. Every interaction in Playwright—such as navigating to a website, clicking buttons, filling forms, uploading files, or validating content—is performed on a Page object.
A Browser Context can contain one or more pages, making it possible to automate scenarios involving multiple tabs or windows while maintaining the same user session.
Unlike browser.newPage(), which creates a page using a default context, context.newPage() ensures that the page inherits all the settings, permissions, authentication state, cookies, and configurations defined for that specific Browser Context. This makes it the recommended approach for enterprise automation.
Syntax
const page = await context.newPage();
Parameters
The context.newPage() command does not accept any parameters. It creates a new page using the configuration of its parent Browser Context.
TypeScript Example
import { chromium } from '@playwright/test';

async function openNewPage() {

    const browser = await chromium.launch();

    const context = await browser.newContext();

    const page = await context.newPage();

    await page.goto('https://playwright.dev');

    console.log(await page.title());

    await browser.close();
}

openNewPage();
Enterprise Use Case
Suppose you’re testing an HR Management System. An HR administrator logs into the application and opens employee records in separate browser tabs to compare payroll information.
Using context.newPage(), the automation framework can create multiple tabs within the same authenticated session.
Browser Context
       │
       ├──────────────┐
       │              │
       ▼              ▼
Employee Tab     Payroll Tab
       │              │
       ▼              ▼
Compare Records  Update Salary
Because both pages belong to the same Browser Context, they share authentication, cookies, and local storage, accurately simulating real user behavior.
Command 6: browser.close()
What it does
The browser.close() command closes the entire browser instance and releases all associated resources.
When this command executes, Playwright terminates every Browser Context and Page created within that browser. This marks the end of the automation session.
Closing the browser is essential to ensure that memory, CPU resources, and browser processes are properly released after test execution. It is commonly placed in test teardown logic or executed automatically by the Playwright Test Runner.
Syntax
await browser.close();
Parameters
The browser.close() command does not require any parameters.
TypeScript Example
import { chromium } from '@playwright/test';

async function browserLifecycle() {

    const browser = await chromium.launch();

    const context = await browser.newContext();

    const page = await context.newPage();

    await page.goto('https://playwright.dev');

    console.log("Test completed.");

    await browser.close();
}

browserLifecycle();
Enterprise Use Case
A SaaS company’s CI/CD pipeline executes more than 3,000 automated Playwright tests every night.
Each test suite launches a browser, creates isolated Browser Contexts, executes test scenarios, generates reports, and finally calls browser.close().
This ensures that every pipeline starts with a clean browser environment and prevents orphan browser processes from consuming build server resources.
Browser Lifecycle
Launch Browser
       │
       ▼
Create Context
       │
       ▼
Create Page
       │
       ▼
Execute Tests
       │
       ▼
Generate Report
       │
       ▼
browser.close()
       │
       ▼
Browser Process Ends
browser.close() vs context.close()
| Feature | browser.close() | context.close() |
|---|---|---|
| Closes Browser | ✅ | ❌ |
| Closes Browser Contexts | ✅ | Only the selected context |
| Closes Pages | ✅ | Only pages in that context |
| Ends Browser Process | ✅ | ❌ |
| Typical Usage | End of complete test execution | Clean up a single user session |
Command 7: context.close()
What it does
The context.close() command closes a specific Browser Context while keeping the browser instance running. Since a Browser Context represents an isolated browser session, closing it removes all associated pages, cookies, local storage, session storage, cache, and permissions belonging to that session.
Unlike browser.close(), this command does not terminate the entire browser. It only cleans up the selected Browser Context, making it particularly useful when multiple users or sessions are running simultaneously within the same browser.
Syntax
await context.close();
Parameters
The context.close() command does not require any parameters.
TypeScript Example
import { chromium } from '@playwright/test';

async function closeContext() {

    const browser = await chromium.launch();

    const adminContext = await browser.newContext();
    const customerContext = await browser.newContext();

    const adminPage = await adminContext.newPage();
    await adminPage.goto('https://example.com/admin');

    const customerPage = await customerContext.newPage();
    await customerPage.goto('https://example.com');

    await adminContext.close();

    // Customer session is still active
    await customerPage.reload();

    await customerContext.close();
    await browser.close();
}

closeContext();
Enterprise Use Case
Imagine an insurance application where three different users participate in a claim approval process:
- Customer submits a claim.
- Claims Officer reviews the request.
- Manager approves the claim.
Each user operates within a separate Browser Context.
Once the Claims Officer completes the review, the automation closes only that Browser Context while allowing the Customer and Manager sessions to continue uninterrupted.
Browser
   │
   ├──────────────┬──────────────┐
   │              │              │
Customer      Claims Officer    Manager
Context         Context         Context
   │              │              │
   ▼              ▼              ▼
 Running       Closed         Running
This approach enables efficient multi-user workflow testing without launching multiple browser instances.
Command 8: storageState()
What it does
The storageState() command captures the current browser session and stores authentication-related data such as cookies and local storage. The saved session can later be loaded into a new Browser Context, allowing tests to bypass repetitive login steps.
Authentication is one of the most time-consuming operations in UI automation. Instead of logging in before every test, QA engineers can authenticate once, save the session, and reuse it across hundreds of test cases.
This significantly reduces execution time while improving test stability.
Syntax
Save Storage State
await context.storageState({
    path: 'auth.json'
});
Load Storage State
const context = await browser.newContext({
    storageState: 'auth.json'
});
Parameters
Saving Session
| Parameter | Type | Required | Description |
|---|---|---|---|
path | string | Yes | File path where the authentication state will be stored. |
Loading Session
| Parameter | Type | Required | Description |
|---|---|---|---|
storageState | string | Yes | Path to the previously saved authentication file. |
TypeScript Example
Saving Authentication
import { chromium } from '@playwright/test';

async function saveLoginState() {

    const browser = await chromium.launch();

    const context = await browser.newContext();

    const page = await context.newPage();

    await page.goto('https://example.com/login');

    await page.fill('#username', 'qauser');
    await page.fill('#password', 'Password123');
    await page.click('button[type="submit"]');

    await context.storageState({
        path: 'auth.json'
    });

    await browser.close();
}

saveLoginState();
Reusing Authentication
import { chromium } from '@playwright/test';

async function reuseLogin() {

    const browser = await chromium.launch();

    const context = await browser.newContext({
        storageState: 'auth.json'
    });

    const page = await context.newPage();

    await page.goto('https://example.com/dashboard');

    await browser.close();
}

reuseLogin();
Enterprise Use Case
A banking application contains more than 1,500 automated regression tests. Logging in before every test would significantly increase execution time and put unnecessary load on the authentication service.
Instead, the QA framework performs login once during the setup phase, saves the authenticated session using storageState(), and reuses it across all remaining test cases.
Login Once
     │
     ▼
Save auth.json
     │
     ▼
Regression Suite
     │
     ├───────────────┐
     │               │
     ▼               ▼
Test 1          Test 2
     │               │
     ▼               ▼
Reuse auth.json  Reuse auth.json
This approach speeds up execution, reduces dependency on authentication services, and makes large regression suites more efficient.
Browser & Context Commands Summary
| Command | Purpose |
|---|---|
chromium.launch() | Launches a Chromium browser instance. |
firefox.launch() | Launches a Firefox browser instance. |
webkit.launch() | Launches a WebKit browser instance for Safari compatibility. |
browser.newContext() | Creates an isolated browser session. |
context.newPage() | Opens a new page within a Browser Context. |
browser.close() | Closes the browser and all associated contexts. |
context.close() | Closes a specific Browser Context while leaving the browser running. |
storageState() | Saves and restores authentication state for faster test execution. |
Playwright Commands: Navigation & Page Commands
After launching a browser and creating a browser context, the next step in every Playwright test is interacting with web pages. Navigation commands allow QA engineers to open URLs, refresh pages, move through browser history, and synchronize test execution with page loading.
Command 9: page.goto()
What it does
The page.goto() command navigates the current browser page to a specified URL. It is one of the most frequently used Playwright commands because every UI automation scenario starts by opening a webpage.
Whether you’re testing a login screen, an e-commerce product page, an admin dashboard, or a REST API documentation site, page.goto() is typically the first page-level action performed after creating a new page.
By default, Playwright waits for the page to reach a load state before continuing execution, reducing synchronization issues compared to traditional automation frameworks.
Syntax
await page.goto(url, options);
Parameters
| Parameter | Type | Required | Description |
|---|---|---|---|
url | string | Yes | The URL to navigate to. |
options | PageGotoOptions | No | Optional navigation settings such as timeout and wait conditions. |
Common navigation options:
| Option | Description |
|---|---|
waitUntil | Defines when navigation is considered complete (load, domcontentloaded, networkidle, commit). |
timeout | Maximum navigation time before Playwright throws an error. |
referer | Sends a custom HTTP Referer header during navigation. |
TypeScript Example
import { test } from '@playwright/test';

test('Open Playwright Website', async ({ page }) => {

    await page.goto('https://playwright.dev');

    console.log(await page.title());

});
Navigating to a Local Application
await page.goto('http://localhost:3000');
Opening a Specific Page
await page.goto('https://example.com/login');
Enterprise Use Case
A retail company maintains an online shopping platform with separate environments for development, staging, and production.
During every CI/CD pipeline, Playwright opens the staging application using page.goto(), performs user authentication, validates product searches, completes checkout workflows, and verifies payment confirmation before deployment is approved.
Because the application URL changes across environments, QA teams often store the base URL in Playwright configuration files instead of hardcoding it within test scripts.
Command 10: page.reload()
What it does
The page.reload() command refreshes the currently opened webpage. It behaves similarly to pressing the browser’s Refresh button or using the keyboard shortcut (F5 or Ctrl+R).
Reloading a page is useful when testing applications that update content dynamically after server-side processing, background jobs, scheduled tasks, or asynchronous events.
Playwright waits for the page to reload completely before executing the next command, making test execution more reliable.
Syntax
await page.reload(options);
Parameters
| Parameter | Type | Required | Description |
|---|---|---|---|
options | PageReloadOptions | No | Optional settings controlling reload behavior and timeout. |
Common reload options:
| Option | Description |
|---|---|
waitUntil | Determines the page load event that Playwright waits for. |
timeout | Maximum time allowed for the reload operation. |
TypeScript Example
import { test } from '@playwright/test';

test('Reload Current Page', async ({ page }) => {

    await page.goto('https://playwright.dev');

    await page.reload();

    console.log(await page.url());

});
Reloading After an Update
await page.reload({
    waitUntil: 'networkidle'
});
Enterprise Use Case
Consider a warehouse management system where inventory levels are updated after an order is processed.
A QA engineer submits an order through the application, waits for the backend service to update stock quantities, and then refreshes the inventory dashboard using page.reload() to verify that the product count has changed correctly.
This command is also commonly used when validating:
- Live dashboards
- Analytics reports
- Monitoring portals
- Stock trading applications
- Order management systems
- Administrative dashboards
where data changes without requiring users to navigate away from the current page.
Command 11: page.goBack()
What it does
The page.goBack() command navigates the browser to the previous page in its history, just like clicking the Back button in a web browser.
This command is particularly useful when testing user journeys that involve moving between multiple pages. Instead of opening the previous page again with page.goto(), page.goBack() validates whether the browser history behaves correctly.
If there is no previous page in the browser history, the command returns null.
Syntax
await page.goBack(options);
Parameters
| Parameter | Type | Required | Description |
|---|---|---|---|
options | PageGoBackOptions | No | Optional settings for timeout and page load synchronization. |
Common options:
| Option | Description |
|---|---|
waitUntil | Specifies when navigation is considered complete. |
timeout | Maximum navigation time before throwing an error. |
TypeScript Example
import { test } from '@playwright/test';

test('Navigate Back', async ({ page }) => {

    await page.goto('https://example.com');

    await page.goto('https://example.com/products');

    await page.goto('https://example.com/products/laptop');

    await page.goBack();

    console.log(await page.url());

});
Enterprise Use Case
An online retail application allows customers to browse products, view product details, and return to the product listing.
A QA engineer verifies that clicking the browser’s Back button correctly returns the user to the previously filtered product list without losing applied filters, sorting preferences, or pagination state.
This command is commonly used while testing:
- Product browsing
- Knowledge base navigation
- Learning Management Systems
- Banking transaction history
- Insurance claim workflows
- Multi-step business applications
Command 12: page.goForward()
What it does
The page.goForward() command moves the browser to the next page in its history, similar to clicking the browser’s Forward button.
It is generally used after executing page.goBack() to verify that browser history navigation functions correctly.
This command is especially valuable when validating multi-step workflows where users frequently move backward to review information before continuing.
Syntax
await page.goForward(options);
Parameters
| Parameter | Type | Required | Description |
|---|---|---|---|
options | PageGoForwardOptions | No | Optional navigation configuration. |
Frequently used options:
| Option | Description |
|---|---|
waitUntil | Determines the navigation completion event. |
timeout | Maximum navigation timeout. |
TypeScript Example
import { test } from '@playwright/test';

test('Navigate Forward', async ({ page }) => {

    await page.goto('https://example.com');

    await page.goto('https://example.com/products');

    await page.goBack();

    await page.goForward();

    console.log(await page.url());

});
Enterprise Use Case
A travel booking platform allows customers to search flights, review available options, compare fares, and complete reservations.
During testing, a QA engineer navigates backward to modify travel dates and then moves forward again to ensure that selected flights, passenger information, and pricing remain accurate throughout the booking process.
Testing browser history is particularly important for:
- Airline reservation systems
- Hotel booking platforms
- University admission portals
- Government service websites
- Online loan applications
- Healthcare appointment systems
Browser History Flow
Home Page
     │
     ▼
Products
     │
     ▼
Product Details
     │
     ▼
Shopping Cart

goBack()
     ▲
     │
Product Details

goForward()
     ▼
Shopping Cart
Command 13: page.waitForURL()
What it does
The page.waitForURL() command pauses test execution until the current page URL matches the expected value or pattern. It is commonly used after user actions that trigger navigation, such as logging in, submitting forms, clicking menu items, or completing checkout processes.
Unlike using static waits such as waitForTimeout(), page.waitForURL() waits intelligently for the navigation to complete, making tests more stable and less prone to timing issues.
This command supports exact URLs, wildcard patterns, regular expressions, and custom predicate functions, making it suitable for both simple and dynamic applications.
Syntax
await page.waitForURL(url, options);
Parameters
| Parameter | Type | Required | Description |
|---|---|---|---|
url | string | RegExp | function | Yes | Expected URL, wildcard pattern, regular expression, or predicate function. |
options | WaitForURLOptions | No | Controls timeout and navigation completion behavior. |
Common options:
| Option | Description |
|---|---|
timeout | Maximum waiting time before throwing an error. |
waitUntil | Specifies the navigation event to wait for (load, domcontentloaded, networkidle, or commit). |
TypeScript Example
Waiting for an Exact URL
await page.click('#loginButton');

await page.waitForURL('https://example.com/dashboard');
Using Wildcards
await page.waitForURL('**/dashboard');
Using a Regular Expression
await page.waitForURL(/dashboard/);
Enterprise Use Case
A banking application redirects users to different dashboards based on their roles.
After authentication:
- Customers navigate to
/customer/dashboard - Managers navigate to
/manager/dashboard - Administrators navigate to
/admin/dashboard
The automation framework waits for the correct destination URL before validating account information, menus, and permissions.
Using page.waitForURL() ensures that verification begins only after the application has completed its navigation.
Command 14: page.waitForLoadState()
What it does
The page.waitForLoadState() command waits until the current page reaches a specific loading state before continuing test execution.
Although Playwright automatically waits for many actions, there are situations where additional synchronization is required. Applications that load data asynchronously, fetch API responses after rendering, or update components dynamically may require waiting for a particular load state.
This command improves test stability by ensuring the page is ready before interacting with its elements.
Syntax
await page.waitForLoadState(state, options);
Parameters
| Parameter | Type | Required | Description |
|---|---|---|---|
state | 'load' | 'domcontentloaded' | 'networkidle' | No | Specifies the desired page load state. |
options | WaitForLoadStateOptions | No | Optional timeout configuration. |
Available Load States
| Load State | Description |
|---|---|
load | Waits until the page and its resources finish loading. |
domcontentloaded | Waits until the HTML document has been parsed. |
networkidle | Waits until network activity has been idle for a short period. Useful for SPA applications. |
TypeScript Example
Wait for Complete Page Load
await page.goto('https://example.com');

await page.waitForLoadState('load');
Wait for Dynamic Content
await page.goto('https://example.com/dashboard');

await page.waitForLoadState('networkidle');
Wait After Clicking
await page.click('#submitOrder');

await page.waitForLoadState('networkidle');
Enterprise Use Case
A logistics company uses a dashboard that displays live shipment information.
When a dispatcher signs in, the page loads immediately, but shipment details continue loading through multiple background API requests.
Instead of using arbitrary delays, the automation suite waits for the networkidle state before validating shipment status, delivery routes, and tracking information. This approach produces more reliable and maintainable tests.
Waiting Strategy Comparison
| Command | Primary Purpose | Best Used For |
|---|---|---|
page.waitForURL() | Wait for URL changes | Login, redirects, navigation, route validation |
page.waitForLoadState() | Wait for page readiness | Dynamic pages, dashboards, SPAs, asynchronous loading |
Real-World Navigation Flow
User Clicks Login
         │
         ▼
Authentication Request
         │
         ▼
Redirect to Dashboard
         │
         ▼
page.waitForURL()
         │
         ▼
Dashboard Starts Loading
         │
         ▼
Background API Calls
         │
         ▼
page.waitForLoadState('networkidle')
         │
         ▼
Validate Dashboard Elements
Command 15: page.title()
What it does
The page.title() command returns the title of the currently loaded webpage. The value is retrieved from the HTML <title> element and is commonly used to verify that users have successfully navigated to the correct page.
Although validating page titles may seem simple, it provides an effective way to confirm successful navigation, detect unexpected redirects, and ensure SEO-critical pages display the correct metadata.
Many automation frameworks include title verification immediately after navigation to quickly confirm that the application has reached the expected destination before executing additional validations.
Syntax
const title = await page.title();
Parameters
The page.title() command does not accept any parameters.
TypeScript Example
import { test, expect } from '@playwright/test';

test('Verify Homepage Title', async ({ page }) => {

    await page.goto('https://playwright.dev');

    const title = await page.title();

    expect(title).toContain('Playwright');

});
Enterprise Use Case
An insurance company maintains separate portals for customers, agents, and administrators.
After login, the automation framework retrieves the page title to verify that users are redirected to the correct portal.
Examples include:
- Customer Portal
- Agent Dashboard
- Claims Management
- Administration Console
Incorrect page titles may indicate failed navigation, improper routing, or configuration issues that require investigation.
Command 16: page.url()
What it does
The page.url() command returns the complete URL of the currently active page.
Unlike page.waitForURL(), which waits for navigation to complete, page.url() simply retrieves the current browser address. It is frequently used for assertions, logging, debugging, and reporting.
QA engineers often combine page.url() with Playwright assertions to validate successful navigation after user actions.
Syntax
const currentUrl = page.url();
Parameters
The page.url() command does not accept any parameters.
TypeScript Example
import { test, expect } from '@playwright/test';

test('Verify Current URL', async ({ page }) => {

    await page.goto('https://playwright.dev');

    const currentUrl = page.url();

    expect(currentUrl).toContain('playwright.dev');

});
Logging the Current URL
console.log(page.url());
Enterprise Use Case
Consider a banking application with role-based dashboards.
After authentication:
- Customers navigate to
/customer/dashboard - Employees navigate to
/employee/dashboard - Managers navigate to
/manager/dashboard - Administrators navigate to
/admin/dashboard
Instead of relying solely on UI elements, the automation framework retrieves the current URL to verify that users have landed on the correct route before validating page-specific functionality.
This technique also helps identify unexpected redirects caused by authentication failures, expired sessions, or authorization issues.
page.waitForURL() vs page.url()
| Command | Purpose | Waits for Navigation | Returns Value |
|---|---|---|---|
page.waitForURL() | Waits until the expected URL is reached | ✅ Yes | No |
page.url() | Retrieves the current page URL | ❌ No | ✅ String |
Navigation & Page Commands Summary
| Command | Purpose |
|---|---|
page.goto() | Opens a specified URL in the current page. |
page.reload() | Refreshes the current webpage. |
page.goBack() | Navigates to the previous page in browser history. |
page.goForward() | Navigates to the next page in browser history. |
page.waitForURL() | Waits until the page reaches a specific URL or URL pattern. |
page.waitForLoadState() | Waits for a specified page loading state. |
page.title() | Returns the title of the current webpage. |
page.url() | Returns the current page URL. |
Choosing the Right Navigation Command
| Scenario | Recommended Command |
|---|---|
| Open a new page | page.goto() |
| Refresh updated data | page.reload() |
| Validate browser back button | page.goBack() |
| Validate browser forward button | page.goForward() |
| Wait for redirects | page.waitForURL() |
| Synchronize with page loading | page.waitForLoadState() |
| Verify page title | page.title() |
| Verify current route | page.url() |
Playwright Commands: Locator Commands
Locating web elements accurately is one of the most critical aspects of UI automation. Even the best test scripts can become unstable if they rely on fragile locators. Playwright introduces a modern locator engine that prioritizes reliability, accessibility, and maintainability over traditional XPath and CSS selector-heavy approaches.
Command 17: locator()
What it does
The locator() command creates a Locator object that identifies one or more elements on a webpage. Unlike older automation frameworks that immediately search for an element, Playwright locators are lazy. They resolve the element only when an action such as click(), fill(), or textContent() is performed.
This design makes Playwright tests significantly more reliable because locators automatically re-evaluate the DOM before every interaction. If the page changes due to JavaScript rendering or AJAX updates, Playwright interacts with the latest version of the element instead of a stale reference.
The locator() command supports CSS selectors, XPath expressions, text selectors, and Playwright-specific selector engines, making it the most flexible way to locate elements.
Syntax
const locator = page.locator(selector);
Parameters
| Parameter | Type | Required | Description |
|---|---|---|---|
selector | string | Yes | CSS, XPath, text selector, or any Playwright-supported selector. |
TypeScript Example
import { test, expect } from '@playwright/test';

test('Locate Login Button', async ({ page }) => {

    await page.goto('https://example.com');

    const loginButton = page.locator('#loginButton');

    await loginButton.click();

});
Locating Multiple Elements
const products = page.locator('.product-card');

await expect(products).toHaveCount(20);
Chaining Locators
const submitButton = page
    .locator('#loginForm')
    .locator('button[type="submit"]');

await submitButton.click();
Enterprise Use Case
An e-commerce website displays hundreds of products on a category page.
Instead of writing long XPath expressions for every product card, the QA team creates reusable locators for product containers, prices, ratings, and “Add to Cart” buttons. Whenever the frontend layout changes, only the locator definition needs updating, while the remaining automation code remains unchanged.
This approach improves maintainability across large automation projects.
Command 18: getByRole()
What it does
The getByRole() command locates elements based on their ARIA (Accessible Rich Internet Applications) role.
Rather than identifying elements using CSS classes or IDs, Playwright searches for semantic roles such as buttons, links, checkboxes, headings, textboxes, menus, dialogs, and navigation regions.
This is Playwright’s recommended locator strategy because it closely reflects how assistive technologies interact with web applications.
Using accessibility roles makes automation scripts more resilient and simultaneously encourages better accessibility practices within development teams.
Syntax
const locator = page.getByRole(role, options);
Parameters
| Parameter | Type | Required | Description |
|---|---|---|---|
role | string | Yes | ARIA role of the target element. |
options | object | No | Filters elements using properties such as accessible name. |
Common options include:
| Option | Description |
|---|---|
name | Matches the accessible name of the element. |
exact | Performs an exact name match. |
checked | Filters checkboxes or radio buttons. |
disabled | Filters disabled controls. |
expanded | Filters expandable elements. |
selected | Filters selected items. |
TypeScript Example
import { test } from '@playwright/test';

test('Login Using Accessible Button', async ({ page }) => {

    await page.goto('https://example.com');

    await page.getByRole('textbox', {
        name: 'Email'
    }).fill('qa@example.com');

    await page.getByRole('textbox', {
        name: 'Password'
    }).fill('Password123');

    await page.getByRole('button', {
        name: 'Sign In'
    }).click();

});
Common ARIA Roles
| Role | Example |
|---|---|
button | Submit, Login, Save |
link | Home, Contact Us |
textbox | Username, Search |
checkbox | Accept Terms |
radio | Gender Selection |
combobox | Country Dropdown |
heading | Page Title |
dialog | Confirmation Popup |
navigation | Navigation Menu |
Enterprise Use Case
A government services portal follows WCAG accessibility standards.
Instead of locating elements using CSS classes that frequently change during UI redesigns, the QA automation framework uses getByRole() throughout the project.
As long as the application’s accessibility implementation remains consistent, tests continue to work even if frontend styling, CSS frameworks, or HTML structures change. This significantly reduces locator maintenance while ensuring the application remains accessible to users with assistive technologies.
Locator Comparison
| Feature | locator() | getByRole() |
|---|---|---|
| Uses CSS/XPath selectors | ✅ Yes | ❌ No |
| Uses Accessibility Roles | ❌ No | ✅ Yes |
| Recommended for Accessible Applications | ⚪ Good | ✅ Excellent |
| Supports Chaining | ✅ Yes | ✅ Yes |
| Ideal For | Flexible element selection | User-centric and accessibility-first testing |
Command 19: getByText()
What it does
The getByText() command locates an element based on its visible text content. Instead of relying on CSS selectors, IDs, or XPath expressions, Playwright searches for the text that users actually see on the screen.
This approach makes test scripts easier to read and maintain because they closely resemble real user interactions. It is particularly useful for buttons, links, notifications, menu items, headings, and validation messages.
The command supports exact text matching, partial text matching, and regular expressions, making it flexible enough for both static and dynamic applications.
Syntax
const locator = page.getByText(text, options);
Parameters
| Parameter | Type | Required | Description |
|---|---|---|---|
text | string | RegExp | Yes | The visible text or regular expression to search for. |
options | object | No | Optional matching configuration. |
Common options:
| Option | Description |
|---|---|
exact | Performs an exact text match instead of a partial match. |
TypeScript Example
Locate a Button by Text
await page.getByText('Login').click();
Partial Text Match
await page.getByText('Welcome').click();
Regular Expression
await page.getByText(/Welcome/i).click();
Validate a Success Message
import { expect } from '@playwright/test';

await expect(
    page.getByText('Profile updated successfully')
).toBeVisible();
Enterprise Use Case
An online banking application displays confirmation messages after users complete transactions.
After transferring funds, the QA automation verifies that the success message “Transaction completed successfully” appears on the screen before validating the updated account balance.
Using getByText() closely mirrors the end-user experience and eliminates dependence on implementation-specific selectors.
Command 20: getByLabel()
What it does
The getByLabel() command locates form controls using the text of their associated HTML <label> element.
Rather than identifying input fields through IDs or CSS selectors, Playwright uses the relationship between labels and form controls. This produces cleaner, more maintainable tests while encouraging accessible web development.
It is commonly used for login forms, registration pages, search boxes, payment forms, profile updates, and any interface containing labeled input fields.
Syntax
const locator = page.getByLabel(text, options);
Parameters
| Parameter | Type | Required | Description |
|---|---|---|---|
text | string | RegExp | Yes | The text of the associated label. |
options | object | No | Optional matching configuration. |
Common option:
| Option | Description |
|---|---|
exact | Matches the complete label text exactly. |
TypeScript Example
Fill Login Form
await page.getByLabel('Email').fill('qa@example.com');

await page.getByLabel('Password').fill('Password123');

await page.getByRole('button', {
    name: 'Login'
}).click();
Registration Form
await page.getByLabel('First Name').fill('John');

await page.getByLabel('Last Name').fill('Doe');

await page.getByLabel('Phone Number').fill('1234567890');
Using Regular Expressions
await page.getByLabel(/email/i).fill('qa@example.com');
Enterprise Use Case
A healthcare management system contains large patient registration forms with dozens of input fields.
Instead of depending on dynamically generated element IDs, the QA team uses getByLabel() to populate patient details, insurance information, emergency contacts, and medical history.
Because labels rarely change during frontend updates, the automation suite remains stable even when HTML structures or CSS classes are modified.
Locator Comparison
| Feature | getByText() | getByLabel() |
|---|---|---|
| Searches Visible Text | ✅ Yes | ❌ No |
| Targets Form Controls | ❌ No | ✅ Yes |
| Accessibility Friendly | ✅ Yes | ✅ Yes |
| Best For | Buttons, links, headings, messages | Input fields, textareas, form controls |
Choosing the Right Locator
| Scenario | Recommended Command |
|---|---|
| Click a button with visible text | getByText() |
| Verify a confirmation message | getByText() |
| Fill an email field | getByLabel() |
| Populate registration forms | getByLabel() |
| Interact with accessible form elements | getByLabel() |
Command 21: getByPlaceholder()
What it does
The getByPlaceholder() command locates input fields using their placeholder text. A placeholder is the hint displayed inside an input box before the user enters any value.
This locator is particularly useful for modern web applications where placeholders are used instead of visible labels. It improves test readability by allowing QA engineers to interact with elements the same way users identify them.
However, if both a label and a placeholder are available, Playwright recommends using getByLabel() because it aligns better with accessibility standards.
Syntax
const locator = page.getByPlaceholder(text, options);
Parameters
| Parameter | Type | Required | Description |
|---|---|---|---|
text | string | RegExp | Yes | Placeholder text used to identify the element. |
options | object | No | Optional matching configuration. |
Common option:
| Option | Description |
|---|---|
exact | Matches the placeholder text exactly. |
TypeScript Example
Fill Search Box
await page.getByPlaceholder('Search products').fill('Laptop');
Login Form
await page.getByPlaceholder('Enter your email')
    .fill('qa@example.com');

await page.getByPlaceholder('Enter password')
    .fill('Password123');
Using a Regular Expression
await page.getByPlaceholder(/search/i)
    .fill('Playwright');
Enterprise Use Case
A SaaS CRM platform includes a global search box on every page. The input field has no visible label but displays the placeholder “Search customers, invoices, or opportunities”.
The QA automation framework uses getByPlaceholder() to validate search functionality across multiple modules, ensuring users can quickly locate records regardless of where they are in the application.
Command 22: getByTestId()
What it does
The getByTestId() command locates elements using a dedicated test ID attribute. Test IDs are specifically added by developers to create stable and automation-friendly selectors.
Unlike CSS classes or HTML structures, test IDs are not affected by UI redesigns or styling changes. This makes them one of the most reliable locator strategies for large enterprise automation projects.
By default, Playwright looks for the data-testid attribute, although the attribute name can be customized through Playwright configuration.
Syntax
const locator = page.getByTestId(testId);
Parameters
| Parameter | Type | Required | Description |
|---|---|---|---|
testId | string | Yes | Value of the configured test ID attribute. |
Example HTML
<button data-testid="login-button">
    Login
</button>
TypeScript Example
await page.getByTestId('login-button').click();
Fill a Form
await page.getByTestId('email-input')
    .fill('qa@example.com');

await page.getByTestId('password-input')
    .fill('Password123');

await page.getByTestId('login-button')
    .click();
Custom Test ID Attribute
// playwright.config.ts

export default defineConfig({

    use: {
        testIdAttribute: 'data-qa'
    }

});
Example HTML:
<button data-qa="save-button">
    Save
</button>
Automation:
await page.getByTestId('save-button').click();
Enterprise Use Case
A multinational insurance company has more than 8,000 automated Playwright tests covering policy management, claims processing, billing, and customer portals.
Frontend developers assign a unique data-testid attribute to every interactive component. Even when CSS frameworks, layouts, or component libraries change, the automation suite remains stable because test IDs are preserved.
This practice significantly reduces maintenance effort and minimizes flaky tests caused by UI changes.
Locator Comparison
| Feature | getByPlaceholder() | getByTestId() |
|---|---|---|
| Uses Placeholder Text | ✅ Yes | ❌ No |
| Uses Test Attribute | ❌ No | ✅ Yes |
| Recommended for Forms | ✅ Yes | ✅ Yes |
| Resistant to UI Changes | ⚪ Moderate | ✅ Excellent |
| Enterprise Friendly | ✅ Yes | ⭐ Highly Recommended |
Choosing the Right Locator
| Scenario | Recommended Command |
|---|---|
| Search input with placeholder | getByPlaceholder() |
| Login form without labels | getByPlaceholder() |
| Stable enterprise automation | getByTestId() |
| Frequently changing UI | getByTestId() |
| CI/CD regression suites | getByTestId() |
Command 23: getByAltText()
What it does
The getByAltText() command locates images and other supported elements using their alternative (alt) text. The alt attribute is primarily intended for accessibility, allowing screen readers to describe images to users who cannot see them.
For QA engineers, this command provides a reliable way to verify that important images, logos, icons, banners, and product thumbnails are present on the page without relying on CSS selectors or XPath expressions.
It is especially useful when testing accessibility compliance and SEO-critical pages where descriptive image alt text is required.
Syntax
const locator = page.getByAltText(text, options);
Parameters
| Parameter | Type | Required | Description |
|---|---|---|---|
text | string | RegExp | Yes | The image’s alternative text. |
options | object | No | Optional matching configuration. |
Common option:
| Option | Description |
|---|---|
exact | Performs an exact match on the alt text. |
TypeScript Example
Verify Company Logo
import { expect } from '@playwright/test';

const logo = page.getByAltText('Company Logo');

await expect(logo).toBeVisible();
Validate Product Image
await expect(
    page.getByAltText('Apple iPhone 17 Pro')
).toBeVisible();
Using Regular Expressions
await page.getByAltText(/company/i);
Enterprise Use Case
An e-commerce company maintains thousands of product pages where every product image must contain descriptive alternative text for accessibility and SEO.
The automation framework verifies that:
- Product images are displayed.
- Brand logos are visible.
- Promotional banners load correctly.
- Every critical image contains the expected
alttext.
This helps ensure compliance with accessibility standards while preventing broken or incorrectly labeled images from reaching production.
Command 24: getByTitle()
What it does
The getByTitle() command locates elements using their HTML title attribute. The title attribute commonly provides additional information when users hover over an element, such as tooltips, icons, shortcuts, or descriptive text.
This locator is particularly useful for applications that rely on icon-only buttons where visible text is not available.
Syntax
const locator = page.getByTitle(title, options);
Parameters
| Parameter | Type | Required | Description |
|---|---|---|---|
title | string | RegExp | Yes | Value of the HTML title attribute. |
options | object | No | Optional matching configuration. |
TypeScript Example
Click an Icon
await page.getByTitle('Settings').click();
Validate Tooltip
import { expect } from '@playwright/test';

await expect(
    page.getByTitle('Download Report')
).toBeVisible();
Regular Expression
await page.getByTitle(/download/i);
Enterprise Use Case
A business intelligence dashboard uses icons instead of text labels to maximize screen space.
Buttons such as Export, Refresh, Notifications, Settings, and Download Report are identified through their title attributes.
Using getByTitle() allows the automation suite to interact with these controls without depending on fragile CSS selectors or image recognition.
Command 25: frameLocator()
What it does
The frameLocator() command is used to locate and interact with elements inside an iframe.
An iframe (Inline Frame) embeds one webpage inside another. Since iframe content belongs to a separate document, Playwright cannot access its elements directly using standard locators. The frameLocator() command provides a clean and reliable way to work with embedded content.
This command is commonly used when automating payment gateways, embedded reports, document viewers, customer support widgets, maps, and third-party integrations.
Syntax
const frame = page.frameLocator(selector);
Parameters
| Parameter | Type | Required | Description |
|---|---|---|---|
selector | string | Yes | CSS selector that identifies the iframe element. |
TypeScript Example
Fill a Field Inside an iFrame
await page
    .frameLocator('#payment-frame')
    .getByLabel('Card Number')
    .fill('4111111111111111');
Click a Button Inside an iFrame
await page
    .frameLocator('#payment-frame')
    .getByRole('button', {
        name: 'Pay Now'
    })
    .click();
Verify Text Inside an iFrame
import { expect } from '@playwright/test';

await expect(
    page
        .frameLocator('#help-frame')
        .getByText('Support Center')
).toBeVisible();
Enterprise Use Case
An online payment platform integrates a third-party payment gateway hosted inside an iframe.
The QA automation suite uses frameLocator() to:
- Enter credit card information.
- Verify payment forms.
- Complete secure checkout.
- Validate transaction confirmations.
Because Playwright automatically scopes subsequent locators to the selected iframe, the automation code remains clean and easy to maintain.
Locator Commands Summary
| Command | Primary Purpose |
|---|---|
locator() | Locate elements using CSS, XPath, or Playwright selectors |
getByRole() | Locate elements by ARIA role |
getByText() | Locate elements using visible text |
getByLabel() | Locate form controls by associated labels |
getByPlaceholder() | Locate input fields using placeholder text |
getByTestId() | Locate elements using dedicated test IDs |
getByAltText() | Locate images using alternative text |
getByTitle() | Locate elements using the HTML title attribute |
frameLocator() | Locate and interact with elements inside iframes |
Which Locator Should You Use?
| Scenario | Recommended Command |
|---|---|
| General-purpose element selection | locator() |
| Accessibility-first automation | getByRole() |
| Buttons, links, and messages | getByText() |
| Forms with labels | getByLabel() |
| Inputs with placeholders | getByPlaceholder() |
| Enterprise-grade stable selectors | getByTestId() |
| Images and logos | getByAltText() |
| Icons and tooltips | getByTitle() |
| Embedded iframes | frameLocator() |
Playwright Commands: Action Commands
Once you’ve located an element, the next step is interacting with it. Action commands simulate real user behavior such as clicking buttons, entering text, selecting options, uploading files, and pressing keyboard keys.
One of Playwright’s biggest strengths is that its action commands are auto-waiting. Before performing an action, Playwright automatically verifies that the target element is visible, stable, enabled, and capable of receiving user interaction. This intelligent behavior eliminates many synchronization issues that were common in older automation frameworks.
Command 26: click()
What it does
The click() command performs a mouse click on the specified element. It is the most frequently used action command in Playwright and is essential for automating almost every web application.
QA engineers use click() to trigger navigation, submit forms, open dialogs, expand menus, select items, initiate downloads, and perform countless other user interactions.
Before executing the click, Playwright automatically waits until the element:
- Is attached to the DOM.
- Is visible on the page.
- Is enabled.
- Is stable and not moving.
- Can receive pointer events.
This built-in auto-waiting greatly reduces flaky tests caused by timing issues.
Syntax
await locator.click(options);
Parameters
| Parameter | Type | Required | Description |
|---|---|---|---|
options | ClickOptions | No | Configures how the click operation is performed. |
Commonly used options:
| Option | Description |
|---|---|
button | Mouse button to click (left, right, middle). |
clickCount | Number of mouse clicks. |
delay | Delay (milliseconds) between mouse down and mouse up. |
force | Clicks even if Playwright’s actionability checks fail. |
modifiers | Keyboard modifiers such as Shift, Alt, or Control. |
position | Clicks a specific position within the element. |
timeout | Maximum time to wait before the click operation fails. |
TypeScript Example
Click a Button
await page.getByRole('button', {
    name: 'Login'
}).click();
Click a Link
await page.getByRole('link', {
    name: 'Products'
}).click();
Right Mouse Click
await page.locator('.file-item').click({
    button: 'right'
});
Forced Click
await page.locator('#submit').click({
    force: true
});
Enterprise Use Case
A digital banking platform requires customers to approve a money transfer.
The automation workflow performs the following steps:
- Clicks Transfer Funds.
- Selects the recipient.
- Confirms the transfer.
- Opens the transaction receipt.
- Downloads the confirmation PDF.
Each step depends on successful click actions, making click() one of the most heavily used commands in enterprise automation suites.
Command 27: dblclick()
What it does
The dblclick() command performs a double-click on an element, equivalent to rapidly clicking the left mouse button twice.
Although used less frequently than click(), double-click interactions are common in desktop-style web applications where opening folders, editing records, expanding tree structures, or launching detailed views requires two consecutive clicks.
Playwright performs both clicks while applying the same actionability checks used by the click() command.
Syntax
await locator.dblclick(options);
Parameters
| Parameter | Type | Required | Description |
|---|---|---|---|
options | DblClickOptions | No | Configures how the double-click is executed. |
Frequently used options:
| Option | Description |
|---|---|
button | Mouse button to use. |
delay | Delay between mouse actions. |
force | Bypasses actionability checks. |
modifiers | Keyboard modifiers during the action. |
position | Click location inside the element. |
timeout | Maximum waiting time before failure. |
TypeScript Example
Double Click a Table Row
await page.locator('.employee-row').dblclick();
Open a Folder
await page.locator('.folder').dblclick();
Double Click an Image
await page.locator('.thumbnail').dblclick();
Enterprise Use Case
An enterprise document management system displays thousands of files and folders in a web-based interface.
Users double-click folders to navigate deeper into the directory structure and double-click documents to open them for review.
The Playwright automation framework validates that:
- Folders open correctly.
- Documents load successfully.
- User permissions are enforced.
- Preview windows display the correct content.
Using dblclick() accurately reproduces real user behavior and ensures the application’s interaction model functions as intended.
Action Command Comparison
| Feature | click() | dblclick() |
|---|---|---|
| Single mouse click | ✅ Yes | ❌ No |
| Double mouse click | ❌ No | ✅ Yes |
| Supports auto-waiting | ✅ Yes | ✅ Yes |
| Supports force option | ✅ Yes | ✅ Yes |
| Common usage | Buttons, links, menus | File explorers, grids, desktop-style applications |
Command 28: check()
What it does
The check() command selects a checkbox by changing its state to checked. Unlike using click(), this command is specifically designed for checkbox elements and first verifies their current state before performing any action.
If the checkbox is already checked, Playwright does nothing. This makes check() an idempotent operation, ensuring consistent behavior regardless of the checkbox’s initial state.
As with other Playwright actions, the framework automatically waits until the checkbox is visible, enabled, attached to the DOM, and ready for interaction.
Syntax
await locator.check(options);Parameters
| Parameter | Type | Required | Description |
|---|---|---|---|
options | CheckOptions | No | Optional configuration for the check operation. |
Common options:
| Option | Description |
force | Performs the action even if actionability checks fail. |
position | Clicks a specific position within the checkbox. |
timeout | Maximum waiting time before failure. |
trial | Performs actionability checks without actually checking the element. |
TypeScript Example
Check a Checkbox
await page
    .getByLabel('Accept Terms and Conditions')
    .check();
Verify Checkbox State
import { expect } from '@playwright/test';

const checkbox = page.getByLabel('Receive Newsletter');

await checkbox.check();

await expect(checkbox).toBeChecked();
Forced Check
await page
    .locator('#subscribe')
    .check({
        force: true
    });
Enterprise Use Case
An insurance portal contains policy configuration forms where administrators enable optional features such as:
- Email notifications
- SMS alerts
- Automatic renewals
- Multi-factor authentication
- Premium coverage
Instead of clicking each checkbox manually, the automation framework uses check() to ensure every required option is enabled before submitting the form.
Because the command verifies the existing state first, repeated executions always produce consistent results.
Command 29: uncheck()
What it does
The uncheck() command clears a checkbox by changing its state to unchecked.
Similar to check(), this command is state-aware. If the checkbox is already unchecked, Playwright performs no additional action.
Using uncheck() is preferred over click() because it guarantees the final checkbox state regardless of its initial condition.
Syntax
await locator.uncheck(options);Parameters
| Parameter | Type | Required | Description |
options | UncheckOptions | No | Optional configuration for the uncheck operation. |
Frequently used options:
| Option | Description |
force | Bypasses actionability checks. |
position | Specifies the click position. |
timeout | Maximum waiting time. |
trial | Performs validation without changing the checkbox state. |
TypeScript Example
Uncheck a Checkbox
await page
    .getByLabel('Receive Promotional Emails')
    .uncheck();
Validate the State
import { expect } from '@playwright/test';

const newsletter = page.getByLabel('Newsletter');

await newsletter.uncheck();

await expect(newsletter).not.toBeChecked();
Remove Multiple Preferences
await page.getByLabel('Email Alerts').uncheck();

await page.getByLabel('SMS Alerts').uncheck();

await page.getByLabel('Marketing Notifications').uncheck();
Enterprise Use Case
A cloud management platform allows administrators to configure security policies for enterprise customers.
Before testing default security settings, the automation framework removes previously enabled options such as:
- Debug logging
- Beta features
- Email alerts
- Automatic backups
- Experimental modules
Using uncheck() guarantees that every test begins from a predictable configuration, improving repeatability across regression suites.
check() vs click()
| Feature | check() | click() |
| Designed specifically for checkboxes | ✅ Yes | ❌ No |
| Ensures final checked state | ✅ Yes | ❌ No |
| Ignores already checked elements | ✅ Yes | ❌ No |
| Auto-wait support | ✅ Yes | ✅ Yes |
| Recommended for checkbox automation | ⭐ Yes | ⚠️ Only when appropriate |
uncheck() vs click()
| Feature | uncheck() | click() |
| Clears checkbox safely | ✅ Yes | ❌ No |
| Guarantees unchecked state | ✅ Yes | ❌ No |
| Ignores already unchecked elements | ✅ Yes | ❌ No |
| Prevents accidental state toggling | ✅ Yes | ❌ No |
Action Commands Covered So Far
| Command | Purpose |
click() | Performs a single mouse click. |
dblclick() | Performs a double mouse click. |
check() | Selects a checkbox if it is not already selected. |
uncheck() | Clears a checkbox if it is currently selected. |
Command 30: fill()
What it does
The fill() command enters text into an <input>, <textarea>, or editable form field. Before inserting new text, Playwright automatically clears any existing value, ensuring the field contains exactly the text you provide.
Unlike typing character by character, fill() directly sets the value of the field, making it faster and more reliable for most form automation scenarios.
Playwright automatically waits until the target element is visible, editable, enabled, and ready to receive input before performing the operation.
Syntax
await locator.fill(value);Parameters
| Parameter | Type | Required | Description |
|---|---|---|---|
value | string | Yes | The text to insert into the input field. |
options | FillOptions | No | Optional timeout and action configuration. |
TypeScript Example
Fill a Username
await page
    .getByLabel('Username')
    .fill('qa.engineer');
Login Form
await page.getByLabel('Email')
    .fill('qa@example.com');

await page.getByLabel('Password')
    .fill('Password123');
Search Products
await page
    .getByPlaceholder('Search products')
    .fill('Wireless Mouse');
Enterprise Use Case
A healthcare management system requires staff to register new patients.
The Playwright automation framework uses fill() to populate:
- Patient name
- Email address
- Phone number
- National ID
- Insurance number
- Address
- Medical history
Because fill() replaces any existing value, the automation remains consistent even when forms contain previously saved data or default values.
Command 31: press()
What it does
The press() command simulates pressing one or more keyboard keys while an element is focused.
It supports individual keys such as Enter, Tab, Escape, and Space, as well as keyboard combinations like Control+A, Control+C, Control+V, Shift+Tab, and Control+Shift+P.
This command is essential for testing keyboard navigation, accessibility, shortcuts, search functionality, and applications that respond to specific key events.
Syntax
await locator.press(key);Parameters
| Parameter | Type | Required | Description |
key | string | Yes | Keyboard key or key combination to press. |
options | PressOptions | No | Optional timeout configuration. |
Common Keyboard Keys
| Key | Purpose |
Enter | Submit forms or confirm actions |
Tab | Move focus to the next field |
Shift+Tab | Move focus to the previous field |
Escape | Close dialogs or menus |
Space | Toggle buttons or checkboxes |
ArrowDown | Navigate lists or menus |
ArrowUp | Navigate upward in lists |
Control+A | Select all text |
Control+C | Copy selected text |
Control+V | Paste text |
TypeScript Example
Submit a Search
await page
    .getByPlaceholder('Search')
    .fill('Playwright');

await page
    .getByPlaceholder('Search')
    .press('Enter');
Move to the Next Field
await page
    .getByLabel('First Name')
    .press('Tab');
Select All Text
await page
    .getByLabel('Description')
    .press('Control+A');
Close a Dialog
await page
    .locator('body')
    .press('Escape');
Enterprise Use Case
A customer relationship management (CRM) application is designed for users who rely heavily on keyboard shortcuts.
The QA automation suite validates workflows such as:
- Pressing Enter to submit forms.
- Using Tab to navigate between fields.
- Closing popups with Escape.
- Selecting text using Control+A.
- Triggering quick search with keyboard shortcuts.
Testing keyboard interactions ensures the application remains accessible, efficient, and compliant with enterprise usability standards.
fill() vs press()
| Feature | fill() | press() |
| Enters text | ✅ Yes | ❌ No |
| Simulates keyboard keys | ❌ No | ✅ Yes |
| Clears existing value automatically | ✅ Yes | ❌ No |
| Supports keyboard shortcuts | ❌ No | ✅ Yes |
| Common Usage | Forms, search fields, textareas | Navigation, shortcuts, form submission |
Action Commands Covered So Far
| Command | Purpose |
click() | Performs a single mouse click. |
dblclick() | Performs a double mouse click. |
check() | Selects a checkbox. |
uncheck() | Clears a checkbox. |
fill() | Enters text into editable fields. |
press() | Simulates keyboard input and shortcuts. |
Command 32: selectOption()
What it does
The selectOption() command selects one or more options from an HTML <select> dropdown element. Instead of clicking the dropdown and manually choosing an option, Playwright interacts directly with the underlying select element, making tests faster and more reliable.
The command supports selecting options by:
- Value
- Visible label
- Index
- Multiple values (for multi-select dropdowns)
Before performing the selection, Playwright automatically waits until the dropdown is attached to the DOM, visible, enabled, and ready for interaction.
Syntax
await locator.selectOption(values);Parameters
| Parameter | Type | Required | Description |
|---|---|---|---|
values | string | object | array | Yes | Option value, label, index, or multiple selections. |
TypeScript Example
Select by Value
await page
    .getByLabel('Country')
    .selectOption('PK');
Select by Label
await page
    .getByLabel('Country')
    .selectOption({
        label: 'Pakistan'
    });
Select by Index
await page
    .locator('#country')
    .selectOption({
        index: 3
    });
Select Multiple Options
await page
    .locator('#skills')
    .selectOption([
        'Playwright',
        'TypeScript',
        'API Testing'
    ]);
Enterprise Use Case
An HR management application contains employee onboarding forms with numerous dropdowns for:
- Department
- Office location
- Employment type
- Job grade
- Reporting manager
- Country
The automation framework uses selectOption() to populate these fields during regression testing, ensuring dropdown values are selected accurately without depending on mouse interactions.
Command 33: setInputFiles()
What it does
The setInputFiles() command uploads one or more files to an HTML file input element (<input type="file">).
Instead of interacting with the operating system’s file picker dialog, Playwright uploads files directly to the input element. This makes file upload automation fully compatible with local execution, CI/CD pipelines, Docker containers, and cloud-based testing environments.
The command supports:
- Single file uploads
- Multiple file uploads
- Uploading files from memory
- Clearing previously selected files
Syntax
await locator.setInputFiles(files);Parameters
| Parameter | Type | Required | Description |
files | string | array | object | Yes | File path, multiple file paths, or file objects. |
TypeScript Example
Upload a Single File
await page
    .locator('input[type="file"]')
    .setInputFiles('documents/resume.pdf');
Upload Multiple Files
await page
    .locator('input[type="file"]')
    .setInputFiles([
        'images/logo.png',
        'documents/report.pdf'
    ]);
Clear Uploaded Files
await page
    .locator('input[type="file"]')
    .setInputFiles([]);
Upload a File from Memory
await page
    .locator('input[type="file"]')
    .setInputFiles({
        name: 'sample.txt',
        mimeType: 'text/plain',
        buffer: Buffer.from('Hello Playwright')
    });
Enterprise Use Case
An insurance claims portal allows customers to upload supporting documents before submitting a claim.
The Playwright automation framework validates uploads for:
- National ID
- Passport
- Insurance certificate
- Medical reports
- Accident photographs
- Claim forms
The test suite verifies successful uploads, validates supported file formats, checks maximum file size restrictions, and ensures uploaded documents appear correctly before final submission.
Because setInputFiles() bypasses native file dialogs, the same tests execute reliably on developer machines, CI/CD servers, and cloud-based execution platforms.
selectOption() vs fill()
| Feature | selectOption() | fill() |
Works with HTML <select> elements | ✅ Yes | ❌ No |
| Selects predefined options | ✅ Yes | ❌ No |
| Enters free-form text | ❌ No | ✅ Yes |
| Supports multiple selections | ✅ Yes | ❌ No |
setInputFiles() vs Manual Upload
| Feature | setInputFiles() | Manual File Picker |
| Works in automation | ✅ Yes | ❌ No |
| Requires OS interaction | ❌ No | ✅ Yes |
| CI/CD friendly | ✅ Yes | ❌ Limited |
| Supports multiple files | ✅ Yes | ✅ Yes |
| Supports in-memory files | ✅ Yes | ❌ No |
Action Commands Summary
| Command | Primary Purpose |
click() | Perform a single mouse click |
dblclick() | Perform a double mouse click |
check() | Check a checkbox |
uncheck() | Uncheck a checkbox |
fill() | Enter text into input fields |
press() | Simulate keyboard input |
selectOption() | Select values from dropdowns |
setInputFiles() | Upload files to file input controls |
When Should You Use Each Action Command?
| Scenario | Recommended Command |
| Click a button or link | click() |
| Open an item with a double-click | dblclick() |
| Enable a checkbox | check() |
| Disable a checkbox | uncheck() |
| Fill login or registration forms | fill() |
| Trigger keyboard shortcuts | press() |
| Select a country or department | selectOption() |
| Upload documents or images | setInputFiles() |
Playwright Commands: Waiting & Assertion Commands
Reliable automation isn’t just about performing actions—it also requires verifying that the application responds correctly. Modern web applications load data asynchronously, render UI components dynamically, and communicate continuously with backend APIs. Without proper waiting strategies and assertions, even well-written tests can become flaky.
Playwright addresses this challenge through intelligent waiting mechanisms and a powerful assertion library. Together, they help QA engineers synchronize test execution with application behavior and validate expected outcomes with confidence.
Command 34: waitForSelector()
What it does
The waitForSelector() command pauses test execution until an element matching the specified selector reaches a desired state.
Although Playwright automatically waits before most actions, there are situations where explicit waiting is useful—for example, when validating dynamic content, loading indicators, modal dialogs, or elements that appear after asynchronous operations.
The command can wait for an element to become:
- Attached to the DOM
- Visible
- Hidden
- Detached from the DOM
Syntax
await page.waitForSelector(selector, options);
Parameters
| Parameter | Type | Required | Description |
|---|---|---|---|
selector | string | Yes | CSS or Playwright selector used to locate the element. |
options | WaitForSelectorOptions | No | Controls waiting behavior and timeout. |
Common options:
| Option | Description |
|---|---|
state | Expected element state (attached, visible, hidden, detached). |
timeout | Maximum waiting time before throwing an error. |
TypeScript Example
Wait Until an Element Becomes Visible
await page.waitForSelector('#dashboard', {
    state: 'visible'
});
Wait Until a Loader Disappears
await page.waitForSelector('.loading-spinner', {
    state: 'hidden'
});
Wait for a Modal Dialog
await page.waitForSelector('#confirmationModal');
Enterprise Use Case
A financial reporting dashboard loads charts only after several API requests complete.
Instead of using fixed delays, the automation framework waits for the chart container to become visible before validating graph data, filters, and export functionality. This approach improves execution speed while minimizing flaky test failures.
Command 35: waitForTimeout()
What it does
The waitForTimeout() command pauses test execution for a fixed number of milliseconds.
Unlike intelligent waiting commands, this method does not monitor application state—it simply waits for the specified duration.
Although useful for debugging and demonstrations, Playwright recommends avoiding waitForTimeout() in production automation because fixed delays can unnecessarily increase execution time and still fail if the application takes longer than expected.
Whenever possible, prefer commands such as waitForSelector(), waitForURL(), or Playwright assertions.
Syntax
await page.waitForTimeout(milliseconds);
Parameters
| Parameter | Type | Required | Description |
|---|---|---|---|
milliseconds | number | Yes | Duration to pause execution. |
TypeScript Example
Wait for Two Seconds
await page.waitForTimeout(2000);
Pause Before Capturing a Screenshot
await page.waitForTimeout(1000);

await page.screenshot({
    path: 'dashboard.png'
});
Slow Down Test Execution During Debugging
await page.click('#submit');

await page.waitForTimeout(3000);
Enterprise Use Case
During automation development, a QA engineer investigates an intermittent issue where a notification disappears too quickly.
By temporarily adding waitForTimeout(), the engineer can inspect the application manually, capture screenshots, or observe browser behavior before replacing the fixed delay with a more reliable synchronization strategy.
In production test suites, the temporary wait is removed in favor of intelligent Playwright waits.
waitForSelector() vs waitForTimeout()
| Feature | waitForSelector() | waitForTimeout() |
|---|---|---|
| Waits for application state | ✅ Yes | ❌ No |
| Intelligent synchronization | ✅ Yes | ❌ No |
| Fixed delay | ❌ No | ✅ Yes |
| Recommended for production | ✅ Yes | ⚠️ Debugging only |
| Reduces flaky tests | ✅ Yes | ❌ No |
Waiting Commands Covered So Far
| Command | Purpose |
|---|---|
waitForSelector() | Waits until an element reaches a specified state. |
waitForTimeout() | Pauses execution for a fixed duration. |
Command 36: expect().toBeVisible()
What it does
The expect().toBeVisible() assertion verifies that an element is visible to the user.
Unlike a simple existence check, this assertion confirms that the element:
- Exists in the DOM.
- Is not hidden.
- Has a visible size.
- Can be rendered on the page.
One of Playwright’s biggest advantages is its auto-retry mechanism. Instead of failing immediately, toBeVisible() repeatedly checks the element until it becomes visible or the configured timeout expires.
This makes the assertion highly reliable for modern applications where elements appear after API calls, animations, or asynchronous rendering.
Syntax
await expect(locator).toBeVisible();
Parameters
| Parameter | Type | Required | Description |
|---|---|---|---|
locator | Locator | Yes | The Playwright locator to validate. |
options | ExpectOptions | No | Optional timeout configuration. |
TypeScript Example
Verify Login Button
import { expect } from '@playwright/test';

await expect(
    page.getByRole('button', {
        name: 'Login'
    })
).toBeVisible();
Validate Success Message
await expect(
    page.getByText('Profile updated successfully')
).toBeVisible();
Verify Modal Dialog
await expect(
    page.locator('#confirmationModal')
).toBeVisible();
Enterprise Use Case
A cloud-based HR system displays a confirmation dialog after an employee record is successfully saved.
Instead of adding artificial delays, the automation framework waits for the dialog to become visible before verifying its content and proceeding with additional workflow validation.
This reduces flaky failures caused by variable server response times.
Command 37: expect().toHaveText()
What it does
The expect().toHaveText() assertion verifies that an element contains the expected text.
Playwright automatically retries the assertion until the correct text appears or the timeout expires. This is particularly valuable for applications where UI text updates after API responses or JavaScript execution.
The assertion supports:
- Exact text matching
- Partial matching
- Regular expressions
- Arrays of expected values for multiple elements
Syntax
await expect(locator).toHaveText(expectedText);
Parameters
| Parameter | Type | Required | Description |
|---|---|---|---|
locator | Locator | Yes | Element whose text will be verified. |
expectedText | string | RegExp | string[] | Yes | Expected text value. |
options | ExpectOptions | No | Optional timeout and matching configuration. |
TypeScript Example
Verify Page Heading
await expect(
    page.getByRole('heading')
).toHaveText('Dashboard');
Validate Notification
await expect(
    page.getByTestId('notification')
).toHaveText('Payment Successful');
Using a Regular Expression
await expect(
    page.getByText(/welcome/i)
).toHaveText(/Welcome/i);
Verify Multiple Items
await expect(
    page.locator('.menu-item')
).toHaveText([
    'Home',
    'Products',
    'Services',
    'Contact'
]);
Enterprise Use Case
An online banking platform displays transaction status after each payment.
The Playwright regression suite verifies messages such as:
- Transaction Successful
- Payment Declined
- Insufficient Balance
- Session Expired
- OTP Verified
By validating the exact text presented to customers, the automation framework ensures both functional correctness and a consistent user experience.
toBeVisible() vs toHaveText()
| Feature | toBeVisible() | toHaveText() |
|---|---|---|
| Verifies visibility | ✅ Yes | ❌ No |
| Verifies displayed text | ❌ No | ✅ Yes |
| Auto-retries until success | ✅ Yes | ✅ Yes |
| Supports regular expressions | ❌ No | ✅ Yes |
| Common Usage | Buttons, dialogs, forms | Messages, headings, labels, notifications |
Assertion Commands Covered So Far
| Command | Purpose |
|---|---|
waitForSelector() | Waits until an element reaches the desired state. |
waitForTimeout() | Pauses execution for a fixed duration. |
expect().toBeVisible() | Verifies that an element is visible. |
expect().toHaveText() | Verifies that an element contains the expected text. |
Command 38: expect().toHaveURL()
What it does
The expect().toHaveURL() assertion verifies that the current browser page has navigated to the expected URL.
Unlike manually retrieving the URL using page.url() and comparing strings, this assertion automatically retries until the expected URL is reached or the configured timeout expires. This makes it ideal for applications that perform redirects after login, form submissions, payment processing, or role-based navigation.
The assertion supports:
- Exact URL matching
- Partial URL matching
- Regular expressions
Syntax
await expect(page).toHaveURL(expectedURL);Parameters
| Parameter | Type | Required | Description |
|---|---|---|---|
page | Page | Yes | The Playwright page instance. |
expectedURL | string | RegExp | Yes | Expected URL or URL pattern. |
options | ExpectOptions | No | Optional timeout configuration. |
TypeScript Example
Verify Dashboard URL
import { expect } from '@playwright/test';

await expect(page).toHaveURL(
    'https://example.com/dashboard'
);
Verify Using Wildcard
await expect(page).toHaveURL(/dashboard/);Validate Profile Page
await page.getByRole('link', {
    name: 'Profile'
}).click();

await expect(page).toHaveURL(/profile/);
Enterprise Use Case
A banking application redirects users based on their roles after authentication.
Examples include:
/customer/dashboard/employee/dashboard/manager/dashboard/admin/dashboard
The automation framework validates the destination URL before executing role-specific test cases, ensuring users are routed to the correct application module.
Command 39: expect().toHaveTitle()
What it does
The expect().toHaveTitle() assertion verifies the title of the currently loaded webpage.
The page title is defined within the HTML <title> element and is important for navigation, usability, browser tabs, accessibility, and search engine optimization.
Like other Playwright assertions, toHaveTitle() automatically retries until the expected title appears, making it reliable for applications where titles update dynamically after navigation.
Syntax
await expect(page).toHaveTitle(expectedTitle);Parameters
| Parameter | Type | Required | Description |
page | Page | Yes | Current Playwright page instance. |
expectedTitle | string | RegExp | Yes | Expected page title. |
options | ExpectOptions | No | Optional timeout configuration. |
TypeScript Example
Verify Homepage Title
await expect(page).toHaveTitle(
    'Playwright'
);
Regular Expression
await expect(page).toHaveTitle(
    /Playwright/
);
Validate Dashboard Title
await page.goto(
    'https://example.com/dashboard'
);

await expect(page).toHaveTitle(
    'Customer Dashboard'
);
Enterprise Use Case
A SaaS project management platform provides separate dashboards for customers, project managers, developers, and administrators.
The automation suite validates page titles such as:
- Customer Dashboard
- Project Overview
- Sprint Board
- Administration Portal
- Reports & Analytics
Verifying page titles ensures users have reached the correct module while also validating SEO-critical metadata for publicly accessible pages.
toHaveURL() vs toHaveTitle()
| Feature | toHaveURL() | toHaveTitle() |
| Validates page URL | ✅ Yes | ❌ No |
| Validates page title | ❌ No | ✅ Yes |
| Supports regular expressions | ✅ Yes | ✅ Yes |
| Auto-retries | ✅ Yes | ✅ Yes |
| Best For | Navigation, redirects, routing | Metadata, browser titles, SEO validation |
Assertion Commands Covered So Far
| Command | Purpose |
waitForSelector() | Waits until an element reaches a specific state. |
waitForTimeout() | Pauses execution for a fixed duration. |
expect().toBeVisible() | Verifies that an element is visible. |
expect().toHaveText() | Verifies displayed text. |
expect().toHaveURL() | Verifies the current page URL. |
expect().toHaveTitle() | Verifies the current page title. |
Command 40: expect().toBeChecked()
What it does
The expect().toBeChecked() assertion verifies that a checkbox or radio button is currently selected.
Instead of manually retrieving the element state, Playwright automatically checks whether the control is selected and continuously retries until the expected state is reached or the timeout expires.
This assertion is particularly useful after using the check() command or after user actions that automatically enable certain options.
Syntax
await expect(locator).toBeChecked();Parameters
| Parameter | Type | Required | Description |
|---|---|---|---|
locator | Locator | Yes | Checkbox or radio button to validate. |
options | ExpectOptions | No | Optional timeout configuration. |
TypeScript Example
Verify Checkbox
import { expect } from '@playwright/test';

const termsCheckbox = page.getByLabel(
    'Accept Terms & Conditions'
);

await termsCheckbox.check();

await expect(termsCheckbox).toBeChecked();
Verify Radio Button
const paymentMethod = page.getByLabel(
    'Credit Card'
);

await paymentMethod.check();

await expect(paymentMethod).toBeChecked();
Enterprise Use Case
An enterprise ERP application contains a system configuration page with dozens of feature toggles.
The automation suite validates that critical options such as:
- Enable MFA
- Enable Audit Logs
- Automatic Backups
- Email Notifications
- Session Timeout
remain enabled after configuration changes and software upgrades.
Using toBeChecked() ensures that configuration settings are persisted correctly across deployments.
Command 41: expect().toHaveValue()
What it does
The expect().toHaveValue() assertion verifies that an input, textarea, or other form control contains the expected value.
Unlike checking visible text, this assertion validates the actual value stored within the element, making it ideal for forms, search boxes, filters, and editable fields.
Playwright automatically retries until the expected value appears, making the assertion reliable even when values are populated asynchronously.
Syntax
await expect(locator).toHaveValue(expectedValue);Parameters
| Parameter | Type | Required | Description |
locator | Locator | Yes | Form element to validate. |
expectedValue | string | RegExp | Yes | Expected input value. |
options | ExpectOptions | No | Optional timeout configuration. |
TypeScript Example
Verify Username
await page
    .getByLabel('Username')
    .fill('Shahnawaz');

await expect(
    page.getByLabel('Username')
).toHaveValue('Shahnawaz');
Verify Search Box
await page
    .getByPlaceholder('Search')
    .fill('Playwright');

await expect(
    page.getByPlaceholder('Search')
).toHaveValue('Playwright');
Using Regular Expressions
await expect(
    page.getByLabel('Email')
).toHaveValue(/@gmail\.com$/);
Enterprise Use Case
A customer onboarding portal automatically populates profile information retrieved from an internal API.
The automation framework verifies that fields such as:
- Customer Name
- Email Address
- Phone Number
- Employee ID
- Policy Number
contain the expected values before allowing users to continue with the onboarding workflow.
This validation helps detect issues caused by failed API responses, incorrect data mapping, or frontend rendering problems.
Assertion Comparison
| Feature | toBeChecked() | toHaveValue() |
| Verifies checkbox state | ✅ Yes | ❌ No |
| Verifies radio button state | ✅ Yes | ❌ No |
| Verifies form field values | ❌ No | ✅ Yes |
| Supports regular expressions | ❌ No | ✅ Yes |
| Auto-retries until success | ✅ Yes | ✅ Yes |
Waiting & Assertion Commands Summary
| Command | Primary Purpose |
waitForSelector() | Wait for an element to reach a specific state |
waitForTimeout() | Pause execution for a fixed duration |
expect().toBeVisible() | Verify element visibility |
expect().toHaveText() | Verify displayed text |
expect().toHaveURL() | Verify current page URL |
expect().toHaveTitle() | Verify page title |
expect().toBeChecked() | Verify checkbox or radio button state |
expect().toHaveValue() | Verify form field values |
Choosing the Right Waiting or Assertion Command
| Scenario | Recommended Command |
| Wait for a loading spinner to disappear | waitForSelector() |
| Pause execution while debugging | waitForTimeout() |
| Verify a dialog or button is displayed | expect().toBeVisible() |
| Validate success or error messages | expect().toHaveText() |
| Confirm navigation after login | expect().toHaveURL() |
| Validate browser tab title | expect().toHaveTitle() |
| Verify selected checkboxes | expect().toBeChecked() |
| Validate input field contents | expect().toHaveValue() |
Playwright Commands: Network & API Commands
Modern web applications constantly communicate with backend services through REST APIs, GraphQL endpoints, WebSockets, and third-party integrations. UI validation alone is often insufficient because many defects originate in network requests, incorrect API responses, or failed backend communication.
Playwright provides powerful network interception and API testing capabilities that allow QA engineers to inspect, modify, mock, and validate HTTP traffic without relying on external tools. These features make it possible to test frontend and backend behavior together within a single automation framework.
Command 42: page.route()
What it does
The page.route() command intercepts network requests that match a specified URL pattern before they reach the server.
Once intercepted, the request can be:
- Continued without modification.
- Blocked completely.
- Modified before being sent.
- Fulfilled with mocked response data.
This capability enables QA engineers to simulate server responses, isolate frontend testing from backend dependencies, validate error handling, and test scenarios that are difficult or expensive to reproduce in production environments.
Syntax
await page.route(url, handler);
Parameters
| Parameter | Type | Required | Description |
|---|---|---|---|
url | string | RegExp | Yes | URL pattern that identifies requests to intercept. |
handler | RouteHandler | Yes | Callback executed whenever a matching request is intercepted. |
TypeScript Example
Continue the Request
await page.route('**/api/users', async route => {

    await route.continue();

});
Mock an API Response
await page.route('**/api/users', async route => {

    await route.fulfill({

        status: 200,

        contentType: 'application/json',

        body: JSON.stringify({
            id: 1,
            name: 'John Doe'
        })

    });

});
Block Image Requests
await page.route('**/*.{png,jpg,jpeg}', async route => {

    await route.abort();

});
Enterprise Use Case
A retail company’s frontend team wants to validate checkout functionality while the payment service is undergoing maintenance.
Instead of waiting for the backend to become available, the automation suite intercepts payment API requests and returns predefined success, failure, timeout, and validation responses.
This approach enables continuous UI testing while backend services are still under development or temporarily unavailable.
Command 43: page.waitForResponse()
What it does
The page.waitForResponse() command waits until a network response matching a specified URL or condition is received.
Unlike arbitrary delays, this command synchronizes test execution with actual backend activity. It is especially valuable when validating API-driven applications where data appears only after a successful server response.
QA engineers frequently combine this command with user actions such as clicking buttons, submitting forms, or applying filters.
Syntax
const response = await page.waitForResponse(urlOrPredicate);
Parameters
| Parameter | Type | Required | Description |
|---|---|---|---|
urlOrPredicate | string | RegExp | function | Yes | URL pattern or callback used to identify the desired response. |
TypeScript Example
Wait for an API Response
const response = await page.waitForResponse(
    '**/api/users'
);

expect(response.status()).toBe(200);
Wait While Clicking a Button
const responsePromise = page.waitForResponse(
    '**/api/orders'
);

await page.getByRole('button', {
    name: 'Load Orders'
}).click();

const response = await responsePromise;

expect(response.ok()).toBeTruthy();
Wait Using a Predicate
await page.waitForResponse(response =>

    response.url().includes('/products') &&
    response.status() === 200

);
Enterprise Use Case
An investment management platform loads portfolio information through multiple REST APIs.
Instead of validating UI elements immediately after clicking Portfolio Summary, the automation framework waits for the portfolio API response, verifies the HTTP status code, and only then confirms that charts, balances, and investment details appear correctly on the page.
This strategy significantly improves test stability and reduces failures caused by slow backend responses.
Network Command Comparison
| Feature | page.route() | page.waitForResponse() |
|---|---|---|
| Intercepts requests | ✅ Yes | ❌ No |
| Mocks responses | ✅ Yes | ❌ No |
| Waits for server responses | ❌ No | ✅ Yes |
| Validates API completion | ❌ No | ✅ Yes |
| Common Usage | Mocking, interception, offline testing | API synchronization, response validation |
Command 44: page.waitForRequest()
What it does
The page.waitForRequest() command waits until the browser sends a network request that matches a specified URL or custom condition.
Unlike page.waitForResponse(), which waits for the server’s reply, this command focuses on the outgoing HTTP request. It is especially useful when validating that the frontend sends the correct API request after a user action.
QA engineers commonly use this command to verify:
- API endpoints
- HTTP methods
- Request payloads
- Query parameters
- Request timing
- Authentication headers
Because Playwright waits for the actual request instead of using fixed delays, tests remain fast and reliable.
Syntax
const request = await page.waitForRequest(urlOrPredicate);Parameters
| Parameter | Type | Required | Description |
|---|---|---|---|
urlOrPredicate | string | RegExp | function | Yes | URL pattern or callback used to identify the request. |
TypeScript Example
Wait for an API Request
const request = await page.waitForRequest(
    '**/api/users'
);

expect(request.method()).toBe('GET');
Wait While Clicking a Button
const requestPromise = page.waitForRequest(
    '**/api/orders'
);

await page.getByRole('button', {
    name: 'Load Orders'
}).click();

const request = await requestPromise;

expect(request.method()).toBe('GET');
Wait Using a Predicate
await page.waitForRequest(request =>

    request.url().includes('/products') &&
    request.method() === 'POST'

);
Enterprise Use Case
An online banking application sends a secure POST request whenever a customer initiates a fund transfer.
The automation suite validates that:
- The correct API endpoint is called.
- The request uses the POST method.
- Authentication headers are present.
- The transaction payload contains the expected account number and transfer amount.
This ensures the frontend communicates correctly with backend financial services before validating the server response.
Command 45: page.on('request')
What it does
The page.on('request') event listener is triggered every time the browser sends an HTTP request.
Unlike waitForRequest(), which waits for a single matching request, this event continuously listens for all outgoing requests during the page session.
It is useful for monitoring network activity, logging API calls, collecting performance data, and debugging complex applications that communicate with multiple backend services simultaneously.
Syntax
page.on('request', callback);Parameters
| Parameter | Type | Required | Description |
event | string | Yes | Network event name (request). |
callback | function | Yes | Function executed whenever a request is sent. |
TypeScript Example
Log Every Request
page.on('request', request => {

    console.log(request.method());

    console.log(request.url());

});
Log Only POST Requests
page.on('request', request => {

    if (request.method() === 'POST') {

        console.log(request.url());

    }

});
Monitor API Traffic
page.on('request', request => {

    if (request.url().includes('/api/')) {

        console.log(
            `${request.method()} ${request.url()}`
        );

    }

});
Enterprise Use Case
A logistics management platform communicates with dozens of backend microservices for shipment tracking, warehouse inventory, customer notifications, billing, and route optimization.
During regression testing, the automation framework listens to every outgoing request and records:
- API endpoint
- HTTP method
- Request timestamp
- Response correlation
- Failed requests
These logs help QA engineers identify missing API calls, duplicate requests, and unexpected backend communication during large-scale enterprise testing.
waitForRequest() vs page.on('request')
| Feature | waitForRequest() | page.on('request') |
| Waits for one request | ✅ Yes | ❌ No |
| Monitors all requests | ❌ No | ✅ Yes |
| Supports filtering | ✅ Yes | ✅ Yes |
| Suitable for assertions | ✅ Yes | ⚪ Indirectly |
| Best For | Validating specific API calls | Network monitoring and debugging |
Command 46: page.on('response')
What it does
The page.on('response') event listener is triggered whenever the browser receives an HTTP response from the server.
While page.waitForResponse() waits for a single matching response, page.on('response') continuously monitors every response throughout the lifetime of the page.
This command is valuable for:
- Monitoring API health
- Logging HTTP status codes
- Measuring backend activity
- Detecting failed API calls
- Debugging microservice communication
- Collecting network diagnostics
It enables QA engineers to understand how the frontend communicates with backend services without interrupting the application’s execution.
Syntax
page.on('response', callback);Parameters
| Parameter | Type | Required | Description |
|---|---|---|---|
event | string | Yes | Response event name (response). |
callback | function | Yes | Function executed whenever a response is received. |
TypeScript Example
Log Every Response
page.on('response', response => {

    console.log(response.status());

    console.log(response.url());

});
Log Failed Requests
page.on('response', response => {

    if (response.status() >= 400) {

        console.log(
            `Failed: ${response.status()} - ${response.url()}`
        );

    }

});
Monitor API Responses Only
page.on('response', response => {

    if (response.url().includes('/api/')) {

        console.log(
            `${response.status()} ${response.url()}`
        );

    }

});
Enterprise Use Case
A multinational airline booking platform communicates with numerous backend services for:
- Flight availability
- Seat selection
- Fare calculation
- Payment processing
- Loyalty rewards
- Booking confirmation
During regression testing, the automation framework listens to every response and automatically reports API failures, slow endpoints, and unexpected HTTP status codes, enabling QA teams to identify backend issues before they affect customers.
Command 47: APIRequestContext
What it does
APIRequestContext is Playwright’s built-in HTTP client that allows QA engineers to test REST APIs without launching a browser.
Unlike page-based commands that interact with the UI, APIRequestContext communicates directly with backend services, making API tests significantly faster and ideal for validating endpoints independently.
It supports all common HTTP operations, including:
- GET
- POST
- PUT
- PATCH
- DELETE
- HEAD
It also provides support for:
- Authentication
- Custom headers
- Cookies
- Request bodies
- File uploads
- JSON serialization
Syntax
const requestContext =
    await request.newContext(options);
Parameters
| Parameter | Type | Required | Description |
options | APIRequestNewContextOptions | No | Configuration such as base URL, headers, authentication, cookies, and timeout. |
TypeScript Example
Create an API Context
import { request } from '@playwright/test';

const api = await request.newContext({

    baseURL: 'https://api.example.com'

});
Add Authentication Header
const api = await request.newContext({

    baseURL: 'https://api.example.com',

    extraHTTPHeaders: {

        Authorization: 'Bearer TOKEN'

    }

});
Use Cookies
const api = await request.newContext({

    storageState: 'auth.json'

});
Enterprise Use Case
A healthcare management platform exposes hundreds of REST APIs for patient registration, appointment scheduling, prescriptions, billing, and laboratory reports.
Instead of validating these APIs through the browser, the QA team creates an APIRequestContext and executes API tests directly.
Benefits include:
- Faster execution
- Reduced infrastructure costs
- Independent backend validation
- Easier CI/CD integration
- Early defect detection before UI testing begins
Many enterprise organizations execute thousands of API tests using APIRequestContext before launching browser-based end-to-end tests.
page.on('response') vs APIRequestContext
| Feature | page.on('response') | APIRequestContext |
| Monitors browser traffic | ✅ Yes | ❌ No |
| Performs standalone API testing | ❌ No | ✅ Yes |
| Requires browser interaction | ✅ Yes | ❌ No |
| Suitable for backend validation | ⚪ Limited | ✅ Excellent |
| Best For | Network monitoring and debugging | REST API automation |
Command 48: request.get()
What it does
The request.get() command sends an HTTP GET request using Playwright’s APIRequestContext. It is primarily used to retrieve data from REST APIs without launching a browser, making API validation significantly faster than UI-driven testing.
QA engineers commonly use request.get() to verify:
- API availability
- HTTP status codes
- JSON responses
- Authentication
- Response headers
- Performance baselines
Because the request is executed directly against the backend, it eliminates browser rendering overhead and enables rapid API regression testing.
Syntax
const response = await request.get(url, options);Parameters
| Parameter | Type | Required | Description |
|---|---|---|---|
url | string | Yes | API endpoint to call. |
options | APIRequestOptions | No | Request configuration including headers, query parameters, timeout, and authentication. |
TypeScript Example
Send a GET Request
import { request, expect } from '@playwright/test';

const api = await request.newContext();

const response = await api.get(
    'https://api.example.com/users'
);

expect(response.status()).toBe(200);
Read JSON Response
const data = await response.json();

expect(data.id).toBe(1);
Send Headers
await api.get(
    'https://api.example.com/profile',
    {
        headers: {
            Authorization: 'Bearer TOKEN'
        }
    }
);
Enterprise Use Case
A digital banking platform exposes customer profile APIs that are consumed by web and mobile applications.
Before executing UI automation, the QA pipeline validates that:
- Customer information is returned successfully.
- Authentication tokens are accepted.
- Required response fields exist.
- The API responds with HTTP 200.
This allows backend defects to be identified before browser-based regression tests begin.
Command 49: request.post()
What it does
The request.post() command sends an HTTP POST request to create or submit data to a backend service.
It is one of the most frequently used API commands because enterprise applications constantly create new resources such as users, orders, transactions, support tickets, and product records.
The command supports:
- JSON request bodies
- Form data
- Multipart file uploads
- Custom headers
- Authentication
- Cookies
Syntax
const response = await request.post(url, options);Parameters
| Parameter | Type | Required | Description |
url | string | Yes | API endpoint. |
options | APIRequestOptions | No | Request body, headers, authentication, timeout, and other options. |
TypeScript Example
Create a New User
const response = await api.post(
    'https://api.example.com/users',
    {
        data: {
            name: 'John Doe',
            email: 'john@example.com'
        }
    }
);

expect(response.status()).toBe(201);
Submit JSON Data
await api.post(
    'https://api.example.com/orders',
    {
        data: {
            productId: 101,
            quantity: 2
        }
    }
);
Send Authorization Header
await api.post(
    'https://api.example.com/payments',
    {
        headers: {
            Authorization: 'Bearer TOKEN'
        },
        data: {
            amount: 500
        }
    }
);
Enterprise Use Case
An insurance company provides REST APIs for claim submission.
Instead of manually creating claims through the user interface, the automation framework sends POST requests to:
- Create customer profiles.
- Register insurance policies.
- Submit claims.
- Upload claim metadata.
- Generate reference numbers.
Using request.post() dramatically reduces execution time while enabling precise validation of backend business logic.
request.get() vs request.post()
| Feature | request.get() | request.post() |
| Retrieves data | ✅ Yes | ❌ No |
| Creates or submits data | ❌ No | ✅ Yes |
| Supports request body | ❌ No | ✅ Yes |
| Supports custom headers | ✅ Yes | ✅ Yes |
| Common Usage | Fetch resources, validate APIs | Create records, submit forms, transactions |
Network & API Commands Summary
| Command | Primary Purpose |
page.route() | Intercept, modify, or mock network requests |
page.waitForResponse() | Wait for a matching server response |
page.waitForRequest() | Wait for an outgoing request |
page.on('request') | Monitor all outgoing requests |
page.on('response') | Monitor all incoming responses |
APIRequestContext | Create an isolated HTTP client for API testing |
request.get() | Retrieve data from REST APIs |
request.post() | Submit or create data using REST APIs |
Choosing the Right Network & API Command
| Scenario | Recommended Command |
| Mock backend services | page.route() |
| Wait for an API response | page.waitForResponse() |
| Verify an outgoing request | page.waitForRequest() |
| Log all outgoing requests | page.on('request') |
| Monitor all server responses | page.on('response') |
| Build browser-independent API tests | APIRequestContext |
| Read resources from an API | request.get() |
| Create records or submit data | request.post() |
Command 50: page.pause()
What it does
The page.pause() command temporarily pauses test execution and opens the Playwright Inspector.
While execution is paused, QA engineers can:
- Inspect page elements.
- View generated locators.
- Execute commands step by step.
- Resume execution manually.
- Analyze browser state.
- Debug failing automation scenarios.
This command is intended for development and debugging and should typically be removed or disabled before running automated regression suites in CI/CD pipelines.
Syntax
await page.pause();Parameters
This command does not accept any parameters.
TypeScript Example
Pause Before Login
await page.goto(
    'https://example.com/login'
);

await page.pause();
Pause Before Clicking Submit
await page.fill('#username', 'admin');

await page.fill('#password', 'Password123');

await page.pause();

await page.click('#login');
Enterprise Use Case
A QA engineer investigates an intermittent failure in a procurement application where a dynamically generated menu occasionally fails to appear.
By inserting page.pause(), the engineer launches Playwright Inspector, verifies locator accuracy, inspects the DOM, and steps through the execution flow to identify timing issues without modifying the application code.
People Asked Questions
What are the most important Playwright commands?
The most important Playwright commands include chromium.launch(), browser.newContext(), page.goto(), locator(), click(), fill(), expect().toBeVisible(), page.route(), and page.screenshot(). These commands cover browser automation, element interaction, assertions, network interception, and debugging.
How many Playwright commands should a QA engineer know?
A QA engineer should be comfortable with at least 50 core Playwright commands covering browser management, navigation, locators, actions, assertions, API testing, debugging, and utility functions to build reliable end-to-end automation frameworks.
Are Playwright commands different from Selenium commands?
Yes. Playwright commands provide built-in auto-waiting, powerful locators, browser contexts, network interception, and integrated API testing. Selenium often requires additional synchronization and third-party libraries to achieve similar functionality.
Which Playwright command is used for element locators?
Playwright offers several locator commands, including locator(), getByRole(), getByText(), getByLabel(), getByPlaceholder(), getByTestId(), getByAltText(), getByTitle(), and frameLocator().
Can Playwright test REST APIs?
Yes. Using APIRequestContext, request.get(), request.post(), and other HTTP methods, Playwright can perform standalone API testing without launching a browser, making backend validation faster and more efficient.
Which programming languages support Playwright?
Playwright officially supports TypeScript, JavaScript, Python, Java, and .NET, allowing QA teams to choose the language that best fits their automation ecosystem.
Internal Links:
- Learn MCP – Zero to Hero
- Learn AI Agents for QA – Zero to Hero
- Playwright Automation – Zero to Hero
- LangGraph: Complete Zero to Hero
- Learn Python – Zero to Hero
- OpenAI Codex: Complete Zero to Hero
- Cursor AI: Complete Zero to Hero
- Claude Code Tutorial: Complete Zero to Hero
- Free QA Resources Built From Real Experience
- QA Glossary: Test Automation Terms Every Engineer Should Know
External Resources
- Playwright Official Website: https://playwright.dev
- Playwright Documentation: https://playwright.dev/docs
- Playwright GitHub Repository: https://github.com/microsoft/playwright
- Node.js Official Website: https://nodejs.org
- pnpm Official Website: https://pnpm.io
More Related Blogs
- Playwright 1.62.0 Released — Powerful New Features Every QA Engineer Should Know
- Playwright 1.61.1 Released: 5 Critical Bug Fixes QA Engineers Must Know in 2026
- Playwright 1.59.1 Released — What’s New for QA Engineers
Conclusion
This comprehensive guide covered 50 Playwright Commands that every QA Engineer, SDET, and Test Automation Engineer should understand—from browser management and navigation to locators, actions, assertions, network interception, API testing, and debugging. Mastering these commands will help you build faster, more reliable, and maintainable automation frameworks while preparing you for enterprise projects and technical interviews.
Whether you’re beginning your Playwright journey or enhancing an existing automation framework, keeping these commands readily available as a reference will significantly improve your productivity and code quality.
Enjoyed this article? Explore more in-depth guides on AI engineering, automation testing, Model Context Protocol, Playwright, and intelligent software quality at www.skakarh.com. Follow QAPulse by SK for practical, production-focused tutorials designed for QA engineers, SDETs, and AI developers.