 QA
QA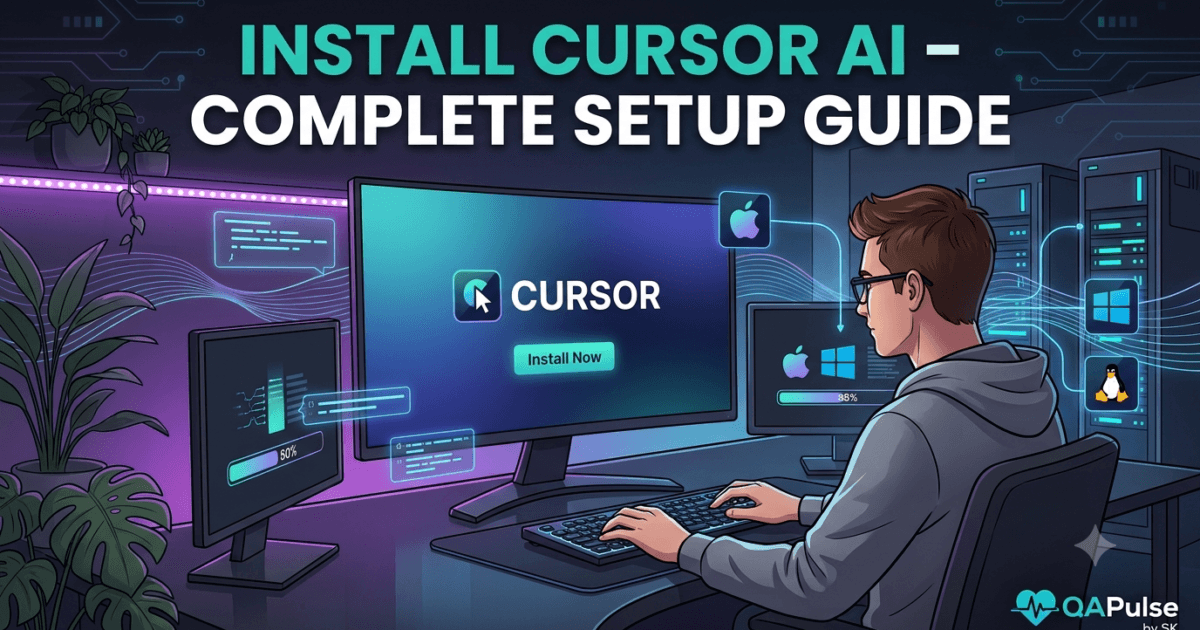
Installing Cursor AI correctly is the first step toward building an efficient AI-assisted development environment. While the installation process is straightforward, configuring the editor properly from the beginning can significantly improve your productivity and reduce common setup issues later.
Many developers simply download Cursor AI and start coding immediately. However, spending a few extra minutes configuring the editor, importing your existing settings, and understanding the workspace creates a smoother development experience and helps you take advantage of Cursor AI’s full capabilities from day one.
In this guide, you will learn how to install Cursor AI on Windows, macOS, and Linux, migrate from Visual Studio Code, configure essential settings, and verify that your installation is ready for professional software development.
System Requirements
Before installing Cursor AI, ensure that your computer meets the recommended requirements.
Supported Operating Systems
- Windows 10 or later
- Windows 11
- macOS (Apple Silicon and Intel)
- Ubuntu
- Debian
- Fedora
- Other major Linux distributions
Recommended Hardware
Although Cursor AI can run on modest hardware, a modern development machine provides the best experience.
Recommended specifications include:
- Multi-core processor
- Minimum 8 GB RAM
- 16 GB RAM or higher for large repositories
- SSD storage
- Stable internet connection for AI features
Large enterprise projects benefit from additional memory because the editor must index more files and provide repository-aware assistance.
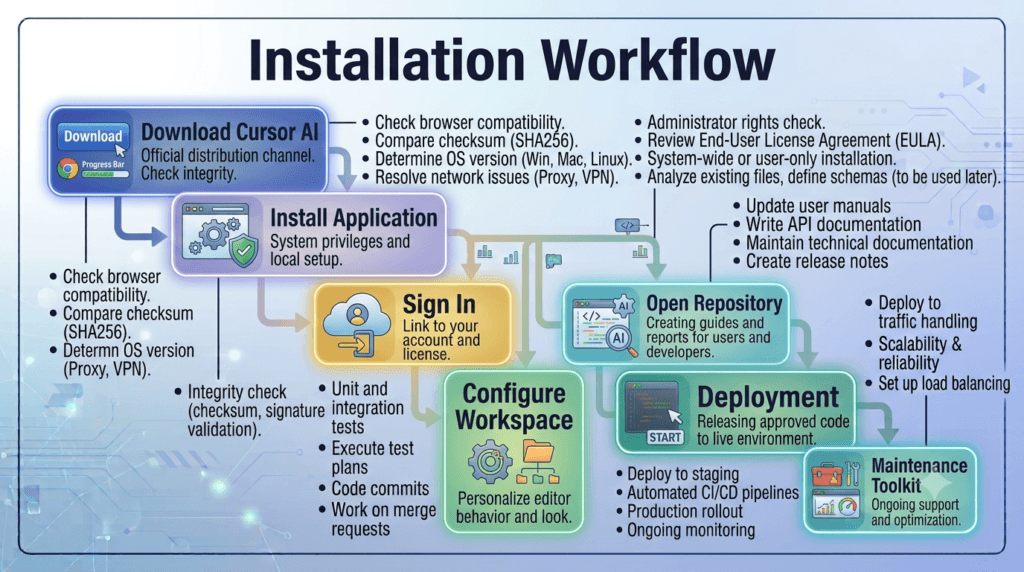
Step 1: Download Cursor AI
Always download Cursor AI from the official website to ensure you receive the latest stable version.
Choose the installer that matches your operating system.
Available downloads include:
- Windows Installer
- macOS Installer
- Linux AppImage
- Linux DEB Package
- Linux RPM Package
Avoid downloading installation files from unofficial sources.
Step 2: Install Cursor AI on Windows
Installation on Windows follows the familiar desktop application process.
- Run the downloaded installer.
- Accept the license agreement.
- Choose the installation directory.
- Allow the installer to complete.
- Launch Cursor AI.
The installation typically takes only a few minutes.
Step 3: Install Cursor AI on macOS
For macOS users:
- Open the downloaded DMG file.
- Drag Cursor AI into the Applications folder.
- Launch the application.
- Grant any required security permissions.
- Sign in to your account.
Both Apple Silicon and Intel-based Macs are supported.
Step 4: Install Cursor AI on Linux
Linux users can choose the installation package appropriate for their distribution.
Typical process:
- Download the package.
- Install using the package manager or AppImage.
- Launch Cursor AI.
- Complete the initial setup.
- Sign in.
The exact commands vary depending on the Linux distribution you use.
Import Your Visual Studio Code Configuration
One of the biggest advantages of Cursor AI is its compatibility with Visual Studio Code.
During setup, you can import:
- Themes
- Extensions
- Keyboard shortcuts
- User settings
- Snippets
- Workspace preferences
Migrating these settings allows you to continue working in a familiar environment while gaining AI-powered capabilities.
Sign In to Your Account
Signing in enables AI-assisted features.
Depending on your subscription, you may gain access to:
- AI chat
- Code generation
- Repository understanding
- Multi-file editing
- Intelligent refactoring
- Documentation assistance
Ensure you are connected to the internet during the first login.
Verify Your Installation
Before starting your first project, confirm that Cursor AI is working correctly.
A quick verification checklist:
- The editor launches without errors.
- You can open an existing project.
- AI features are accessible.
- Imported extensions function correctly.
- Themes and settings have been migrated.
- The integrated terminal opens successfully.
Completing this verification helps identify configuration issues early.
Your First Project Setup
Instead of opening a single source file, open the complete project folder.
A typical workflow looks like this:
Install Cursor AI

↓

Launch the Editor

↓

Import VS Code Settings

↓

Sign In

↓

Open Project Folder

↓

Index Repository

↓

Verify AI Features

↓

Start Development
Opening the entire repository allows Cursor AI to understand your project’s architecture and provide more accurate recommendations.
Common Installation Issues
AI Features Not Available
Verify that you are signed in and have an active internet connection.
Extensions Missing
Re-run the import process or manually install the required extensions.
Slow Repository Indexing
Large repositories may require additional time during the initial indexing process.
Permission Errors
On macOS or Linux, ensure that Cursor AI has the necessary permissions to access project directories.
Import Problems
If certain Visual Studio Code settings do not migrate, review them manually through the settings panel.
Best Practices After Installation
Once Cursor AI is installed successfully:
- Update to the latest stable version.
- Import only the extensions you actually use.
- Remove unnecessary plugins.
- Organize your workspace.
- Open complete repositories instead of individual files.
- Verify AI functionality before beginning development.
- Keep your development environment updated regularly.
These practices create a clean, efficient workspace and provide a strong foundation for the advanced topics covered later in this series.
Expert Tip
Installing Cursor AI is only the beginning. The real productivity gains come from configuring it thoughtfully and allowing it to understand your entire project. A well-organized workspace, imported development preferences, and complete repository context enable Cursor AI to deliver faster, more accurate, and more relevant assistance throughout the software development lifecycle.
Configuring Cursor AI for Maximum Productivity
Installing Cursor AI is only the first step. The real difference between beginners and experienced developers lies in how they configure their development environment. A well-configured editor reduces distractions, speeds up development, improves AI responses, and creates a workflow that feels natural for daily software engineering.
Many developers spend hours every day inside their code editor. Small configuration improvements can therefore save hundreds of hours over the course of a year. From workspace settings and extensions to AI preferences and terminal configuration, every optimization contributes to a more productive development experience.
In this guide, you will learn how to configure Cursor AI for professional software development, whether you are working on personal projects, enterprise applications, or open-source repositories.
Understanding the Cursor AI Workspace
A development environment should provide quick access to everything you need without unnecessary clutter.
A typical Cursor AI workspace consists of:
Activity Bar

↓

Explorer

↓

Search

↓

Source Control

↓

AI Chat

↓

Editor

↓

Terminal

↓

Output & Problems
Organizing these components properly reduces context switching and helps you focus on writing quality software.
Configure Your Workspace
Before writing code, spend a few minutes customizing the editor.
Recommended configuration includes:
- Enable Auto Save.
- Configure your preferred theme.
- Adjust font size for readability.
- Select a programming font with ligatures if preferred.
- Configure tab size.
- Enable format on save.
- Enable word wrap for long files.
- Configure file exclusions.
These simple adjustments improve both comfort and consistency.
Import Only Essential Extensions
Although Cursor AI supports Visual Studio Code extensions, installing too many can negatively impact performance.
Recommended categories include:
Development
- Git support
- Docker
- Kubernetes
- REST Client
Programming Languages
- Python
- TypeScript
- Java
- Go
- C#
- PHP
- Rust
Quality Tools
- ESLint
- Prettier
- SonarLint
Testing
- Playwright
- Jest
- Vitest
Choose extensions that match your technology stack instead of installing everything available.
Configure AI Preferences
One of the most important steps is configuring how Cursor AI interacts with your projects.
Recommended settings include:
- Allow repository indexing.
- Enable AI chat.
- Enable inline AI suggestions.
- Review privacy preferences.
- Configure model selection if available.
- Keep AI features updated.
Proper AI configuration improves the relevance of generated responses.
Organize Your Project Structure
AI performs better when repositories follow a logical structure.
Example:
Project

├── src
├── tests
├── docs
├── config
├── scripts
├── assets
├── package.json
└── README.md
Clear folder organization helps both developers and AI understand the project more effectively.
Configure Git Integration
Version control is an essential part of professional software development.
Inside Cursor AI, configure:
- Git author information
- Default branch
- Commit signing (if required)
- Pull before push
- Git history
- Merge conflict handling
These settings streamline collaboration with your team.
Configure the Integrated Terminal
A properly configured terminal eliminates the need to switch applications.
Common terminal activities include:
- Installing packages
- Running builds
- Executing automated tests
- Starting development servers
- Managing Git repositories
- Running deployment scripts
Using the integrated terminal keeps your development workflow centralized.
Personalize Keyboard Shortcuts
Keyboard shortcuts significantly improve productivity.
Consider customizing shortcuts for:
- AI Chat
- Generate Code
- Explain Code
- Refactor Selection
- Open Terminal
- Search Files
- Source Control
- Run Tests
Small improvements in navigation compound over time.
Configure Code Formatting
Consistency is essential in collaborative software development.
Enable:
- Format on Save
- Automatic imports
- Consistent indentation
- Trailing whitespace removal
- End-of-line normalization
These settings reduce unnecessary code review comments and improve readability.
Optimize AI Responses
The quality of AI assistance depends heavily on context.
For better responses:
- Open the entire repository.
- Keep documentation updated.
- Maintain clear folder names.
- Write descriptive function names.
- Follow consistent coding standards.
- Remove unused files.
A clean repository helps Cursor AI generate more accurate recommendations.
Performance Optimization
Large repositories can affect editor responsiveness.
Recommended optimizations:
- Exclude build directories.
- Ignore dependency folders where appropriate.
- Archive unused projects.
- Close unnecessary editor tabs.
- Disable unused extensions.
- Keep the editor updated.
These adjustments help maintain a responsive development environment.
Common Configuration Mistakes
Installing Too Many Extensions
Every extension consumes resources. Keep only those that provide real value.
Ignoring Repository Structure
Disorganized projects make it harder for both developers and AI to understand relationships between components.
Leaving Default Settings Unchanged
Default settings work well for beginners but often require customization for professional workflows.
Skipping Version Control Configuration
Proper Git integration improves collaboration and reduces deployment issues.
Forgetting Automatic Formatting
Inconsistent formatting creates unnecessary work during code reviews.
Recommended Development Workflow
A productive workflow inside Cursor AI looks like this:
Open Repository

↓

Review Requirements

↓

Understand Existing Code

↓

Configure AI Context

↓

Implement Feature

↓

Generate Tests

↓

Review Code

↓

Commit Changes

↓

Deploy
Following a repeatable workflow helps maintain quality across every project.
Expert Tips
Keep Your Workspace Minimal
Remove distractions by disabling unused panels, extensions, and settings. A clean workspace allows you to focus on solving engineering problems instead of managing your editor.
Review Configuration Regularly
As your projects and technology stack evolve, revisit your Cursor AI settings. Updating extensions, refining keyboard shortcuts, and optimizing AI preferences ensures your development environment continues to support efficient, high-quality software engineering.
Your First Project in Cursor AI: Building a Real-World Application with AI Assistance
After installing and configuring Cursor AI, the next step is applying it to a real software project. While experimenting with small code snippets is useful, the true strength of Cursor AI becomes evident when working within an actual repository containing multiple files, dependencies, business logic, and automated tests.
Professional software development rarely starts from an empty file. More often, developers join existing projects, understand unfamiliar codebases, implement new features, fix defects, and collaborate with teammates. Cursor AI is designed to support these real-world workflows by providing repository-aware assistance throughout the development lifecycle.
In this guide, you will learn how to create your first project in Cursor AI, understand an existing codebase, implement a feature, generate tests, and review AI-generated changes before deployment.
Choosing Your First Project
Beginners often attempt to build large applications immediately. A better approach is to start with a manageable project that demonstrates core development practices.
Good starter projects include:
- Task Management Application
- Weather Dashboard
- Expense Tracker
- Blog Management System
- Notes Application
- REST API Service
- URL Shortener
- Portfolio Website
- Authentication System
- Calculator API
These projects are complex enough to showcase AI-assisted development without becoming overwhelming.
Creating a New Workspace
Begin by creating or opening the project folder rather than individual files.
A recommended structure looks like this:
My Project

├── src
├── tests
├── docs
├── assets
├── config
├── package.json
├── README.md
└── .gitignore
A well-organized repository helps Cursor AI understand the project layout and provide more accurate suggestions.
Understanding the Repository Before Coding
One of the biggest mistakes developers make is writing code before understanding the existing architecture.
Instead, ask Cursor AI questions such as:
- Explain the project structure.
- Describe the application architecture.
- Where is the authentication logic?
- Which files handle API requests?
- Show the database models.
- Explain the routing system.
- Identify shared utilities.
This initial exploration saves time and reduces the risk of introducing inconsistent implementations.
Planning Your Feature
Suppose you want to add user profile management to an existing application.
Rather than asking Cursor AI to build everything at once, divide the work into smaller tasks.
Example roadmap:
Understand Existing Code

↓

Design Feature

↓

Create Models

↓

Implement Business Logic

↓

Develop User Interface

↓

Generate Tests

↓

Update Documentation

↓

Review Changes
Breaking work into logical stages produces cleaner, more maintainable code.
Implementing Features with Cursor AI
When requesting new functionality, provide sufficient context.
Instead of writing:
Add profile page.
Use detailed instructions such as:
- Follow the existing architecture.
- Reuse current authentication.
- Match coding standards.
- Add validation.
- Generate unit tests.
- Update documentation.
Providing project-specific context enables Cursor AI to generate solutions that integrate naturally with the existing codebase.
Understanding AI Suggestions
Not every suggestion should be accepted immediately.
When reviewing generated code, verify:
- Business requirements
- Code readability
- Error handling
- Security practices
- Performance considerations
- Naming conventions
- Architectural consistency
AI accelerates implementation, but engineering judgment remains essential.
Generating Automated Tests
Every new feature should include testing.
Cursor AI can assist in creating:
- Unit tests
- Integration tests
- API tests
- End-to-end tests
- Edge-case scenarios
- Mock data
- Test fixtures
Generating tests alongside implementation improves reliability and simplifies future maintenance.
Using AI for Debugging
Debugging is one of the most valuable use cases for Cursor AI.
When encountering an issue, ask questions like:
- Why is this function failing?
- Explain this error message.
- Suggest possible fixes.
- Identify performance bottlenecks.
- Review this stack trace.
- Find potential null pointer issues.
Providing the relevant files and error context allows the AI to produce more targeted troubleshooting guidance.
Reviewing Changes Before Commit
Before pushing code to version control, perform a structured review.
Checklist:
- Does the implementation satisfy the requirements?
- Are coding standards maintained?
- Have automated tests passed?
- Is documentation updated?
- Are unnecessary files removed?
- Is the commit logically organized?
A disciplined review process prevents many production issues.
Common Beginner Mistakes
Asking Cursor AI to Build an Entire Application
Large requests often produce inconsistent results. Break complex features into smaller, reviewable tasks.
Ignoring Existing Architecture
Generated code should follow the project’s established patterns rather than introducing new approaches without justification.
Skipping Test Generation
Testing should be considered part of feature development, not an optional extra.
Accepting Every Suggestion
Treat AI recommendations as proposals that require validation, not final implementations.
Forgetting Documentation
Whenever functionality changes, update README files, API references, or architecture documentation to keep the repository current.
Best Practices for Your First Project
To build confidence with Cursor AI, adopt these habits from the beginning:
- Start with small, manageable projects.
- Understand the repository before writing code.
- Work incrementally.
- Review every AI-generated change.
- Generate tests for each feature.
- Keep commits focused and descriptive.
- Document important implementation decisions.
- Use AI to assist, not replace, engineering thinking.
These practices establish a strong foundation for larger, more complex software projects.
Expert Tip
The most successful developers use Cursor AI as a collaborative engineering partner rather than a shortcut for generating code. By understanding the existing repository, planning features carefully, reviewing every suggestion, and maintaining high engineering standards, you can build reliable, maintainable applications while significantly improving development speed and productivity.
From Setup to Production: Building an Efficient Cursor AI Development Workflow
By now, you have installed Cursor AI, configured your development environment, and built your first AI-assisted project. The next step is learning how professional developers integrate Cursor AI into their daily workflow.
Many beginners use AI only when they are stuck. Experienced developers, however, incorporate AI throughout the entire software development lifecycle—from understanding requirements and planning features to writing code, generating tests, reviewing pull requests, and maintaining production systems.
Developing a repeatable workflow is one of the biggest factors that separates occasional AI users from highly productive engineering teams.
The Modern AI Development Lifecycle
Software development is no longer limited to writing code. Modern projects involve collaboration, automation, testing, deployment, monitoring, and continuous improvement.
A streamlined workflow using Cursor AI looks like this:
Requirements

↓

Repository Analysis

↓

Feature Planning

↓

Implementation

↓

Code Review

↓

Testing

↓

Documentation

↓

Git Commit

↓

CI/CD

↓

Production
Instead of treating these as isolated activities, Cursor AI helps connect them into a continuous engineering process.
Starting Every Task the Right Way
One of the most common mistakes is opening the editor and immediately asking the AI to generate code.
A better approach is:
Step 1: Understand the Requirement
Before touching the codebase, clarify:
- Business objective
- Functional requirements
- Technical constraints
- Acceptance criteria
- Expected user behavior
A clear understanding of the problem leads to better AI-generated solutions.
Step 2: Explore the Repository
Ask Cursor AI to explain:
- Application architecture
- Related modules
- Existing services
- Data flow
- API structure
- Testing strategy
This context prevents duplicate implementations and keeps new features consistent with the existing design.
Designing Before Coding
Professional developers rarely jump directly into implementation.
Instead, they first identify:
- Required files
- Existing reusable components
- Database changes
- API endpoints
- Security implications
- Testing requirements
Planning before coding reduces rework and improves software quality.
Implement Features Incrementally
Avoid asking Cursor AI to generate large features in one request.
A better workflow is:
Plan Feature

↓

Generate Small Component

↓

Review Code

↓

Run Tests

↓

Refine Implementation

↓

Repeat
Small iterations make debugging easier and reduce review complexity.
Use Cursor AI Beyond Code Generation
Many developers underestimate the broader capabilities of Cursor AI.
It can assist with:
- Explaining unfamiliar code
- Refactoring complex modules
- Reviewing pull requests
- Generating documentation
- Writing automated tests
- Finding potential bugs
- Improving performance
- Suggesting architectural improvements
Treating Cursor AI as a complete engineering assistant unlocks far more value than using it only for code generation.
Incorporating Testing into Every Feature
Testing should never be postponed until the end of development.
A recommended sequence is:
- Implement a small feature.
- Generate unit tests.
- Execute the tests.
- Fix any issues.
- Add integration tests if needed.
- Update documentation.
This continuous validation process improves confidence and reduces regression risks.
Preparing Code for Production
Before merging AI-assisted changes into the main branch, verify:
- Coding standards are followed.
- Business requirements are satisfied.
- Security considerations have been addressed.
- Performance remains acceptable.
- Documentation is updated.
- Automated tests pass successfully.
- No unnecessary code has been introduced.
These checks help ensure production readiness.
Collaborating in a Team Environment
When multiple developers use Cursor AI, consistency becomes essential.
Recommended team practices include:
- Establish coding standards.
- Share prompt guidelines.
- Review AI-generated code through pull requests.
- Maintain automated CI/CD pipelines.
- Keep documentation synchronized.
- Measure engineering outcomes rather than AI usage.
AI should enhance collaboration, not replace established development practices.
Common Productivity Mistakes
Treating AI as an Autocomplete Tool
Cursor AI is designed to understand repositories and workflows. Limiting it to simple code completion reduces its potential.
Working Without Context
Providing minimal information often results in generic recommendations. Always include relevant project details.
Ignoring Code Reviews
AI-generated code should go through the same review process as manually written code.
Skipping Documentation
Documentation is part of software development. Update it whenever functionality changes.
Neglecting Continuous Learning
Cursor AI evolves rapidly. Regularly exploring new features and workflows helps you stay productive.
Building Long-Term Development Habits
Developers who consistently achieve high productivity typically follow these habits:
- Understand requirements before coding.
- Analyze the repository first.
- Implement features incrementally.
- Review every AI-generated change.
- Write tests alongside implementation.
- Maintain documentation.
- Use version control effectively.
- Continuously refine workflows.
These practices remain valuable regardless of programming language, framework, or project size.
Looking Ahead
The first two days of this series have established a solid foundation:
- Understanding Cursor AI
- Installing the editor
- Configuring the workspace
- Building a first project
- Creating an efficient workflow
From the next lessons onward, the focus shifts to more advanced capabilities, including AI-powered editing, prompt engineering, multi-file refactoring, intelligent debugging, project rules, custom instructions, model selection, and enterprise development workflows.
Each topic builds on the concepts you’ve already learned, helping you progress from a beginner to an advanced Cursor AI user.
Key Takeaways
Before moving to Day 3, remember these core principles:
- Use Cursor AI throughout the entire development lifecycle, not just for code generation.
- Understand the repository before implementing new functionality.
- Break large tasks into smaller, manageable iterations.
- Review, test, and document every AI-assisted change.
- Follow your team’s coding standards and development practices.
- Treat AI as a productivity multiplier while retaining responsibility for engineering decisions.
By adopting these habits early, you’ll build a workflow that scales from personal projects to enterprise software development, allowing Cursor AI to become a trusted partner in delivering high-quality, maintainable applications efficiently.
Internal Links:
- Learn MCP – Zero to Hero
- Learn AI Agents for QA – Zero to Hero
- Playwright Automation – Zero to Hero
- Learn Python – Zero to Hero
- Cursor AI: Complete Zero to Hero
- Claude Code Tutorial: Complete Zero to Hero
- Free QA Resources Built From Real Experience
- QA Glossary: Test Automation Terms Every Engineer Should Know
External Resources:
- Model Context Protocol documentation
- Playwright documentation
- GitHub documentation
- TypeScript documentation
- Prompt Engineering Overview
- Git Documentation
- Visual Studio Code
- Cursor AI
- Cursor Documentation
People Also Ask
How do I Install Cursor AI?
Download Cursor AI from the official website, install it on your operating system, sign in, import your Visual Studio Code settings if needed, and open your project folder to begin AI-assisted development.
Can I Install Cursor AI on Windows?
Yes. Cursor AI supports Windows 10 and Windows 11 using its official installer.
Does Cursor AI support macOS?
Yes. Cursor AI runs on both Apple Silicon and Intel-based Macs.
Can I Install Cursor AI on Linux?
Yes. Cursor AI provides installation packages for major Linux distributions, including Ubuntu, Debian, and Fedora.
Do I need Visual Studio Code before installing Cursor AI?
No. Cursor AI works independently, but it can import your Visual Studio Code settings, extensions, and preferences to simplify migration.
Featured Snippet
How to Install Cursor AI
To Install Cursor AI, download the official installer for Windows, macOS, or Linux, complete the installation, sign in to your account, import Visual Studio Code settings if desired, and open your project folder. This enables Cursor AI to analyze your repository and provide intelligent AI-assisted development features.
AI Overview Answer
Install Cursor AI by downloading the latest version from the official Cursor website, selecting the installer for your operating system, completing the installation process, configuring your workspace, and opening your repository. Once installed, Cursor AI provides AI-powered coding, debugging, documentation, and repository-aware assistance.
Enjoyed this article? Explore more in-depth guides on AI engineering, automation testing, Model Context Protocol, Playwright, and intelligent software quality at www.skakarh.com. Follow QAPulse by SK for practical, production-focused tutorials designed for QA engineers, SDETs, and AI developers.